Jan 6, 2010 | DIY
 $498 for a piece of fabric with some spikes on it??? Wow.
Jennifer Behr’s couture headbands have been featured in countless magazines (including Vogue) and TV (on Gossip Girl, for instance). Beautiful and distinctive, they are a favorite of brides and Hollywood starlets. They’re hand-made in New York City.
And they’re very, VERY expensive. Take the turban above, for instance.
It’s silk with patent leather and stainless steel spikes, and $498. Come on.
Obviously I’m in a bad mood this morning, noshing on Cheese Straws. Note to self: DO NOT EVER BUY CHEESE STRAWS AGAIN.

Cheese straws: the work of the Devil.
But back to this “turban” headband.
Lately turbans are experiencing a revival: evidenced in part by Forever21 offering up a turban last month on their site – no, not towel wrap for drying your hair, folks…a real, live turban – as fashion accessory. Plus the girls at BleachBlack blogged about wanting one awhile back (I’m just too stuffed with cheese straws lazy to find the link). Eek.
Friendly reader Kay sent me the photo above saying that the Jennifer Behr piece reminded her of my DIY’s. I do like me them studs, heh heh!
So, here’s the DIY if you’re curious…
You Need:
*20-pc bag of 1/2″ cone spikes ($5.59, Studsandspikes.com)
*100-pc bag of 3/8″ cone studs ($2.89, Studsandspikes.com)
*strip of stretchy black fabric (I used a Lycra swimsuit fabric)
Tools: fabric scissors / matching thread / sewing machine / hand-sewing needle / pliers / awl / Phillips screwdriver
How To:
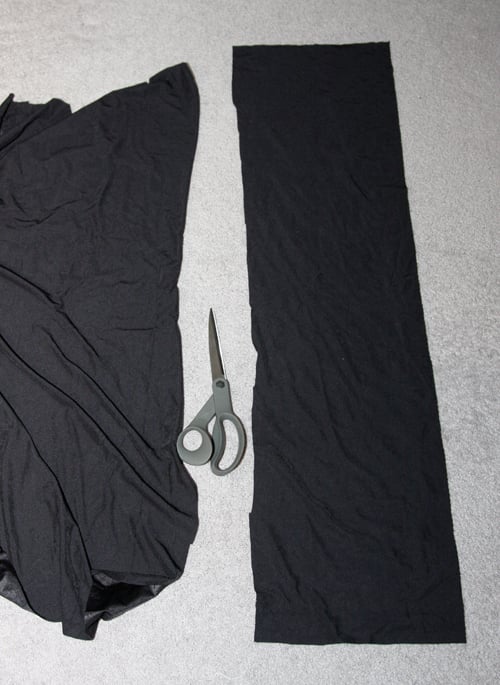 1. Cut a piece of fabric long enough to go around your head and then some. Mine was about 8″ wide and a yard long.
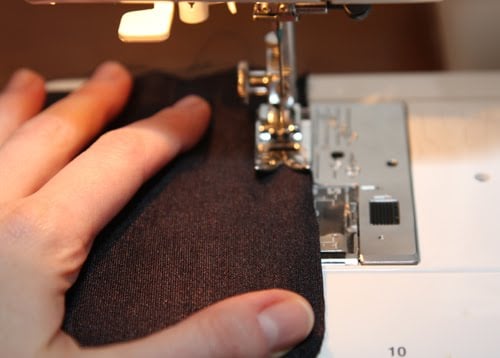 2. Fold cut piece in half horizontally, right sides together, and stitch along long edge.
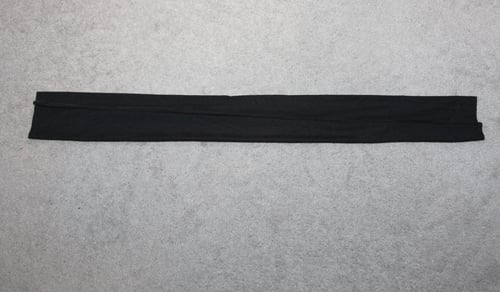 3. Turn piece right side out and you now have a long tube.
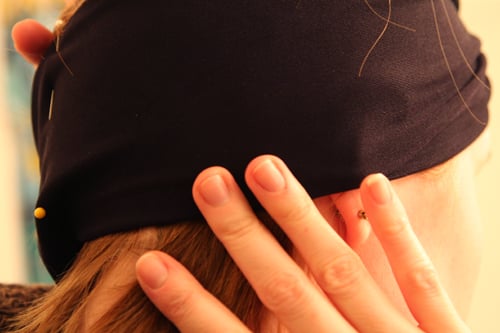 4. Wrap the tube around your head and pin at the correct length. (I made a single twist in the fabric at the front center.) Make sure the tension is correct – you need it a little looser than what you would think is a good tightness for a headband/wrap, lest you get a headache after wearing it all day.
 5. Sew ends of wrap together (right sides together). (not pictured) Then fold seam allowance to inside of wrap, cut excess. This will give you a clean seam on the outside of your wrap. Sew one more time vertically down that seam allowance to secure it down. (not pictured)
—>If you just want a plain twisted-front turban like the Olsen twins below…you’re done! If you want to spike it and stud it like Jennifer Behr’s piece, keep reading… Tutorial continued…

6. Try on head-wrap; bunch it up in a couple places and pin. 7. Hand-tack the bunched-up areas so the piece has a “gathered” look to it.
 8. Now we stud! I slipped the turban over my leg and sat it on my knee for stability. I pushed the prongs of the cone studs into the fabric, and folded them over on the underside of the fabric using pliers.
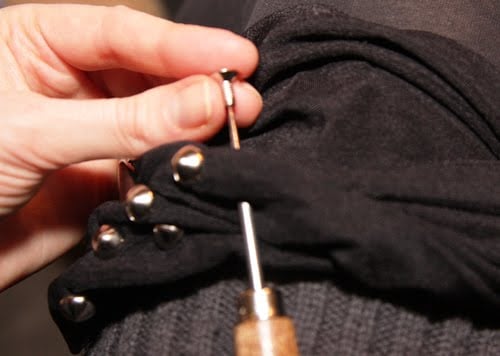 9. Then use an awl to pierce the holes for the cone spikes, which have a thick screw that needs to pass through the fabric. (The easiest way to do this is to poke the hole thru from the right side – then thread the spike screw in from the wrong side, following the awl as you pull it out.) Then attach the cone spike tops, and use a screwdriver to secure from the underside. (not pictured)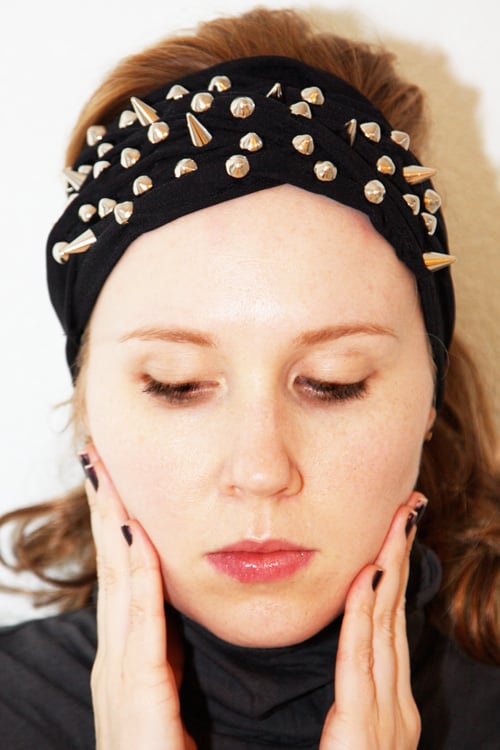
As you can see above, it turned out kind of like a wide headband!
You’re done! I didn’t add quite as many spikes ‘n’ studs as the Jennifer Behr version – simply because I got tired of it. I actually made a second layer to the piece so the center twist wouldn’t be so narrow and I could stud and spike through the upper layer only. This ensured no scratchy stud prongs would be directly against my forehead, but it turned out that the inner layer was a no-go since the spikes wouldn’t sit properly when there was fabric sitting underneath them. If you do choose to add another piece of fabric inside the headwrap (making it shorter than the headwrap and stitching its edges to the headwrap edges so it’s like a little stitched-down flap inside); I’d recommend studding the cone studs in the upper layer of fabric, but setting the spikes through both layers so they sit right. I know that sounds confusing!
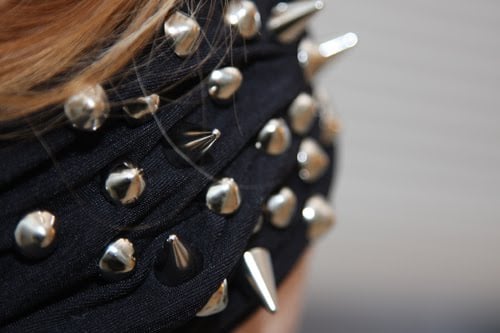 The fabric’s stretch is a bit of a problem – some spikes may fall out if you pull the piece too much, so this requires care when handling. FRA-GEE-LEH as they say in Italian! (Okay, I guess I’ve seen A Christmas Story way too many times…;-)
What do we think? Does this work? Is this a no-go? Do I look like I am about to join a biker gang?

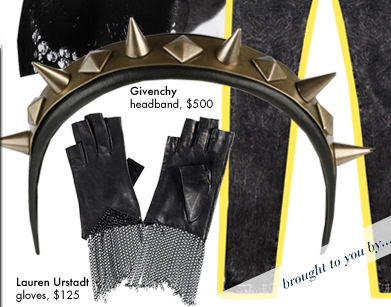 If you need further proof that studded headbands are all that this season, this Givenchy studded headband was featured in WhoWhatWear’s December holiday gift guide. Loving the chain gloves too!
But I’m a little wary of the studs-around-the-head look…they remind me of something quite Biblical. Ah, who’m I kidding?? It’ll be my next DIY, guarantee ya. (DIY available here.)
Happy DIY’ing!
xoxox
Carly
Save
Leave Comment
Nov 23, 2009 | DIY
 Note: Though this is a somewhat long and rambling post about shoe adornment, I do include a quick-and-easy DIY for the shoe elastics above. Scroll down for the tutorial!

As evidenced by the above Polyvore I made, elastic-banded pumps are in, in, in! I love how the black stretchy part over the upper contrasts so sharply with a shiny patent.
But I get the weird feeling that these will also be passe in a couple seasons. What to do??? I love that in Japan they’ve taken the idea of shoe-adornment to a whole ‘nother level with shoes that feature removable bands so you can change up your look whenever you get bored.
 Even though the above shoes were in a magazine a couple years ago (!), you can buy the bands separately, in red, holographic silver, white, brown, gold, or black, for about $9 a pair here. If I started making sets – like a set of 3 pairs – and sold them for $12, do you think they would catch on in the States?
  The concept of shoe bands is kinda similar to shoe clips, but just…bands. If you opt to adorn the top of your boot, then maybe Bandits are for you! They carry a number of different styles, not just the Southwestern-inspired motif pictured above.
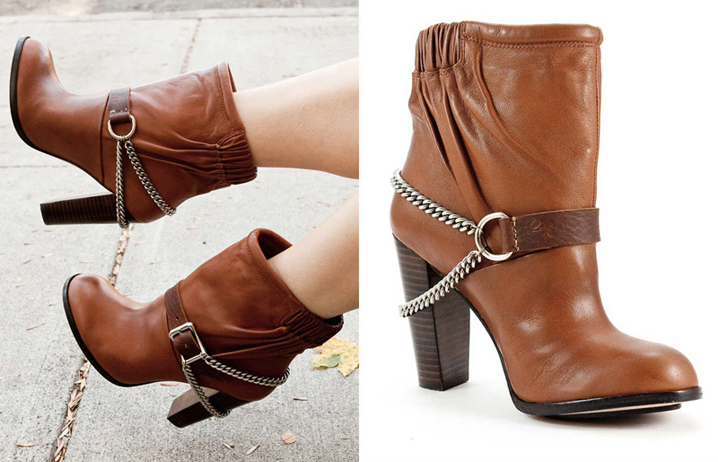 Bandit boot chains above. Adding to DIY list pronto.
Their boot chains are completely covetable, and a lookalike of
LitterSF‘s boot chains, only about $20 cheaper. But I digress.
Shoe bands! Right. So why buy when you can…
You guessed it!
DIY!
D.I.Y. Removable Shoe Elastics…Cause Why Not??!
(This is soooo simple!)
I have the skinniest, boniest feet ever. I know.
 You need:
*your favorite pair of heeled shoes
*about 8″ elastic
*sewing machine
*thread matching elastic color
(sorry, no photos…but you can definitely figure it out!!)
1. Start by puting on the pair of shoes you want to adorn with elastics. Wrap a piece of thick elastic around the upper part of your foot (halfway onto your arch). The band needs to go all the way around the pump and overlap about a 1/2″ on the underside, in front of the heel. Make sure it’s tight so it won’t slip down (just not too tight since we don’t want to crush our foot bones!).
2. Cut elastic to correct length.
3. Sew on a sewing machine – just reinforcing the overlap area on the elastic.
 See? The meeting of the two ends is at an angle – NOT straight on.
I’ve found they work best when the elastic overlaps at an angle – NOT one side meeting the other side exactly – to accommodate the curve of your foot. Repeat for other elastic.
Only really necessary for 1.5″ wide elastic like this; for the thinner types of elastic it doesn’t really matter.
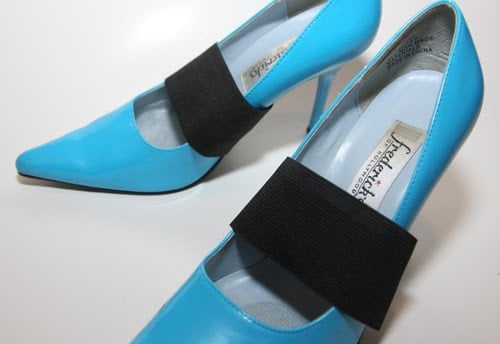 Presto! It’s like you have a whole new pair of shoes!
 And I also tried adding thinner elastic to the ends of silver vinyl belting for a different look…and sparkly silver ribbon for yet a third look. Both have thinner pieces of elastic sewn onto the ends of the contrasting ribbons. (The elastic is only about 1.5″ long in-between, for the underlay part and to allow the band to slide over the widest part of the shoe at the toe.)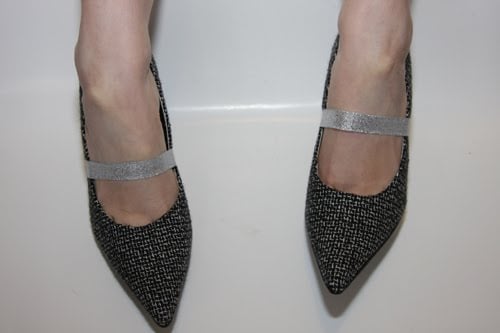
You could do virtually anything! Chain overlaid onto ribbon…frilly ribbon with grosgrain in the center…a line of sequins…anything at all!
Happy DIY’ing!
xoxox
Carly
Leave Comment
Oct 29, 2009 | DIY


So, were you watching the last Sex and the City movie close enough to notice those adorable half-gloves Carrie was wearing while using a pay phone in one scene?
Such a subtle difference to the regular wrist-length leather glove…but oh so cute. The gloves were actually from Ines Gloves, available for $147.
Ines gloves…so cute…but oh so expensive too. Why does this hand model lady have such hairy arms? This confuses me…and dissuades me from wanting to spend that $147 for some reason.
But we wouldn’t think of paying that much for such a simple accessory, now would we?
So why buy when you can D.I.Y.?!
 Enter a typical pair of wrist-length leather gloves (mine I got at the Buffalo Exchange for $8). Wish that they were gray or brown…but c’est la vie. (I didn’t want to go through the whole rigmarole of painting them with leather paint…or worse yet, attempting to dye them. I don’t even know if that would be possible with black gloves. In any case.)
By using the photos on the website as reference, I sketched the scoop shape using an eraseable fabric pen onto the gloves. 
You can see the white lines on the gloves…I tried a couple variations before deciding on the shape. Always make sure your pencil comes off of leather BEFORE you draw all over your gloves!
Add 1/4″ seam allowance below the line, and cut with a pair of sharp shears. Behold the scoop shape! Cut with a pair of sharp shears. I don’t have leather scissors, for some insane reason. Oh yes, because they’re ridiculously expensive and I just squandered my available funds on some new sewing scissors.
Using Loctite Vinyl, Fabric, and Plastic Glue, turn under that 1/4″ seam allowance and secure it to the underside of the glove. (Barge cement is a be-otch to work with since you have to wait 15 minutes after applying it before sticking your surfaces together…a total hang-up for a DIY’er in a rush like me…) ‘Tis necessary to glue the seam allowance since leather gloves are usually made from a thin and soft lambskin…which rolls and shifts uncontrollably as you sew it on a home sewing machine…unless you’re an all-star with sewing lightweight leathers, I’d recommend gluing it down to get that clean seam first!
The seam allowance glued (for the most part) down to the inside.
Then, using a leather needle (medium-weight leather, since we’re going through two thicknesses + two thicknesses of the lining), edge-stitch about 1/8″ from the edge of your gloves to secure that hem. (sorry no photo of the stitching…couldn’t work with the sewing of something black, with black thread, in a might-as-well-be-pitch-black poorly-lit sewing room.)
You’re done! Step back and admire.

LEATHER-SEWING TIPS:
Use a longer stitch than you normally would when it comes to leather…and a good tip when sewing leather is to crank the needle forward manually so that it has pierced the leather completely…BEFORE pressing with the presser foot of the machine to sew your line of stitching. Start sewing with the needle already in the leather to say it another way. Also, you can’t go super-fast or super-slow…there’s a happy medium where your machine’s feed dogs advance the leather at the right speed, the needle punches through the leather without jarring and hitting the needle plate, and the needle goes in vertically and doesn’t hit the bobbin case. Too fast and the aforementioned problems will crop up; too slow and the needle won’t punch through the leather. It’s different for every machine – just something you need to experiment with. (Of course, if you’re using a heavy-duty/industrial machine for sewing leather, you can completely ignore what I’ve just written.:-)
When starting your line of sewing, DO NOT BACKSTITCH. Go all the way around the edge, then back into the first ONE or TWO stitches you did at the beginning of the line. Backstitch ONCE. This will create a nice, professional look to your stitching.
Also, do not start stitching directly on a seamline. This will usually cause the needle to jar and hit your presser foot/needle plate/bobbin case. Sewing machine needles for leather (for the home sewing machine) are pieces of s$#@. They will snap willfully at ANY irregularity of thicknesses in your material; or bend and not punch the leather vertically at certain speeds…ugh. Buy more needles than you think you need!
Can’t wait to work these in a new outfit…the leather glove is THE must-have accessory this Fall, so rock it while you can!
Happy DIY’ing!
xoxo
Carly
Save
Leave Comment
Oct 29, 2009 | DIY
 Few things add edge to a look like bits of metal leering out from an unexpected angle; in combination with swingy fringe, the trend has continued to stomp down many a runway.
Adding a touch of tough to pieces you already have in your wardrobe is a fun way to freshen up your look. But be careful: there is a wrong way to stud and fringe your basics, so we’ve put together this helpful little primer on Badass Embellishment Skills 101.
To sex up a boring black leather tote, this is what you’ll need:
Leave Comment

 $498 for a piece of fabric with some spikes on it??? Wow.
 2. Fold cut piece in half horizontally, right sides together, and stitch along long edge.
 5. Sew ends of wrap together (right sides together). (not pictured) Then fold seam allowance to inside of wrap, cut excess. This will give you a clean seam on the outside of your wrap. Sew one more time vertically down that seam allowance to secure it down. (not pictured)
 7. Hand-tack the bunched-up areas so the piece has a “gathered” look to it.
 9. Then use an awl to pierce the holes for the cone spikes, which have a thick screw that needs to pass through the fabric. (The easiest way to do this is to poke the hole thru from the right side – then thread the spike screw in from the wrong side, following the awl as you pull it out.) Then attach the cone spike tops, and use a screwdriver to secure from the underside. (not pictured)
 The fabric’s stretch is a bit of a problem – some spikes may fall out if you pull the piece too much, so this requires care when handling. FRA-GEE-LEH as they say in Italian! (Okay, I guess I’ve seen A Christmas Story way too many times…;-)
 If you need further proof that studded headbands are all that this season, this Givenchy studded headband was featured in WhoWhatWear’s December holiday gift guide. Loving the chain gloves too!











