Nov 13, 2009 | DIY
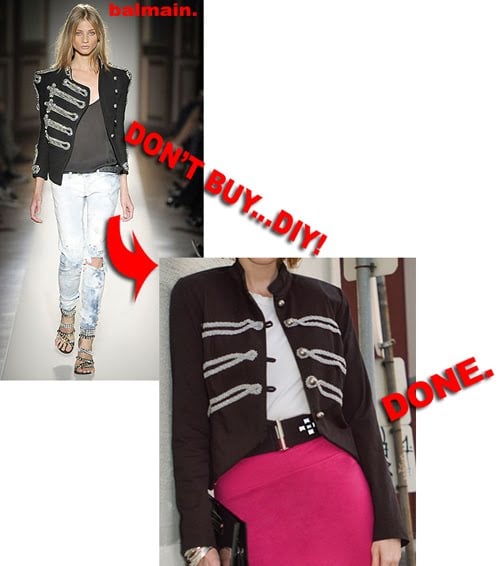
As you may have seen in my most recent entry for America’s Most Stylish Blogger Competition (I’m getting a little tired of writing that by now;-) All the shameless self-promotion is wearing me down!), I styled the hot pink miniskirt with a DIY band jacket that I made from a jacket I already had in my closet.
No joke! Here’s the DIY:
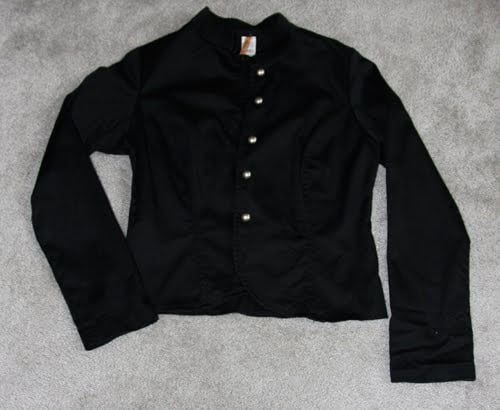

1. Use a jacket that is a shorter length with a little mandarin collar or similar collar to what you want your final jacket. (A boxy shape and flimsy material for the jacket is best!)
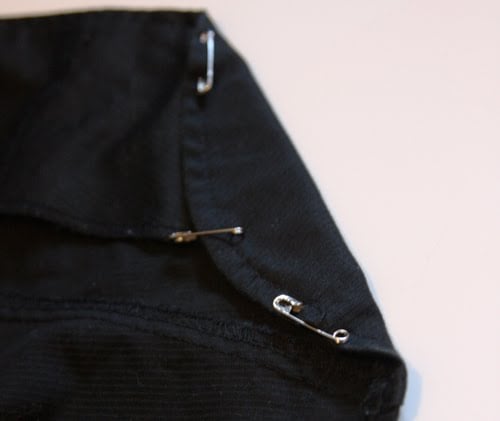 The underside of the pinned edge.
2. Pin under your hemline, using safety pins, to create that cutaway band jacket shape. Iron if you want to create a crisp, sharp edge.
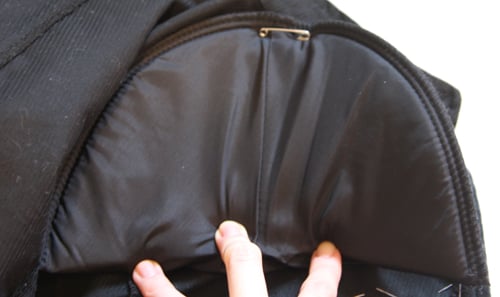 3. Pin shoulder pads inside the shoulders, using safety pins. (I used foam Dritz ones in Large that I got at my local Jo-Anns. Alternatively, you can rip them out of a jacket you already have – but you need them big to create that strong structured shoulder, so double them up if you can!)
4. Sew decorative trim onto the front of you jacket in scalloped curliques. (I just used matching thread and long basting stitches. This took awhile, but wasn’t very difficult.)
The inside of the jacket showing my basting stitches.
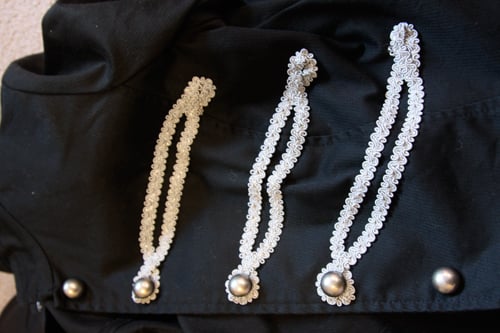
The trim on the outside encircling the buttons.
5. Optional: If you want, to create more of a “couture-looking” line below the shoulder, take in the sleeve in the upper arm area a little. (By sewing a line inside the sleeve seam line in the upper arm area.) This will make your shoulder pads “pop out” and give it that Balmain-look. Ideally speaking.:-)

PLUS, once you get tired of the look, remove your safety pins and shoulder pads, cut your basting stitches, re-iron your hem and your jacket is back to the way it was! *sigh* Multiple options in the same garment are just so, so lovely.
Happy DIY’ing!
xoxox
Carly Multifunctional Cais
Save
Leave Comment
Nov 12, 2009 | DIY, Fashion
To subject y’all to entirely non-fashion-related babbling drivel for a little bit…
One of the things that we were so psyched about when we moved from Honolulu to Oregon 2 years ago was…drumroll please….
Ikea within driving distance.
Yes, I know it’s sad and bourgeosie. Or strident middle-class desperation. Whatever. In Hawaii, the furniture available at most furniture stores is utter crap and ridiculously, ridiculously overpriced. And either teak (endangered…weighing a thousand pounds…um, no thanks) or wicker (infested with bugs, “island-style casual”…blech.) Nothing modern, nothing clean and streamlined…unless we wanted to pay thousands of dollars at Natuzzi or Z Design or somewhere. We lived in a beautiful condominium with cardboard boxes and junky mismatched stuff from Wal-Mart and cabinets from Home Depot.
Until we came to Oregon, finally visited Ikea, and were in heaven. Seriously, for the amount that you have to pay to furnish a home beautifully in a contemporary style in the islands…it would be cheaper to fly to the mainland, stock up at Ikea, and ship everything to Hawaii instead! Ikea could even raise their prices by 20% and still undercut what’s available in Honolulu by hundreds of dollars. Ikea people, take note!
But I digress. I love the textile patterns available in their fabric department; they’re so cool, so clean and uncomplicated. I must admit I went on a bit of a spree in the textiles department, picking myself up 2 yds of Patricia printed fabric last time I visited the mecca of Swedish design watered down for the average consumer palate.

And I made myself a dress. The fabric is stiff and 100% cotton, so it doesn’t lend itself well to anything but structured clothing, IMHO. I had to line the dress in poly satin since the fabric is really too rough to sit against the skin.
I wanted structured sheath dress with a little twist, so I chose Vogue pattern V1068 (dress on upper left). I had to make multiple alterations on the dress once made since of course the top part didn’t fit like the pattern said it would. I hate store-bought patterns. I thought the neckline was a little bit interesting. Not earth-shattering, but interesting.
This is why i.d. Bare Minerals is a travesty for my skin. It settles into all the fine lines around my eyes and makes me look like a perfectly lovely 60-year-old when I laugh.
I’m also working on a little removable puff-peplum for this dress…it won’t be done before the leaves start to decay, so I wanted to get these shots first. And a clutch handbag where I’m shading in the flowers with a fabric marker in various tones of gray…should be cool.
I’ve left the garden in this atrocious state for more than a week, reasoning that I wanted to do a photoshoot on top of all those beautiful Japanese Maple leaves before I rake them up. That’s my story and I’m sticking with it. I had a little Marilyn Monroe moment there with the elbow-length gloves…from Target, can you believe it?!

Now I’m off to rake me some leaves!
xoxox
Carly
Leave Comment
Nov 11, 2009 | DIY

As most of you probably already know, I did a DIY refashion of a Men’s Shirt to a Cute Summer ShirtDress that I posted back in August. One of my lovely readers, Amanda V., sent me a photo of the dress she made following the tutorial.
Amanda’s dress. Fabulous!
So I decided to do another shirt dress tutorial…this time using a men’s plaid shirt as the base, and changing up the front embellishment.
Are you ready? Here we go…
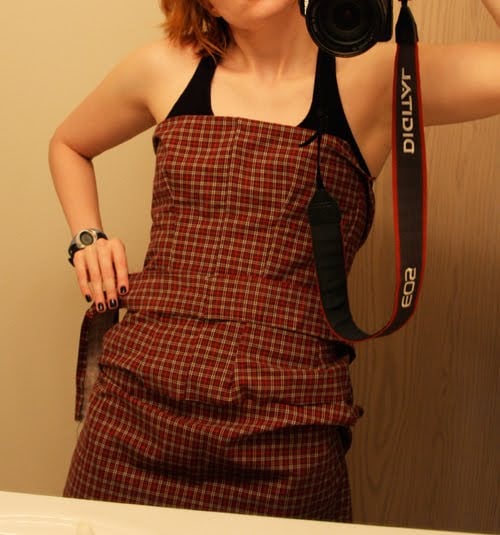
How to Make a Bustier Dress with a Peplum, Faux Waistband, Zip Back, Bust Darts, Tulip Skirt, & Front Cascading Folds
(say that 10 times fast!)
You’ll Need:
*1 men’s shirt (I used an Eddie Bauer M size shirt)…preferably not flannel
*1 invisible 14″ zipper
*12″ of 1/4″ wide elastic
*hook and eye
*thread matching topstitching thread in shirt
seam ripper / fabric scissors / pins / hand-sewing needle / sewing machine + regular sewing foot / zipper foot for sewing machine / a friend (or, a sewing dummy to pin on)
How To:
PREP YOUR PARTS
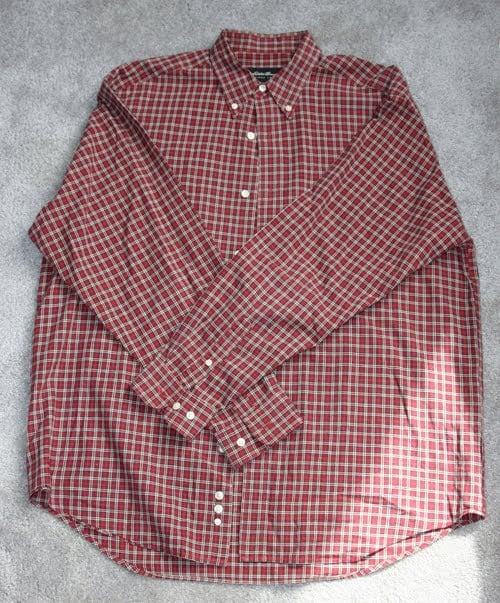
1. Cut shirt as follows:

- cut button placket off front
- cut sleeves off body
- rip pocket off front with seam ripper
- cut bottom off shirt, going straight across from underarms, through front and back
For each sleeve:
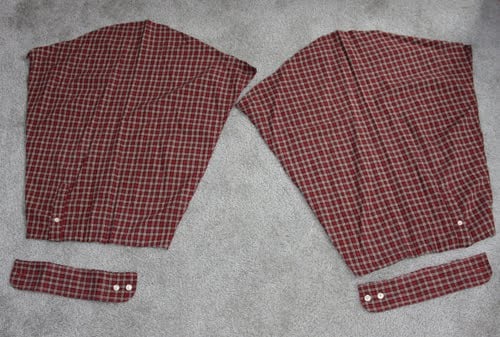
cut top rounded part off sleeves (we won’t use the tops)
2. Remove buttons from button placket.
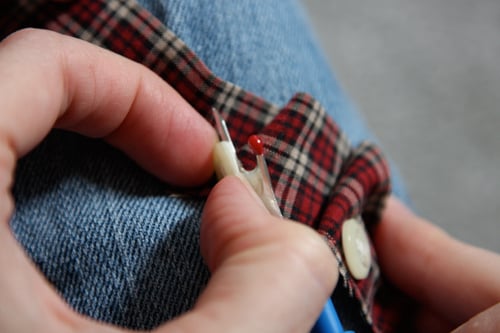 Bye-bye buttons!
Use seam ripper to open topstitched edges of button placket, making it into a flat piece of fabric.
Iron it completely flat.
3. Use seam ripper and open cuffs up at edge seams all the way to buttonholes; remove buttons.
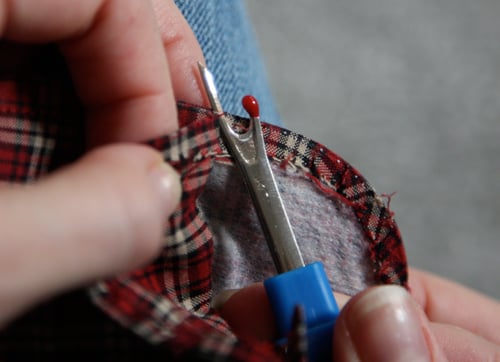
Cut off ends of cuffs where the buttonholes are (we won’t use those parts).
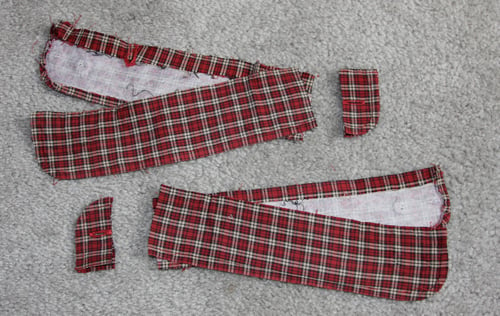
Peel off any interfacing that’s stuck to your cuffs and discard.
PIN
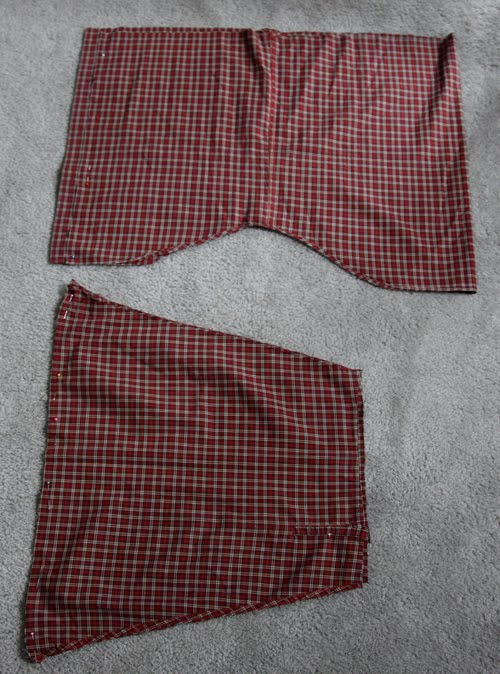
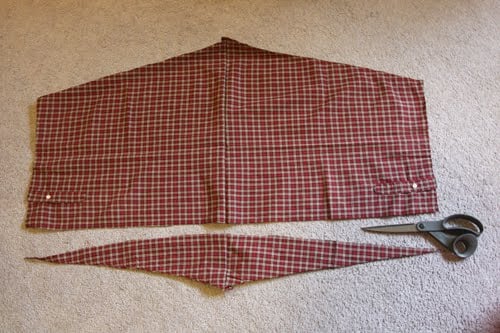
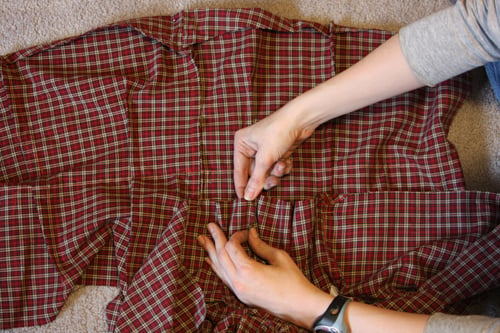
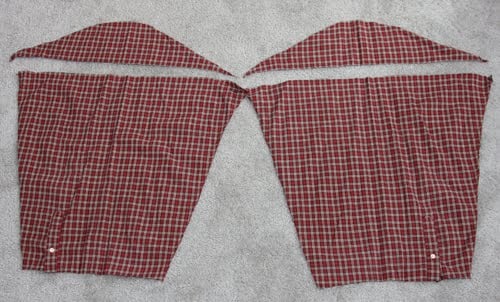
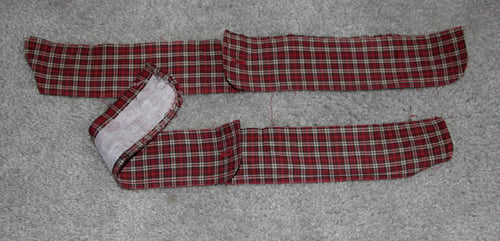
4. Turn shirt bottom inside out and cut off buttonhole placket. Pin edges together (where button placket formerly was). This will be your skirt. (top piece in photo; the shirt bottom is folded in half and flat)5. Pin the two sleeve pieces right sides together, matching the line where you cut the rounded tops off them. This will become the bodice of the dress. (bottom in photo above)
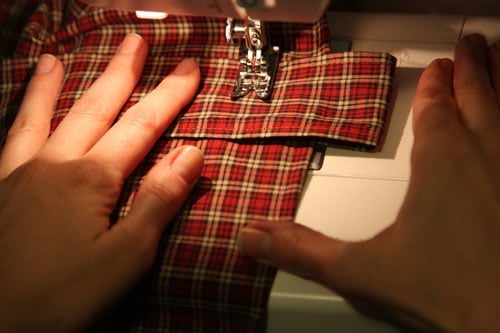
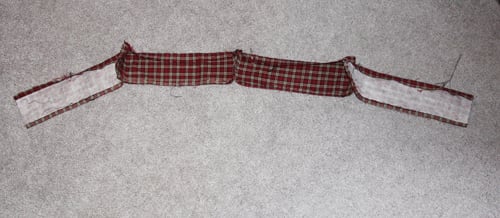 5. Pin cuffs together, matching short ends, to make a long line. (I matched the center two so the curved parts of the cuffs will be in the center.) This will be your waistband. (I haven’t yet removed the interfacing in the photo below. My bad.:-)
SEW
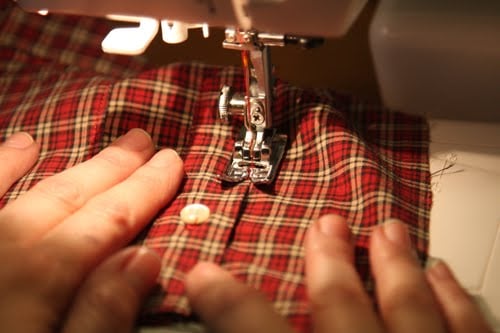
6. Topstitch sleeve opening plackets closed on the back side of your bodice.
Sew both bodice pieces together where you pinned. (not pictured)
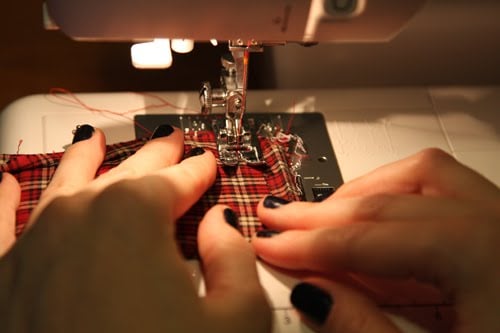
8. Sew all cuffs together at their ends.
This is what the waistband will look like once all your cuffs are connected.
9. Turn under about 1/4″ on each long side of the button placket you ironed back in Step 2). Sew 1/8″ from edges.
10. Sew along line you pinned on the shirt bottom in order to make the skirt, leaving about 5″ unsewn at the top of the skirt. (not pictured)
DART THE BUST
11. Cut off bottom of sewn bodice piece straight across. (This is the edge closest to your sleeve opening plackets.)
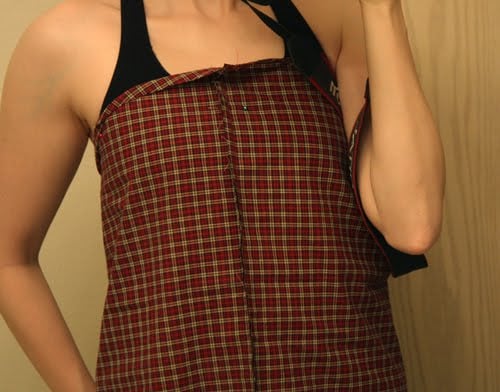
12. Wear a well-fitting sports bra or tank top that can support the weight of your dress bodice, and pin bodice (wrong side out) to your top in the center and at each of the side seams under your arm. (I’m referring to the side seams of the bra/tank top you are wearing.)
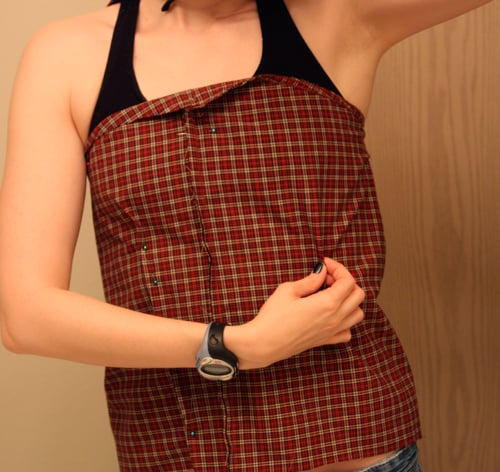
13. Using your fingers, start “pinching” the fabric outwards starting right below the fullest part of your bust on the right (usually where your nipple is). Pin as you go, moving downwards towards your waist. Do the same for your left side. Stand with both arms flat at your sides, move around, bend, etc…and see if the fabric pulls in strange ways. Alter your darting until both darts are relatively the same size and begin and end at symmetrical points to either side of your center front seam. (Measuring by the plaid pattern helps.)
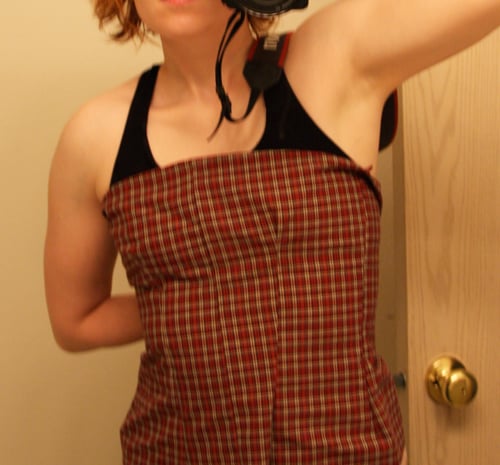
14. Create side seams by the same method, using the side seams on your sports bra/tank as guidelines.
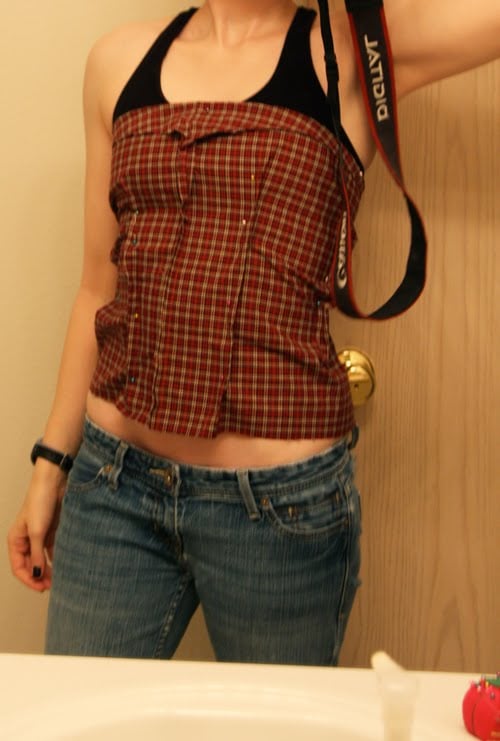 I know it looks like it’s pulling in a lot of directions – mostly it’s because I’m raising one arm to take the photo.
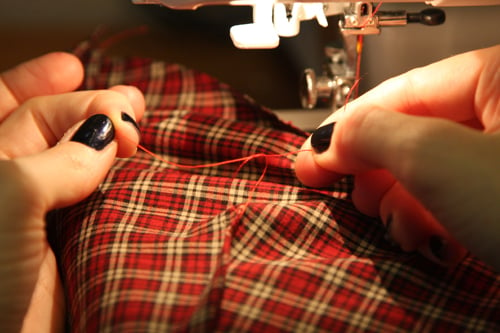
15. Take off the bodice and sew the darts on your machine, starting at the bottom and moving up to the bust point.
Leave two long threads at the end and knot the threads. Sew the side seams, and trim the seam allowance, notching where necessary.
16. Try the bodice on again, this time right side out. Are you pleased with the fit? No weird bobbles or anything? If it’s a little off, go back and fix. Also, does your bodice go all the way around your body? If not, now’s the time to add in some fabric salvaged from the leftover bits of your shirt – and add it to both sides of the open back. (You need enough fabric to touch at your center back PLUS 1/2″ on EACH SIDE.)
SEW THE TOP TO THE BOTTOM; MAKE THE PEPLUM
17. Pin the bodice back on your shirt/bra top. Pin the skirt underneath (onto a pair of tight-fitting leggings/underwear that you’re wearing underneath). Make sure the skirt underlaps the bodice part all the way up to your waist, since that will be the connection point of the skirt and the bodice. You need to match the side seams of that skirt to the side seams of what you’re wearing on the bottom…and place the seam that you sewed down the front of the shirt…at your center back. Place waistband over bodice at your natural waist, matching center fronts. Pin waistband to bodice all the way to the side seams. Make sure top of skirt underlaps bottom of waistband (or top of waistband, if you want a super-short miniskirt). Pin skirt bottom to bodice in center and at side seams only.
Take everything off.
18. Place dress on a flat surface. Continue pinning waistband all the way around to back parts of bodice. Pin skirt back to bodice back (pinning thru waistband) and gathering skirt at back where needed. Gather skirt at front between pins, and pin gathers in place.Creating gathers in the skirt part with my fingers.
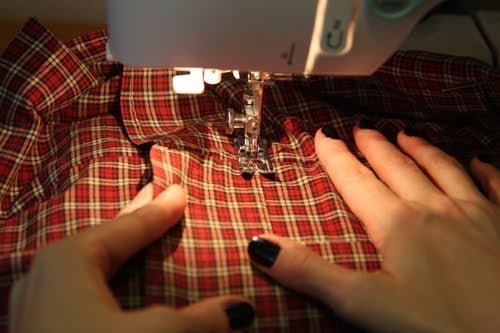
19. Topstitch top of waistband through all layers.
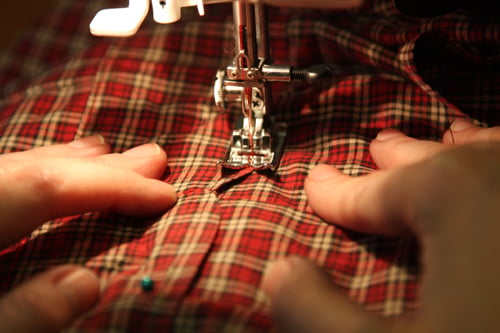
See the little w-shaped center to the waistband? A new day – you can see I’ve ditched the black nails.:-)
20. Topstitch bottom of waistband through all layers, preserving gathers in skirt as you stitch through them.
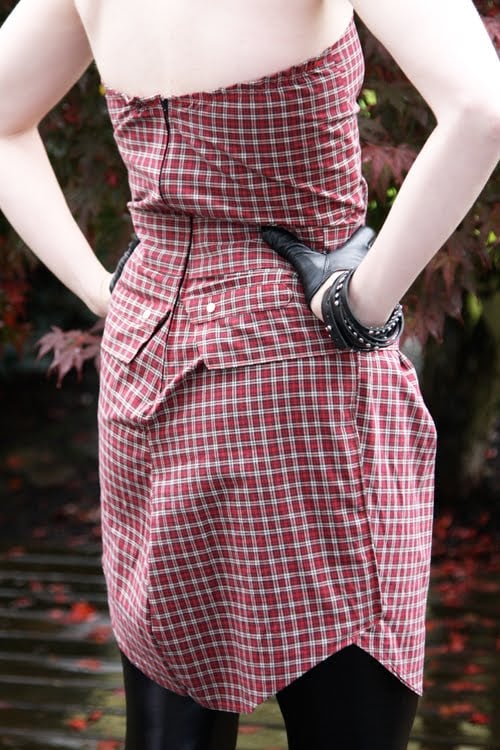
You can see the angle of the peplum at the center back.
21. Using a seam ripper, open the front bodice darts below the waistband to create a flared peplum. Fold under the ends of your peplum at an angle towards the center back, and topstitch edges.
PLACE THE ZIPPER
22. Try dress on inside out. Have a friend pin the dress at center back to create the seam allowance for the zipper. Also measure the zipper against the back of the dress and place a pin in the center back at the point where the zipper ends. (not pictured)
23. Take the dress off again. Sew the CB seam on your skirt up to the pin your friend placed. (not pictured)
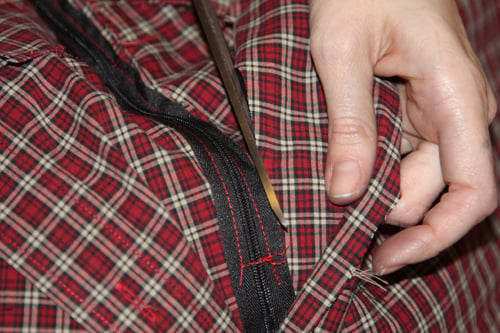
24. Place the dress on a flat surface and pin the zipper to one side of the CB opening. Sew the zipper on one side, using a zipper foot. (Pre-basting if necessary.) Close the zipper, pin to other side of CB opening, and sew. Make sure not to catch the peplum in your stitching. (not pictured) Trim seam allowance next to zipper.
FINISHING TOUCHES
25. Put the dress on again. Fold under top of bodice to create a straight line, and pin. Take dress off; trim seam allowance under top. Stitch a 1/4″ seam at the top. (not pictured)
26. Try the dress on yet again. If the bodice seems too loose, zigzag-stitch a piece of elastic on each side of the back bodice, at the top on the wrong side of the garment. (not pictured)
27. Place top of flattened button placket on underside of top of bodice, matching edge of placket to edge of bodice top seam allowance. Center on bodice. Stitch placket to bodice on right side, going through all layers.
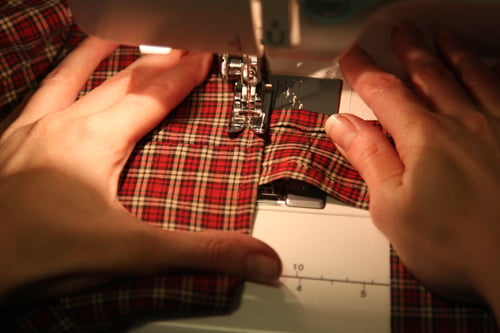
28. In order to make the cascading folds in the placket, measure out about 2″ from secured top of placket, and fold under, underlapping about 0.5″.
Sewing the first fold. The loop will actually hang a little below the line of sewing, camouflaging it. Work from the top to the bottom of the bodice in this way.
Push placket fabric up and out of the way, and sew straight across placket to secure at 1″ down from top of bodice. Repeat another 4 times to create cascading ripples down the front of the bodice; cut placket at appropriate length. The bottom looped ripple will cover up the end of the placket if you sew the end about 0.5″ above the bottom of the loop, and where the waistband top hits. (Your bottom loop will overlap the waistband slightly.)
28. Add a hook-and-eye closure above the zipper in the back. (not pictured)
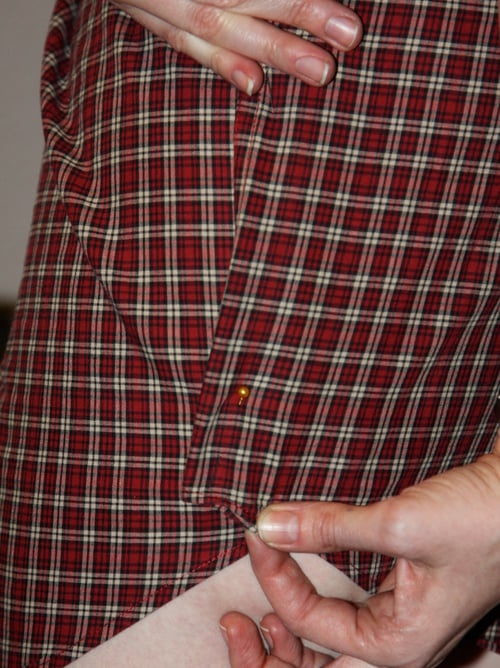
29. To create a tulip-like effect to the skirt, overlap the edges at the side seams slightly, pin, and topstitch.Believe it or not, you’re finally done!!
I’m a Misses’ Size 4/6 (usually a S in dresses though sometimes a medium because my waist is kind of thick). A Men’s M shirt was sufficient for my size…if you are larger, choose a larger shirt to work with!
Not loving the ripply back, though. It might need a little nip in the back to make it sit right.

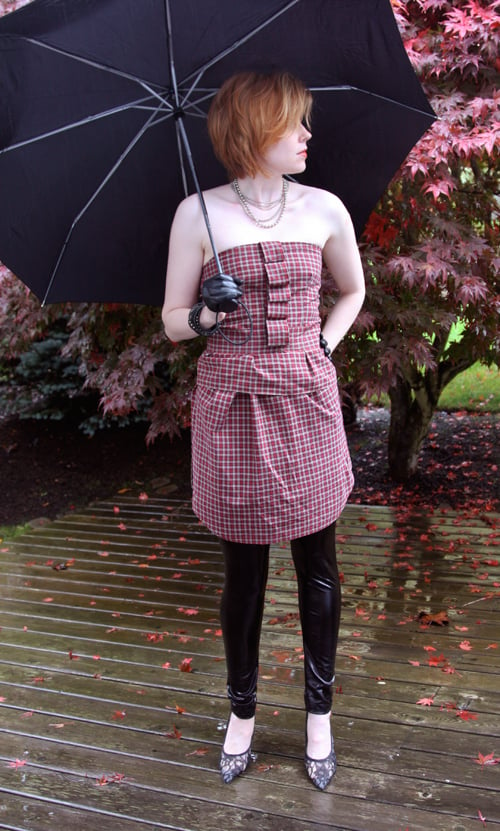
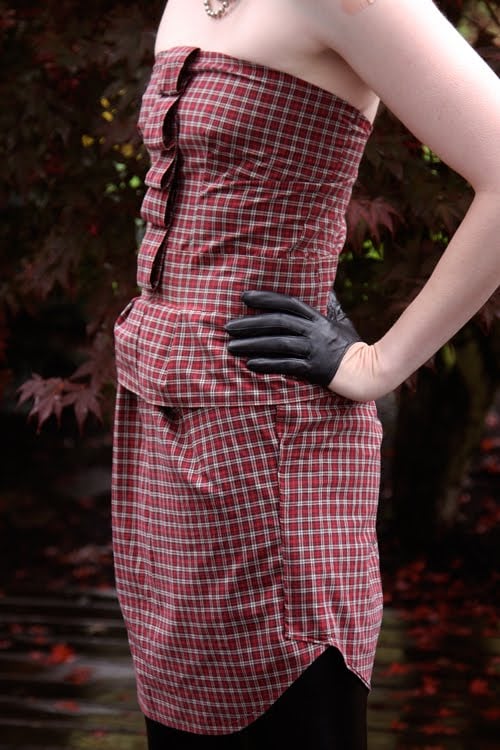
Whew! This took me awhile to write. I know the darting method I’m using is not exactly accurate (and most patternmakers would have my head), but as you can see, it works fairly well! The poor man’s (er, woman’s) version of bust darts.LOL
Thoughts: I’m thinking this is just too many elements for one dress. The point is for you to add and take away as you like. The peplum is not as full as I would like it – instead of being fashioned out of the bodice, it needs to be made from a completely rectangular piece of fabric to create the necessary flare. I’m also not liking the skirt gathers; I think instead the skirt should have pleats in the front to create the tulip shape; the gathers just look messy to me. I’m going to do a little makeover on this piece, but otherwise, I hope this gives you the tools to make your own!
Happy DIY’ing!
xxoxo
Carly
~If you liked this post, please share it!~
Leave Comment
Oct 31, 2009 | DIY

Tie-dyed denim is ba-a-aaack this season (sure you probably thought you’d never see the day) but it’s a blotchy, abstract dye that’s all over the runways…and all over celebs and fashionistas in the know. (And what I got knocked for in Challenge #1 in America’s Most Stylish Blogger competition. Whatever! If you haven’t noticed this trend – insert your head back in its hole in the sand.) Whether you embrace it or stay far, far away – using the crumple dye technique on your fabric is fun and virtually hassle-free (compared to some other tie-dye techniques that involve rubber-banding, stirring fabric for 15 minutes continuously etc.).
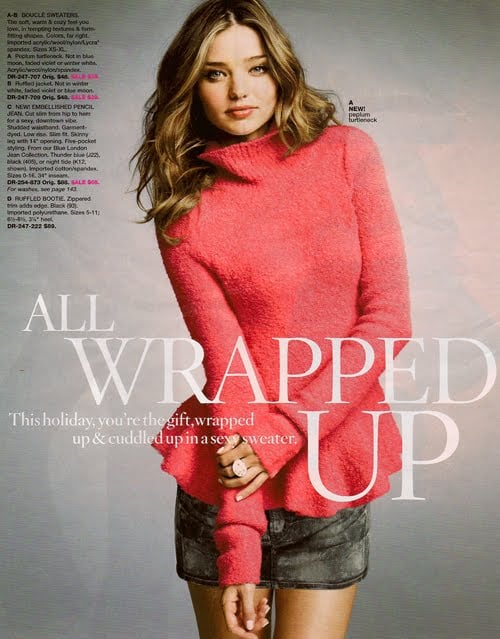
This is an image from Victoria’s Secret most recent catalog…and you can buy the sweater here but the skirt strangely seems to be unavailable. And I want that skirt.
So I used Tulip Permanent Fabric Dye and a denim miniskirt I found at the thrift store to create an abstract, funky dye-pattern.
The first step was bleaching the skirt to remove the color. This was accomplished by soaking in a hot water & bleach solution (ratio like 8:1 or something like that)…for like 8 hours. Had I used full-strength bleach (or a smaller ratio of water to bleach), the process would have been much quicker, but it also would have caused rusting on the metal embellishments on the skirt (zipper, grommets etc.), weakened the fabric fibers and seams, and even perhaps burned holes in the fabric or given the piece an orange tint. So to be safe I diluted.
 Most of the color was removed by this method. Ran it through the wash cycle (with detergent) to get rid of any remaining bleach.
Now it’s time for the dye!
Following the instructions, I created a dyebath of Black fabric dye…and dipped the skirt into it. I then pulled it out quickly, crumpled it on top of a spread-out garbage bag, and spooned dye from the bath onto certain areas of the skirt. Hmm…it didn’t work so well. By giving it that initial dip in the bath, I found that the skirt soaked up a base gray color that wouldn’t show any darker black areas like I had intended. Ohwell. Frustrated, I poured some bleach (undiluted this time) back on the skirt in certain areas. After a few minutes as I watched some areas of the skirt lighten to a muddy brown, I washed the whole thing in cold water, then threw it in the wash cycle of the washing machine (sans detergent this time). And this is what I got:
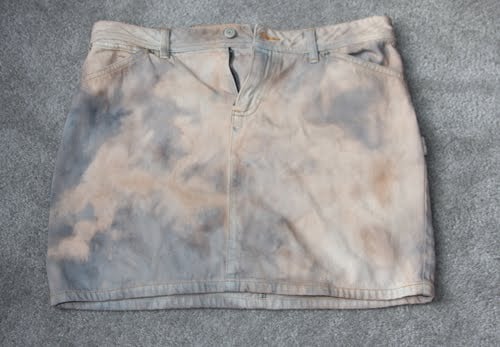 Definitely not what I was going for. I then wet the skirt, crumpled it up again on another garbage bag, and spooned black dye from the dyebath onto certain areas of the skirt, crumpling as I went. I left it for a short time, covered in garbage bag, then pulled it out and ran cold water through it. Back to the washing machine (no detergent) and into the dryer, and I got this…
It’s hard to see, but the skirt is more gray-and-white-tinted than before.
(Kenneth Cole new york sweater, DIY Old Navy denim mini-skirt, Sam Edelman Zoe boots, unknown puffball ring)
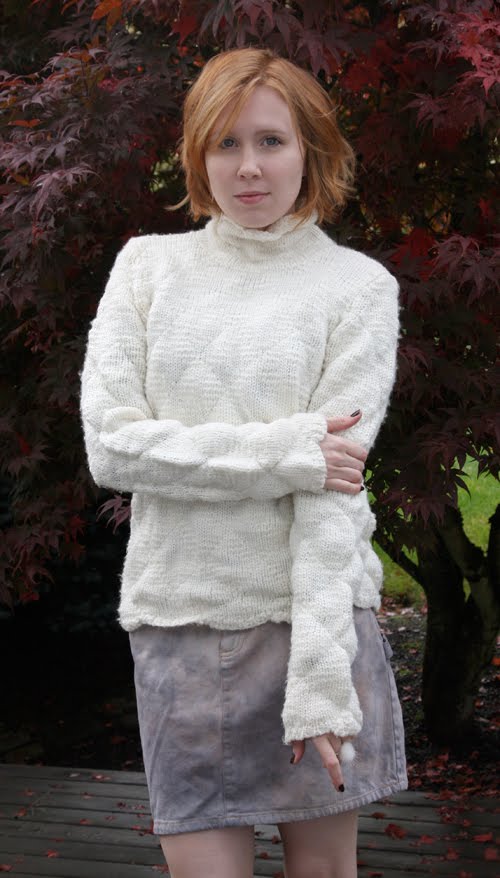
Somehow I never look quite the same as the Victoria’s Secret model does. Hmmm.
And EVERYONE needs a puffball ring. It’s just a Fact of Life.
The final product: the tie-dyed skirt. I definitely wanted it to be black & gray…but this stone blue/gray/little bit of brown thing is cool, too. You just never know when you’re dying denim and working with bleach!
In reality Tulip One-Step Fashion Dye would make more sense for this project, especially since you’re applying dye directly to the fabric. But I used what I had! Perhaps I’ll try another application to make it more black at some point in the future, but I’m kind of satisfied with what I have now.
Also, if you’d like some different fabric-dyeing projects to try out (just in the nick of time if you’re still stuck on ideas for a Halloween costume!) download the free Fun with Fabric Dye eBook from FaveCrafts.com…This eBook features 28 free fabric dye craft projects organized by 18 different dye techniques, with step-by-step photo instructions. Not only does the eBook include a great variety of stylish clothing craft projects for all ages, but it also features home decorating projects, accessories and holiday projects too.
Definitely try your hand at the DIY tie-dye denim mini…just don’t dip the whole thing in the dye after you’ve bleached it out…crumple and spoon, my friends!
Happy DIY’ing…and Happy Halloween!
xoxox
Carly
Save
Leave Comment
Oct 9, 2009 | DIY
(Jacket from Japan; scarf from I forget; Claire’s wristbands, necklace, and armwarmers; handmade studded ring; DIY Chanel tee; Paris Blues Jeans; DIY’d GoJane boots)
It’s that time of year again when the leaves change color, Fall activities are well underway, and Portland Fashion Week presents 5 days of local and sustainable collections, presented in some warehouse practically off the map in a NW corner of the city. I skipped out on attending Day 1, so here I am on Day 2 of the Collections, as I like to say, since it sounds more frou-frou and New-York-wannabe.
I made this shirt the morning before the madness started – with a fabric pen. Because life definitely needs more cavorting! (The real version says “Cavour Roma” in case you were wondering – here’s a piccy below:)
 (sorry I don’t remember the site I saw this on)
 Actually it was on KnightCat, I remembered, and a reader mentioned it was originally from Lookbook.nu. Thanks Danni!
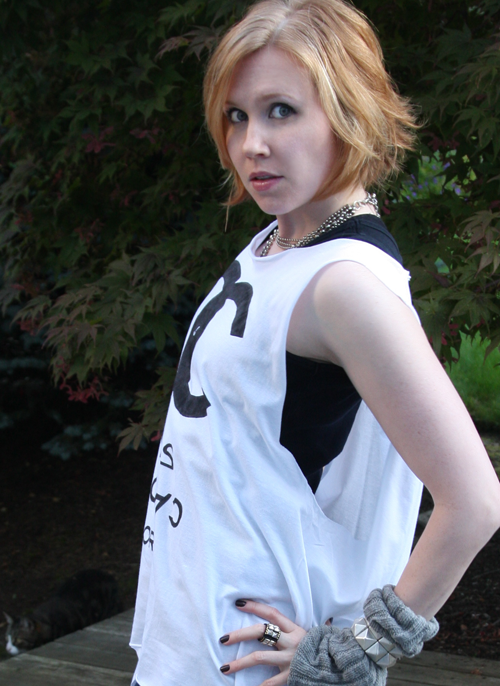
I know armwarmers went out of style (or never came into style) like a decade ago, but my hands get cold easily and I often add them to an outfit. Yes, inside of me is a fashion-challenged 12-year old. With warm hands.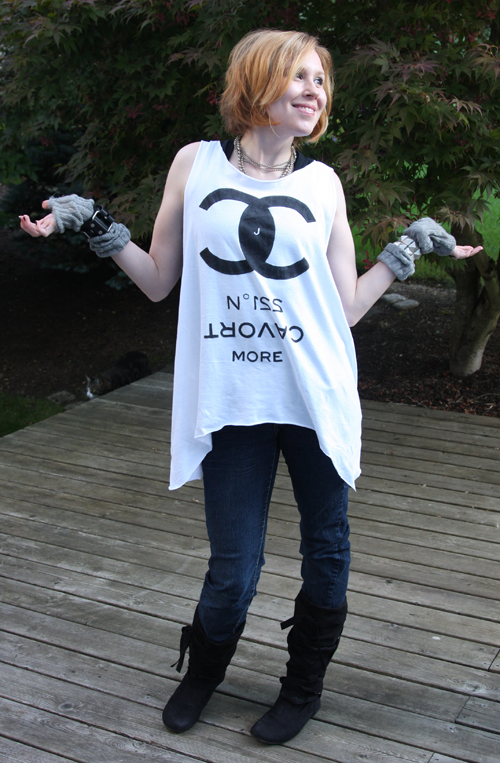
Even though it’s Fashion Week, when you’re covering the shows my best piece of advice is:
Wear comfortable shoes!
I wrapped a long strip of ultrasuede around these flat, scrunchy boots from GoJane and tied the ends. I’m all tied up!
Fashion Show coverage coming soon!
Have a lovely Friday!
xoxo
Carly
DIY Update: For those of you who were wondering how to make the shirt…
1. Take a white Men’s XL t-shirt and a black fabric pen (I used a FabricMate Chisel Tip ). Place your shirt over a piece of cardboard and apply a liberal spraying of Spray Laundry Starch
 to make it literally “flat as a board.”
2. I used Photoshop to create the lettering (and added my initials as the double-C logo in the middle, haha), printed out the image, and placed the paper underneath my t-shirt on top of the board. Then I simply traced the letters and filled them in with the fabric marker (took awhile).
3. I cut off the hem a little higher in the front and lower at the sides so it makes “side-tails,” cut off the neck ribbing and the sleeves, and stretched the cut edges until they rolled slightly.
4. Then I washed it on the delicate cycle in the wash and laid flat to dry, to get rid of the starch and “set” the fabric marker paint.
So super-easy to make! I’d love to see everyone’s DIY versions!
Leave Comment


 The underside of the pinned edge.