Dec 13, 2010 | DIY
My tutorial for this sparkly, holiday-style jeweled DIY cardigan clip was featured in the Nov/Dec 2010 issue of Style Sample Magazine (see pg. 20!). It’s super-easy to make – with just a glue gun, some sparkly buttons, and some trim scraps you too can make one in no time.
As the holidays approach, we’re all looking for that perfect accessory to elevate a blah outfit into FABulous; office-wear into party attire; the everyday into elegant. And what better than a functional closure to your sweater (or jacket, or scarf) that can double as a statement brooch? Clip it on, bling it out – however you wear it, it’s sure to be the focal point of any outfit!
Materials:
*stiff felt, cut into 2 circles (each about 1.5″ diameter)
*scrap of lacy ribbon
*assorted jeweled buttons
*2 shoe clips
*short length of chain (about 3″)
*Optional: 2 jump rings
*Optional: 2 brooch pinbacks
Tools:
*scissors
*glue gun & gluesticks
*pliers
*needle &thread
How-To:
1. Start by stitching the lace around the edge of each felt piece, in a spiral. (Although you can use the hot glue for this, the stitches look neater.)
2. Hot-glue the buttons on top of the lace.
3. Turn each felt piece over, and hot-glue a shoe clip onto its back. Keep in mind that in order to wear at the front of a jacket or cardigan, each clip has to open outwards, so make sure they face the right way before you glue them down.
4. Add the chain to the bottom of the felt pieces. I attached it using jump rings, but if you like you can just use hot glue to affix it, hiding the ends underneath the lace.
5. Optional: If you’d like to wear this piece as a brooch, also glue a pinback to the back of each felt piece.
You can try a number of configurations, using ribbons, soutache braid, fancy trims, different chains, studs, vintage findings, or even stick-on jewels (form the scrapbooking section of the craft store!) The sky’s the limit!
And make sure the very next time you rock it out – you tell everyone that you didn’t buy it…you DIY’d it!
I love how it looks like a little smiley face! (Once you see it..you can’t UNsee it!:-/)
And if you’re interested in the other features in this issue (like an interview with Project Runway Season 6 finalist Althea Harper and the how-to on making your own badge for your blog)…
Read the full issue online here
Thanks so much to Tamia and the team at Style Sample! I truly appreciate the inclusion and am honored to be a part of this great publication.
[And since they are the only magazine currently dedicated to bloggers and the art of style blogging, please help support this great publication by reading, contributing, or even purchasing the print version online. Thanks so much!]
xoxox
Carly
~If you liked this post, please share it!~
Save
Save
Save
Leave Comment
Sep 30, 2010 | DIY
Inspired by Candace Ang‘s ruffle necklaces, I created a super-simple, super-affordable version for one of my submissions for Style Sample Magazine and New York Design Shop’s Create Couture Challenge back in early August.
You Need:
*Cream Sweater Style Stretch Trim
*Large Silver Pyramid Studs
Additional Tools/Materials:
*silver necklace or chain
*sewing machine
*hand-sewing needle
*matching thread
*pliers
*chain-cutting pliers
How to:
1. Cut the Stretch Trim in half.
2. Zigzag stitch the two halves together along the long sides on the sewing machine. (Slightly overlapping them is best.)
3. Securely knot a long piece of thread on your needle, and make long, basting stitches along the long side of the trim piece you just made.
4. Pull thread tight to gather the trim – and knot securely on the other side.
5. Sew back through the top gathers to secure.
6. Stud the trim and fold the stud prongs down on the underside.
7. Cut chain necklace in half, and stitch both ends of it to the top ends of your ruffle piece.
Fuzzy and fun – this was sooooo quick to do.
Totally tactile, this fuzzy trim makes an edgy statement with all that metal peeking out!
xoxox
Carly
~If you liked this post, please share it!~
Leave Comment
Sep 1, 2010 | DIY
Since I’ve been attempting to write the tutorial for my Men’s Shirt to Romper project for the last 2 hours and I’m now going cross-eyed with no end in sight, I think I’ll instead share yet another project I submitted for Style Sample Magazine and New York Design Shop’s Create Couture Challenge.
Materials:
*White Rose Pin (leaves only)
*Cream Rose Pin (leaves only)
Additional Tools/Materials:

*chain earrings (basically just some french hooks and some lightweight chain)
*pliers
*2 jump rings
*scissors
*awl
How to:
1. Remove leaf sections from undersides of both rose pins.

Separate leaves and trim tops.
2. Stack 4 leaves atop one another and poke a hole in their tops using the awl. (You can also use small sharp scissors or a pin.)

3. Thread the bundle of leaves onto a jump ring.

4. Add jump ring to earring. Repeat Steps 2-4 for the remaining leaves and other earring.

Pretty easy, huh?
Fun, dangly, and lightweight – these are perfect for summer!
xoxox
Carly
~If you liked this post, please share it!~
Leave Comment
Aug 24, 2010 | DIY
Yet another of the projects I submitted for Style Sample Magazine and New York Design Shop’s Create Couture Challenge.
You Need:
*Rust Suedette Fringe
*Mocha Suedette Fringe
Additional Tools/Materials:
*double-chain necklace
*hand-sewing needle
*matching thread
*scissors
How to:

1. Start on bottom chain of necklace. Stitch chain links onto top of Suedette Fringe (I stitched through every other link).
2. Cut fringe once you’ve reached the end of the chain.
 3. Repeat for the lighter-colored fringe and the top chain.
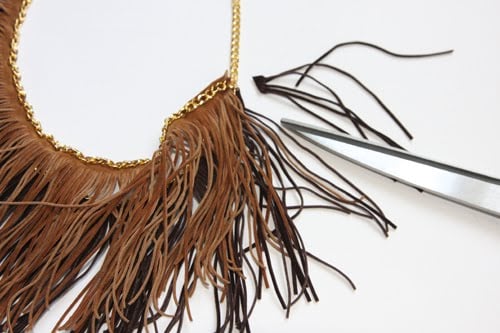 4. If desired, trim edges of fringe so they hang better whilst wearing.
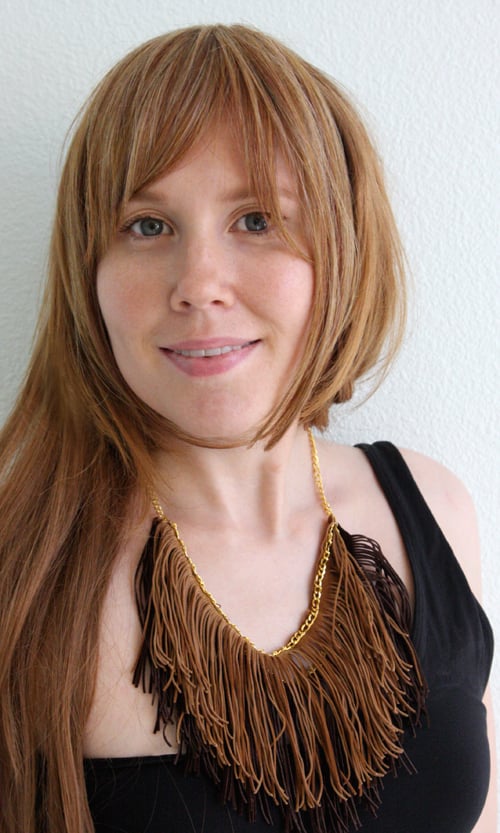 Sometimes the best thing about DIY is the fringe benefits! 😉
xoxox
Carly
**This was actually the project that the person who won the random commenter drawing commented on, saying she loved it! (I know that sentence doesn’t seem to make sense, but my brain is feeling muddled right now:-) So I sent this fringed necklace to the winner – and I hope she likes it! Congrats, Monica!
~If you liked this post, please share it!~
Leave Comment
Jul 16, 2010 | DIY
To continue on in the theme of strange things to wear on your wrists…
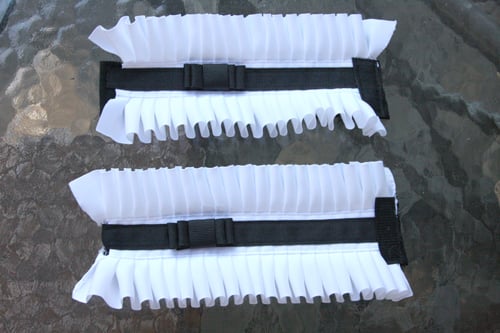
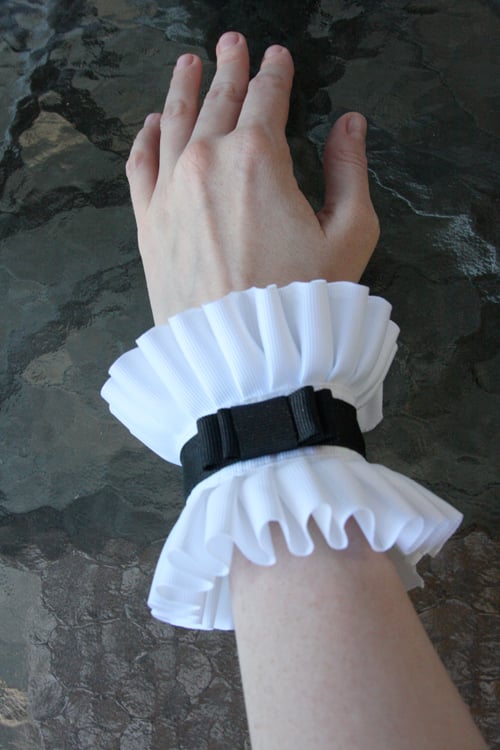
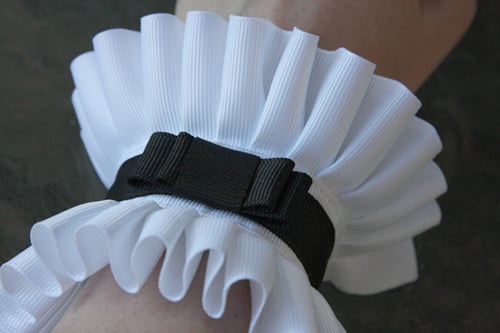
I’d like to share with you how to make your very own pair of pleated wrist cuffs.
As an accessory they may be somewhat unusual – but maybe you noticed them on China Chow from a previous episode of Bravo’s Work of Art? (Episode 3; the one where the artists have to create a piece of art for a book cover; I can’t find the screencap from Bravotv.com. She’s wearing them though!!)
They’ve been seen on celebrities such as Audrina Patridge and Brooke Hogan, courtesy of Cuffs Couture, but at $58-$90 for a single cuff I find this brand a bit out of my budget.
I actually saw the cuffs I got the idea from in a February 2010 issue of Vivi magazine, and thought they were a great idea to wear with bare arms to add a bit of romance to an outfit.
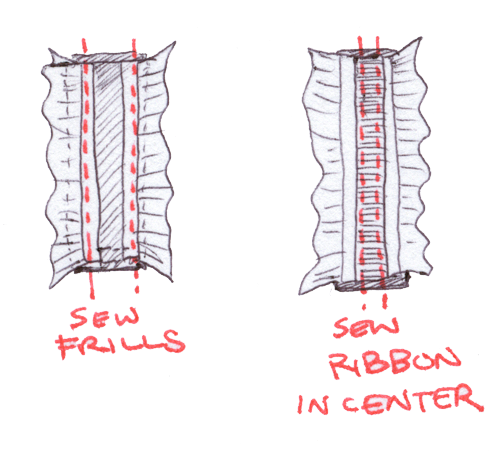
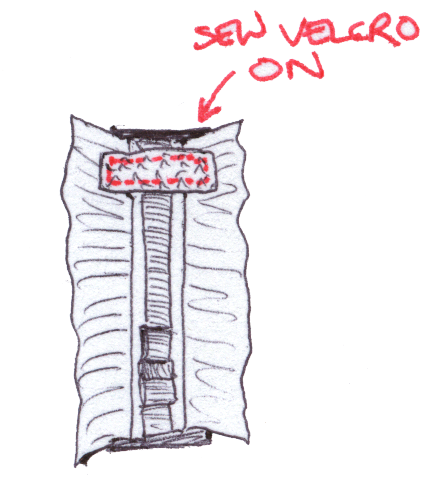
You Need: (sorry for the hand-drawings, I didn’t photograph the step-by-step)
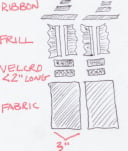
*2 pieces of black woven fabric, each about 3″ wide and long enough to wrap loosely around one wrist with about a 2″ overlap
*2 sets of black velcro strips (the furry side and the hooked side = 1 set), each about 2″ long
pleated white trim (mine was grosgrain ribbon trim I found at Jo-Ann’s Fabrics, though if you can find pleated silk or cotton that would be soooo much better)
*black grosgrain ribbon, 1/2″ wideAnd…
*fabric scissors
*flame
*sewing machine and needle for wovens
*hand-sewing needle
*black thread
*white thread
*fabric glueHow To:
1. Turn under all the raw edges of each fabric piece about 1/2″, and sew.
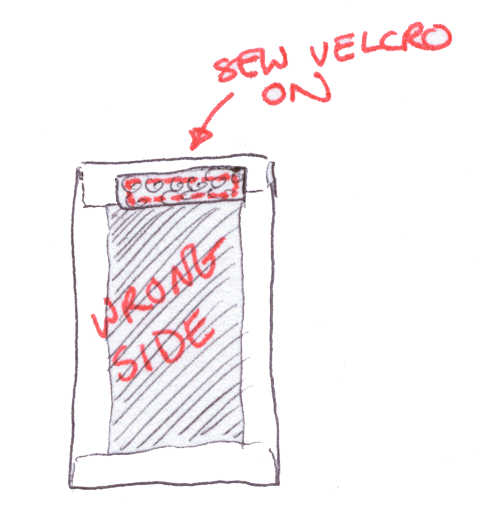
2. On the underside of one of the smaller ends of a fabric piece, sew a piece of velcro (the furry side out). Do the same for the other fabric piece.
3. Cut 2 pieces of your black grosgrain ribbon and 4 pieces of pleated trim to the same length as your finished fabric pieces.
Use an open flame to heat-seal the edges if they are synthetic fibers; if cotton you will have to either fold the raw edges under or seal them with Fray-Check.
4. Sew 2 pleated trim pieces onto each long side of one of the fabric pieces. Place them just far apart enough so that the 1/2″ wide ribbon placed in-between them will just overlap them in the center. Do the same for the other fabric piece and remaining pleated trim.
5. Sew each piece of black grosgrain ribbon down in the center of the fabric pieces.
6. Make the bow: (For my bow I made two loops; one a little smaller than the other, and placed them on top of each other, gluing the top loop onto the bottom one, then wrapping the center and securing with stitching underneath. You can make two or one or however many loops you want! The methodology is the same anyway. The following directions are for a single-loop bow🙂
*Cut a 2.5″-long piece and a 1.5″ piece of grosgrain ribbon. Double-thread your hand-sewing needle with black thread, and double-knot the end.
*Create a loop with the longer piece of ribbon, underlapping the ends.
*Push your needle into the underlapped pieces to the inside of the loop, then back through and out, pulling the knot tight onto the ribbon underside.
*Pierce the end of the smaller piece of ribbon and push it all the way down to anchor it onto the underside of the loop you just made.
*Curl the small ribbon around the loop, and anchor the other side of it with the needle and thread.
*Sew an X through all layers except for the tops of the loops, knot, and cut the thread.
*Make one more bow.
7. Use a dab of fabric glue to glue each bow onto the center ribbon of each cuff.
8. Sew the other velcro strips onto the opposite ends of the fabric cuffs, onto the right sides, the hooked side facing outwards.
Each cuff is fastened by pressing the strips of velcro together on the underside of your wrists.
The stiffness of the ribbon pleats makes it stand out from the wrist more than I had hoped, thus something that is softer or thinner would be a better choice for the pleating. You could even make the pleating by hand (with the help of an iron) if you were particularly hardcore.
I think they look equally as good with a casual ensemble as with a slinky LBD!
Hope this has inspired you to make your own!
Happy DIY’ing!
xoxox
Carly
~If you liked this post, please share it!~
Save
Leave Comment