Dec 10, 2010 | DIY
Feathered things are experiencing a revival lately – and I’ve been hankering after a maribou feather clutch for awhile. But I’m not going to buy when I can DIY for much cheaper! It’s sooooo easy too…
DIY Marabou Feather Clutch
Difficulty: (Easy/Beginner)
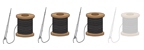
You Need:
*old clutch-style purse
*tacky glue
*marabou boa
*scissors
How-To:
1. Lay your clutch flat and visually estimate how far apart the pieces of your boa need to be to get the kind of coverage you want.
2. Spread the tacky glue in vertical lines down the front of your clutch, and across the top below the clasp.
3. Starting from one side, lay one end of the boa onto the glue at the bottom of the clutch.
4. Fold the boa piece over at the top of the clutch, and then loop it down towards the bottom. Snip at the bottom of the clutch.
5. Repeat for all the lines of glue until the front of your clutch is completely covered. Allow to dry and then trim the ends so they’re all one length.
Pretty easy, right? To cover both the front AND the back using this method, you’ll probably need two boas. And you could use any type of feathers that suit your fancy…they don’t have to be marabou, and they don’t have to be in boa-form, either.
Did You Know?
“Marabou” is a term for fluffy feathers – and most “marabou” feathers available for crafting, fishing lures, garment trims, or millinery supply are actually turkey or chicken feathers, not feathers from the Marabou Stork (which are extremely expensive). Feather supply companies may obtain their feathers from birds that are killed by the meat industry, or the down may be plucked from the bird as the seasons transition and it has no need of it anymore (termed “live-plucking”). Feathers also may be collected as they naturally molt (like peacock feathers), or from birds’ nests (like eider down).
So finally, welcome to DIY Roundup 8! If you’re unsure how to link up your tutorial (or finished project), here’s how:
Just click the light blue “Add Your Link” button that appears to the bottom left below. Follow the instructions in the Inlinkz window, pasting in the URL of your project or tutorial (from your own blog, Facebook page, Flickr account, Craftster.org, CutOutandKeep.net, etc). Don’t forget to write the NAME/DESCRIPTION of your project – like “Bow T-Shirt” or “DIY Lanvin Necklace” – not your own name or your blog’s name!!! You can link up any piece you’ve made or tutorial you’ve written from any time, not just in the last two weeks (though it would be nice if it’s a recent project, just to keep the content fresh). It’s all about sharing and bringing in more like-minded visitors to your site!
So now you get to share your own DIY’s! If you have a DIY project or tutorial that you’d like to share, please feel free to link below! (However you can only link YOUR OWN PROJECT. Please do not link others’ projects!)
If you’ve linked up your project to the Roundup, feel free to grab the button below.
Can’t wait to see everyone’s projects!
xoxox
Carly
~If you liked this post, please share it!~
Leave Comment
Dec 8, 2010 | DIY
Again, 2 weeks condensed into one cuz I’ve been lazy.
The Ongoing Project DIY’ed Tom Binns’ rhinestone, pearl, and safety pin necklace. I love her version and can’t believe it wasn’t on my radar before!
Faux fur bootie covers – so lovely! Required2BeInspired DIY’s her own version, inspired by a pair of Dune boots she saw on ASOS.
Speaking of ASOS…Love the idea of Minx nails but the $50+ price tag + salon appointment hassle is scaring you off? Try the $12 DIY version – Nail Rocks, available at ASOS.com. I just ordered meself the gold metallic, but they also have animal print, lace print, and designer graphic prints…and I’m dying to try them all.
Ever wanted to DIY your own knitwear? (*Guilty!) Trendy Workshop allows users to create their own sweaters, scarves, dresses, and more in cashmere or cotton. Based in France, the company has an online editor where you can choose from different silhouettes, colors, sleeve styles, text, and detailing for each piece. Once finished you can have them produce and ship you the finish piece, and/or add it to your own webstore on their platform.
And – more nails again – sometimes glittery polishes just aren’t…glittery enough, ya know? Kate from This is What I Do DIY’ed her own version of the glitter manicure…with real glitter, and it looks just perfect. (found via A Pair and a Spare)
Nixxi’s No-Sew DIY dress tutorial on Ecouterre is amazingly simple…and stylish, and multifunctional! Got 5 minutes? Give it a try!
The 34 Great Homemade Gifts You Can Make list from Get Rich Slowly is an oldie but a goodie – and a great list to turn to for inspiration when it’s well into the holiday season and you’re in need of creative gifting inspiration.
And BurdaStyle is having an amazing Holiday Giveaway a DAY (until December 30th)- just leave a comment on each giveaway post on their blog, and you’ll be entered!
Hope all of you had a lovely two weeks filled with DIY!
All imgs from their respective sites except the cookie jar mix, which was from here.
xoxox
Carly
~If you liked this post, please share it!~
Leave Comment
Nov 23, 2010 | DIY
Combining 2 weeks into one since I got so busy since the second week of November.
Annette featured my Lace Top to Lace Vest tutorial in her 25+ Free Vest Patterns on Craft Stew. She’s included a whole bunch of really great vest patterns and projects that I can’t wait to try!
Ever wanted to make a Hermes-style clear purse? Scottish Toile shares her how-to here.
Cupcakes and Cashmere posted a Semi DIY for those Yves St. Laurent fringe pumps that are making the rounds on teh interwebs. Instead of spending the $69.95 on the Steve Madden pumps, though – you can find the same version for $39 from Newport-News or $32.90 from Alloy. Or you can even take a plainer velvet or suede pump and add Bondo to the heels to sculpt them just like the originals, like christeric did.
My Vintage Secret shows you how to make your own pair of DIY shearling boots. Just like the Burberry Fall 2010 version:-)
Bye Bye Soccer Mom shows off her studded pant cuffs DIY – done so simply with iron-on grommets, they look edgy and fabulous!
Suzannah at Adventures in Dressmaking shares her tutorial for making a leaf-embellished cardigan. Her finished piece looks perfect enough to be sold at Anthropologie!
xoxox
Carly
~If you liked this post, please share it!~
Leave Comment
Nov 9, 2010 | DIY
I contributed a tutorial to Foam Magazine on how to Make a Rope Knot Necklace. Check it!
If you’ve ever wondered how to make felt hats, The Fashionate Traveler has a wonderful video on How to Make a Felt Pillbox Hat. She has a great tutorial on making a military-style cap out of an old farmer’s straw hat by steaming it over a steam-cooker. (!!)
Amy Sedaris‘ new book Simple Times: Crafts for Poor People hits shelves. Less DIY and more funny? I’m adding it to my reading list!
A T-shirt turned into a shirred-top skirt? Sounds right up my alley! Check out sewlikemymom‘s tutorial on Instructables.com.
I just came across DIY Style, a site that has a number of crafty tutorials and vodcasts (video podcasts). They even produce a line of patterns through McCall’s! (DIY Lingerie, anyone? Sign me up!)
Lucinda at thriftandthread posted her tutorial for turning a tee into a knot-bust dress. It’s so easy to do and the results are so pretty you’ll be wondering why you didn’t think of it before!
Hope you guys all had a week filled with DIY!
xoxox
Carly
~If you liked this post, please share it!~
Leave Comment
Nov 5, 2010 | DIY, Life
Eeek! I meant to post this awhile ago, and it ended up slipping through the cracks. I’m so sorry!
Nonetheless, I had a great time visiting all your blogs and checking out your pieces. You’re all so creative! Here are the top 3 projects:
#3: Flower Bobby Pins
Sara from Simply Step Back shared her rolled-fabric flower bobby pins. They are adorable! (And so easy to make:-) Thanks Sara!
Did someone say “shirt“???! 😉 Buildeth Her House With love added beads and a ribbon to the neckline of an old shirt to jazz it up. I love how subtle and feminine it is!
From Bandy Candyon comes this colorful, adjustable skirt tutorial in 2 parts. The stripes are so summery and fun!
Thank you so much for sharing everyone!
If your project has been featured above, feel free to grab the button below.
xoxox
Carly
~If you liked this post, please share it!~
Leave Comment