Mar 5, 2011 | DIY
 My hubby has a ton of white shirts that have seen better days…and sometimes I steal one or two of them to makeover for myself. But men’s shirts are so shapeless and boxy, and I want something that isn’t as boring as it looks straight out of the package! With a few strategically-placed hooks and some elastic cord, this is a quick DIY makeover that will turn any boxy and shapeless top into a form-fitting gathered tunic or dress. Minimalist sex-appeal at its best!
You Need:
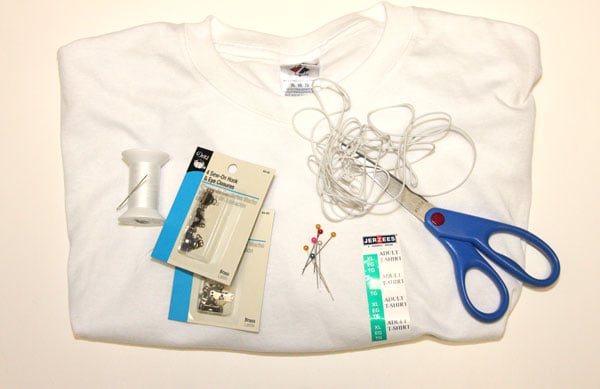 *white tunic-length t-shirt (mine is XXL)
*8 hooks from sew-on hook-and-eye sets
*white thread & hand-sewing needle
*white elastic cord
*marking chalk (not shown)
*measuring tape or ruler
How To:
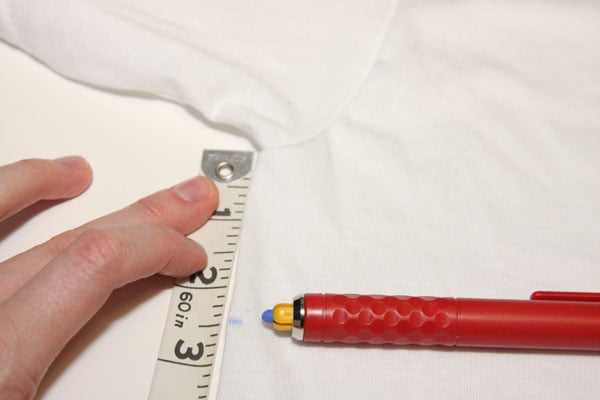 1. Lay your t-shirt flat, back side up. Measure about 2.5″ down from below where the sleeves meet the sides. (This is what worked for me – you may want to try the shirt on you to make sure this is the area where you want the corseting to end.) Mark.
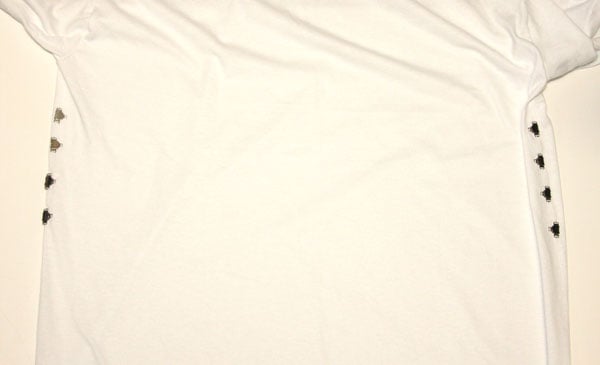
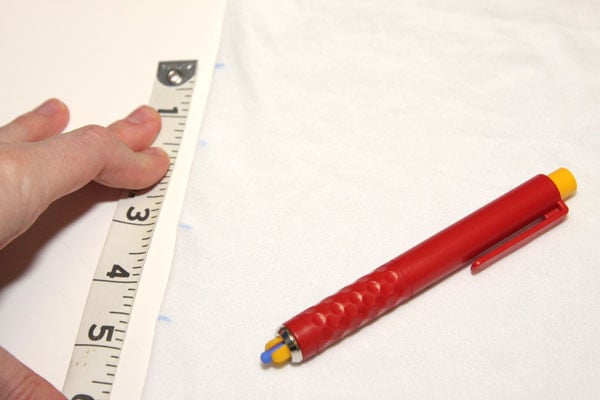 2. Measure below that mark 1.5″ and make another mark at each side. Repeat twice so you have 4 marks total, evenly-spaced at 1.5″ apart.
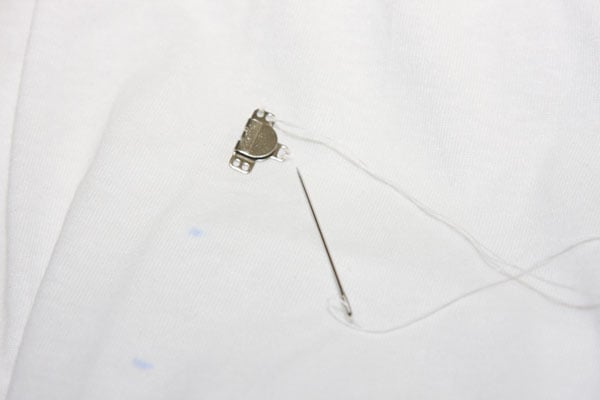 3. Hand-sew the hooks on at each part. Since we’re sewing onto the back and the t-shirt fabric will be pulled to the front, make sure the hooks are facing outwards.
 4. Try the shirt on. Take the elastic cord , fold it in half, and match its center to your bellybutton. Keep these lined up, thread either side of the cord into the bottom hook on either side of the shirt.
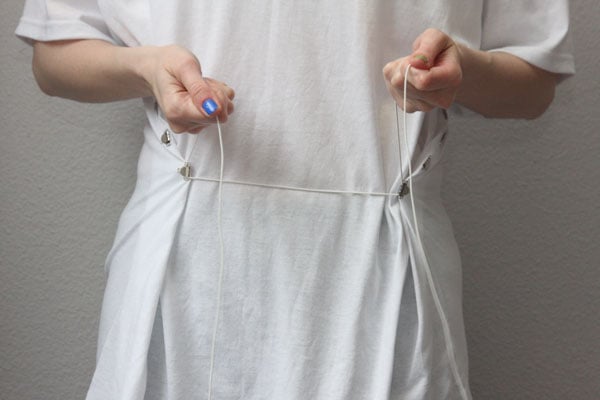 5. Pull to the front, pulling the shirt fabric with it. Cross the cord over at your center, then back into the next hooks above.
 Continue to lace the corset-front in this manner, and rearrange the extra fabric of the tee as you go to look neater and more tucked-in to the corset area.
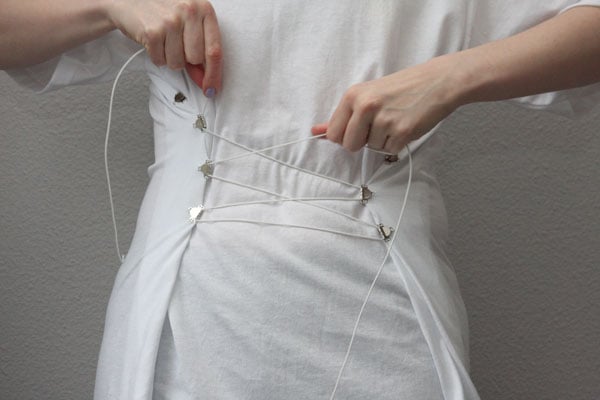

 6. Tie the ends of the cords at the top of the corseting in a bow; trim the ends.
Wear with something not overtly sexy – this shirt has all the sex appeal you need!
This project was featured in a recent Crafty Superstar interview on the tutorial-sharing site Cut Out + Keep…
click here to read the interview questionnaire & my other projects!
 (I’ll be re-posting all of them here on my blog soon.)
Thanks to Cat and the whole COAK team for the interview! I’m so flattered to have been featured:-)
Happy DIY’ing!
xoxox
Carly
~If you liked this post, please share it!~
Leave Comment
Feb 25, 2011 | DIY
 One day I was browsing in my usual drugstore in Hawaii, Lil Tot in tow, when I spied something in the Sally Hansen nail products aisle
that stopped me in my tracks. Ardell Duralash Eyelash Extension Kit. DIY eyelash extensions???!
It was mid-2007, Talika Lipocils seemed to be taking over the world, and I was toying with the idea of forking over the $40 for a tube. I’ve always had sparse, light brown lashes with blonde roots – so I’ve had to gunk on tons of mascara to get full coverage all the way to my eyelids to completely disguise the blonde part. (Which I’ve found almost impossible anyway.) I’d considered getting them dyed before, but the side effects and potential for disaster (blindness, anyone?) had scared me off. After having my son, I noticed my eyelashes were falling out about the same time the hair on my head was [if you didn’t know, about 6 weeks – 4 months after having a baby your body begins shedding all the hair that it held onto during pregnancy; normally you lose about 100 hairs a day but during pregnancy your hair does not shed at the same rate – we’ve all heard that your hair gets thick and luscious during pregnancy, right? It’s in part due to less shedding…which commences abruptly and often in large clumps after delivery, just FYI]. So I was looking to do something about the situation…and being such a do-it-yourselfing frugalista, I figured I wouldn’t be stepping into a salon anytime soon.
I was so intrigued by the concept of the eyelash extension kit, I just had to try them. They were pretty affordable, too – at around $11 for a pack. So I took them home, and after my son was asleep for the night I spent about an hour and a half grappling with them and applying them.
The next day, it was amazing. I got so many compliments wherever I went – from the women in my Mom’s Club asking: “Did you do something different?” to the lady at the grocery checkout line telling me I had beautiful eyes. Amazing!! And even more amazing, the lashes I had applied so painstakingly over that hour-and-a-half lasted….3 and a half WEEKS. Absolutely incredible.
So since then, I’ve been hooked on  Ardell Duralash. Not too long afterwards I started seeing ads for expertly-applied eyelash extensions in the Japanese magazines I was reading, and eventually went to a salon in Tokyo to have them applied ($84 for 120 lashes!!…back in 2008, though it’s more pricey now). But since I don’t go to Tokyo more than once a year (and salons that apply extensions here in the U.S. are few and far between and AMAZINGLY expensive at $150 – $400 for a full set of extensions) this DIY version is much more doable.
Now, eyelash extensions are not something that should be worn continuously. As your natural eyelashes grow, the extensions start to twist in different directions and poke you in the eye, or get matted in the corners of your eyes. The glue is annoying and crusty, and visible in closeups (unless you get them done by an expert). You don’t ever want to get the glue in your eyes or on your eyelids, since it will burn and possibly cause damage. You can’t rub your eyes or else you run the risk of pulling the extensions off. You can’t wear mascara or eyelash conditioner on your lashes at the glueline since both will dissolve the glue. And with extended weight on your eyelashes for long periods of time, your natural eyelashes can become brittle and prone to breaking off. You will want to give your eyelashes a “rest” in-between wearing the extensions, so they can get healthy and flourish during their natural growing cycle, and you may have to regularly use an eyelash conditioner to undo the damage. Plus, I’m not an expert and am not dispensing medical advice – if you choose to follow, please do so at your own risk!!
So, if you do want to try out Ardell Durlash, they are available online where I’ve linked above, and in the Sally Hansen/false eyelash section of your drugstore (at least here in the States, I’m not sure about internationally). The only version I’ve seen for years includes eyelashes that are wide, fanning clumps – not the kind they used to have (the slimline, bundled clump which I used in the below tutorial). But the application method is the same: (WARNING: There’s a lot of close-up photos of my eye in the tute below, so if you find close-up photos of [my] eyes gross, skip it!)
You Need:
 *Ardell Duralash Eyelash Extension Kit (my old kit is on the left; currently sold kit is on the right)
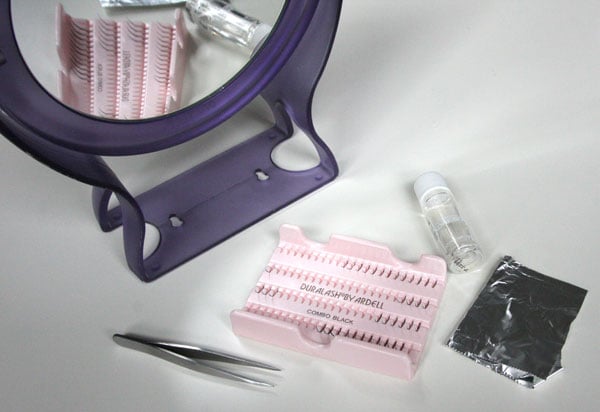 *magnifying stand mirror (it’s sooooo much easier when your mirror is on a stand!!)
*small pieces of foil
*tiny scissors (optional), not pictured
*tissue (optional), not pictured
*lampstand if you need more light, not pictured
[The tweezers, LashTite adhesive, and set of lashes are all included in the kit.]
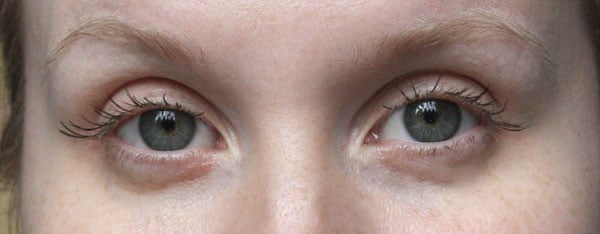
 The Before photo. I was startled by how much I look like Steve Buscemi in the above photo. :-/
How To:
1. Open up the kit, pull out the tweezers and Eyelash Adhesive. Fold the piece of foil so it’s doubled-over.
 2. Pour a small amount of the adhesive onto the foil (about the size of a pea).
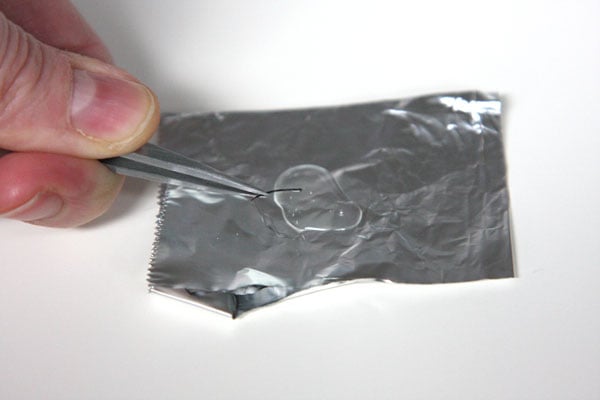 Grasp one of the shorter eyelashes near the end (just beyond the curve in the center) with the tweezers, and dip the knotted end into the adhesive. Allow a tiny bead of adhesive to form on the underside of the knot before you apply.
 3. Close one eye and use your other hand to hold the eyelid taut while you are applying. (I like to start in the middle of my eye and fan out from there, but it’s up to you.) Carefully place the lash ON TOP of your top lashes.
 Use the tweezers to squeeze the lash onto your natural lashes, and open your eye and squeeze the lashes together (being careful not to touch the gluey end). Wait for a few seconds, and the glue should dry and adhere to your natural lashes. DON’T touch or try to shift the extension lashes at all after a few seconds, or else you could pull them off.
 4. Repeat with the shorter lashes, applying in towards your nose, and then outwards towards the outer corner of your eye.
 Change to the medium- or even the longer-length lashes near and at the outer corners of your eyes for a natural look.
 5. If you find the application doesn’t look as “full” as you like, go back in and apply the shorter lashes in-between what you’ve already applied. If you drop the lashes or the glue dries too fast before you can place them on your natural lashes, you can wait a few seconds, and use your fingers to “ball up” the glue and pull it off the lashes, and then re-apply glue and start over. If you get glue on your natural lashes where you aren’t applying the extensions, pull off the glue as quickly as you can before it dries using your fingers (you can also use Adhesive Remover, included in the kit, on a tissue to remove extra gobs of glue). I also find that as I’m going back in and filling in the lashes, I can use my fingers to grasp the lashes and then “squeeze” them onto my lashline since I have all the applied lashes to grip and press against.
 6. Once you’re happy with one eye, count the number of lashes you end up applying. Then apply the same amount and sizes to the other eye so they match. For me (since I’ve done this many, many times), the whole process takes about 30 minutes, and I usually do it while watching some bad late-night TV.
 7. (Optional) I find that straight out of the kit the lashes are a little long for me for daily wear, so I like to trim them with nail scissors. DON’T simply cut the ends straight up or else they’ll look weird; you want to half-close the scissors and pull the blades down the length of each clump of the lashes so they snip the ends at different lengths (kind of like how you would “feather” your bangs or hair if you were cutting it). Always snip just a little – you can go back and cut more if you want. And DON’T cut your natural lashes!!
Once all dry, take care of them – no scrubbing or pulling; avoid contact with soaps/makeup/makeup remover; and be extra careful when you wake up in the morning and want to rub the “grit” out of your eyes – because a lot of it is GLUE that needs to be there!! Your natural lashes will shed as time goes on, and the glue will weaken and the extensions fall off, so you can choose to re-apply more, or use the Remover that was in the kit to remove them all.
 No more Steve Buscemi! And the best thing is, I wake up in the morning, look in the mirror, and feel pretty immediately…without makeup, without washing my face or doing my hair…it’s truly amazing what a different a pair of lashes make!
But they’re still long-lasting lash extensions for a fraction of the cost!
I know, I know – here I am advocating poking at your eye with sharp instruments and a pair of scissors, not to mention toxic, smelly glue and bristly clumps of eyelashes. FOLLOW AT YOUR OWN RISK!!
 Happy DIY’ing!
xoxox
Carly
Leave Comment
Feb 17, 2011 | DIY

Yesterday I coveted it, so today I’m going to show you how to make it. It’s DIY in 5 – minutes, that is. The easiest, quickest ways to take a piece from blah to fab and update it to current trends.
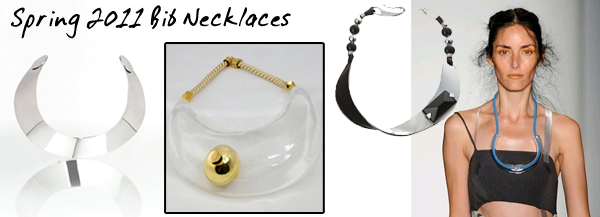
From left to right: Giambattista Valli, Alexis Bittar, Giorgio Armani, VPL Victoria Bartlett.
photo credits: Style.com, Wireimage.com; photo array by me.
With the coming of Spring, jewelry tends to go lighter, translucent, and more plastic-y…and the bib necklace is no exception. But finding just the right clear acrylic piece for a necklace is pretty tough; jewelry supply stores usually don’t sell large bib-style acrylic pieces, for one thing. You could always design it yourself and have it cut by Ponoko.com – but there’s a steep learning curve for the design software, usually multiple prototypes are necessary before you reach your final design, the service is pretty expensive for just once, and hiring out lasercutting seems a bit over-the-top for just a single piece for yourself. No, fast, cheap, and easy is the name of the game, so when I spied a set of acrylic purse handles at Jo-Ann Fabrics and Crafts store, I figured one would be perfect for a necklace.
Project Difficulty: (Easy/Beginner)
You Need:
 *1 acrylic purse-handle
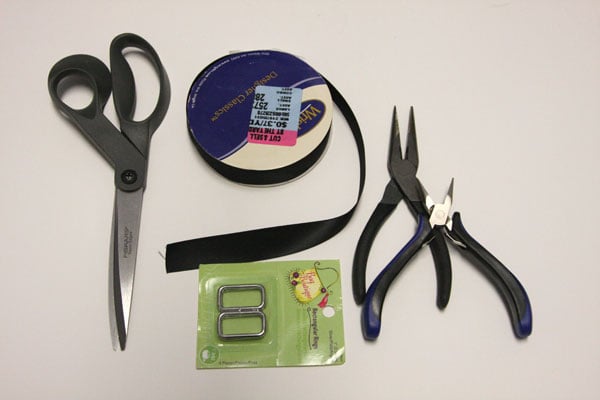
*2 silvertone rectangle rings or D-rings (also found in purse-making section)
*1/2″ wide satin ribbon
*2 silvertone scrapbooking brads (not pictured)
And…
*pliers (optional: wirecutting pliers)
*scissors
*awl
*lighter/flame
How-To:
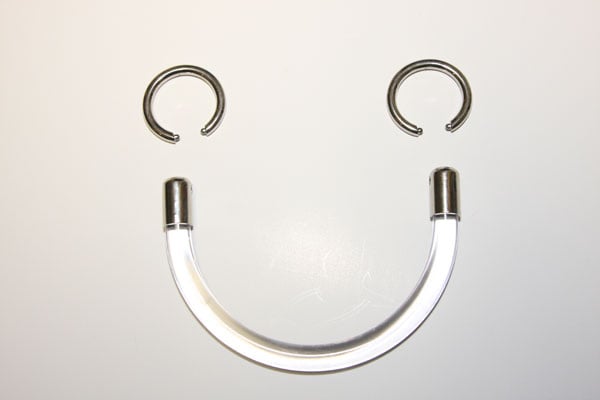 I love how it looks like the purse handle is smiling at you. Happy Handle!:-D
1. Use the pliers to remove the top rings from the handle – usually I find these rings, being sized for purses, are too big and bulky in relation to the size of the handle to use as-is for a necklace. (It literally looks like you’ve slung a purse handle around your neck…something I don’t want to be too obvious in the finished piece.)
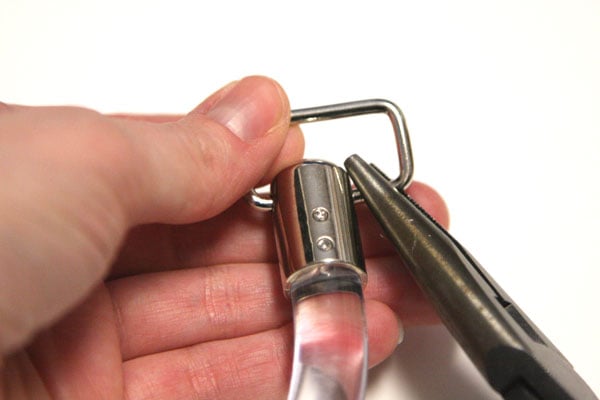
2. Attach the rectangles or D-rings that you got separately to the ends of the handle with the pliers – twisting apart and then re-closing like a jump ring with 2 sets of pliers. (If you couldn’t find any rings or don’t like that look, you can always skip this step and just thread the ribbon ends through the holes in the ends of the handle instead.)
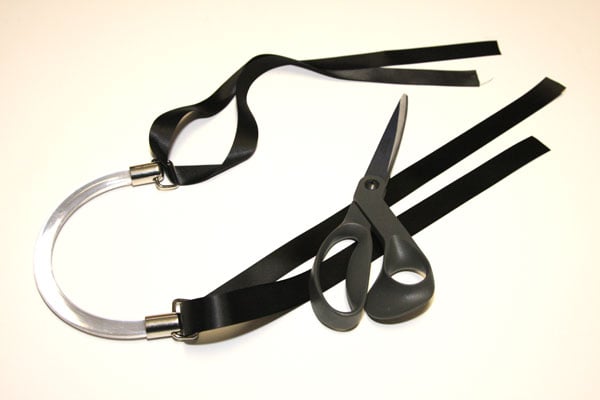
3. Cut two long pieces of ribbon and thread each through the rectangles/D-rings. (Make sure each ribbon piece when doubled-over, is still long enough to tie behind your neck.)
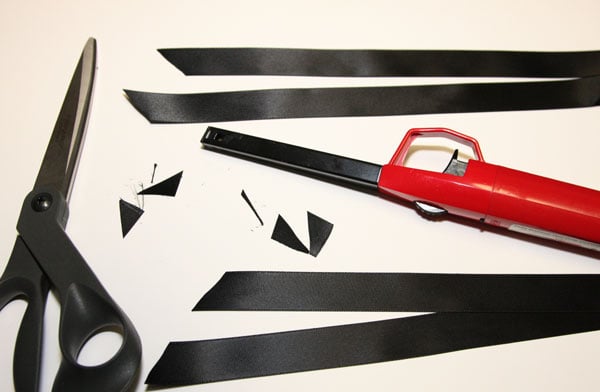
Cut the ends at an angle and heat-seal them with a lighter or open flame.

4. Use an awl or the scissors to poke a hole through the ribbon center near the rectangle/D-rings. Attach a scrapbooking brad through the hole and fold over the brad legs. (You can also trim them if they stick out beyond the width of the ribbon by using wirecutting pliers.)
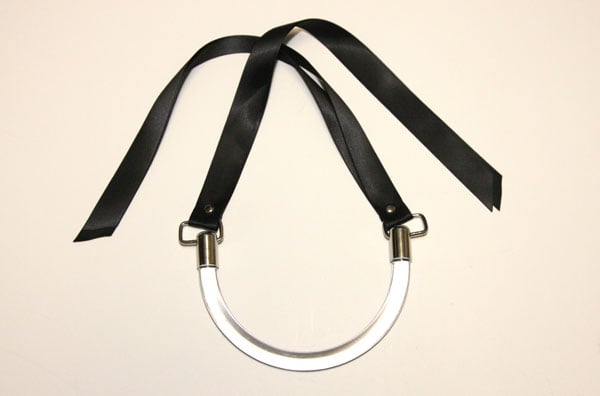
The doubled ribbon ends you then tie behind your neck in a knot or a bow depending on your preference.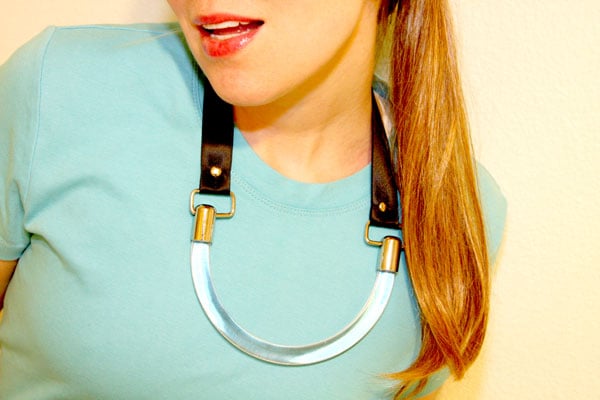
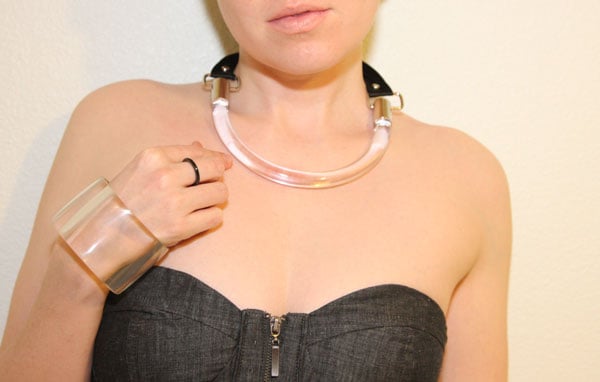
Wear paired with brighter-than-bright colors for a Spring 2011 feel, or over bare skin for a more upscale vibe.
Happy DIY’ing!
xoxox
Carly
~If you liked this post, please share it!~
Save
Leave Comment
Feb 8, 2011 | DIY

runway photos: Marcio Madeira, Style.com; photo array by me.
Seen on the Spring 2010 runways (more than a year and a half ago, would you believe?) these stirrup socks, gaiters, or whatever you wanted to call them were the quintessential accessory for Alexander Wang‘s 2010 football-inspired sporty-girly aesthetic. With a little hand-stitchery and some Stop Fraying sealant, they’re a breeze to make.
You Need: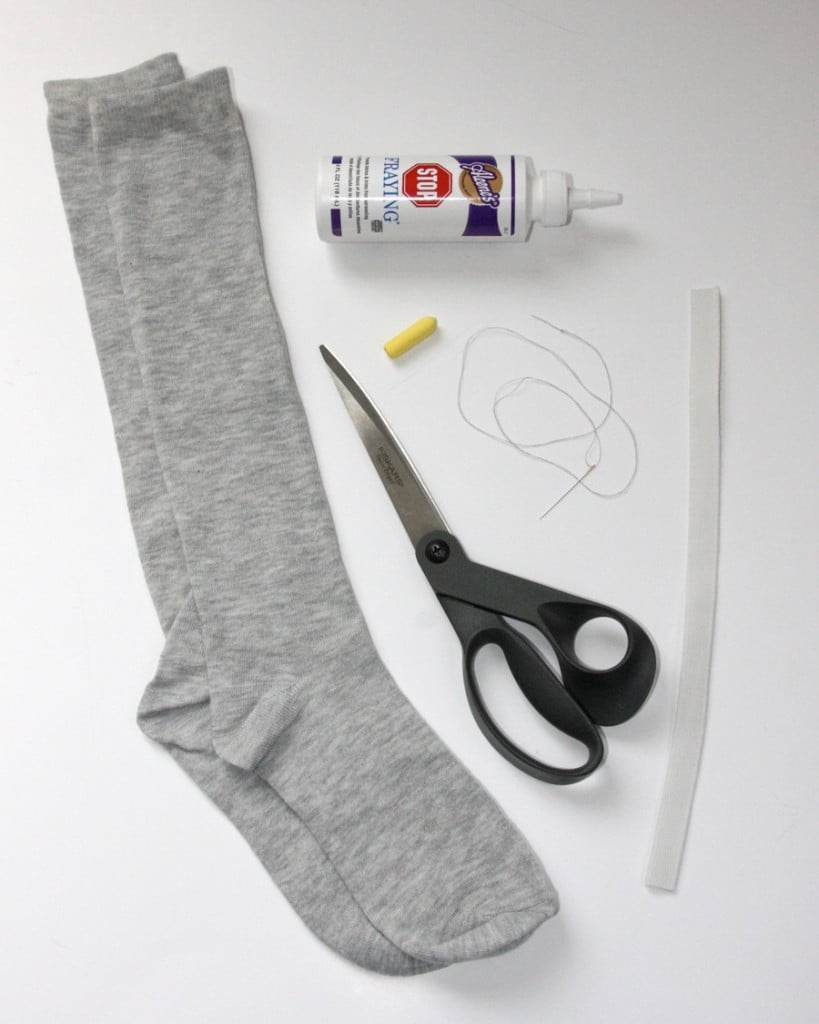
*pair of knee-high socks
*marking chalk
*white 1/2″ wide soft, lightweight elastic
*matching thread & hand-sewing needle
*fabric scissors
*Aleene’s Stop Fraying fabric sealant
How-To:
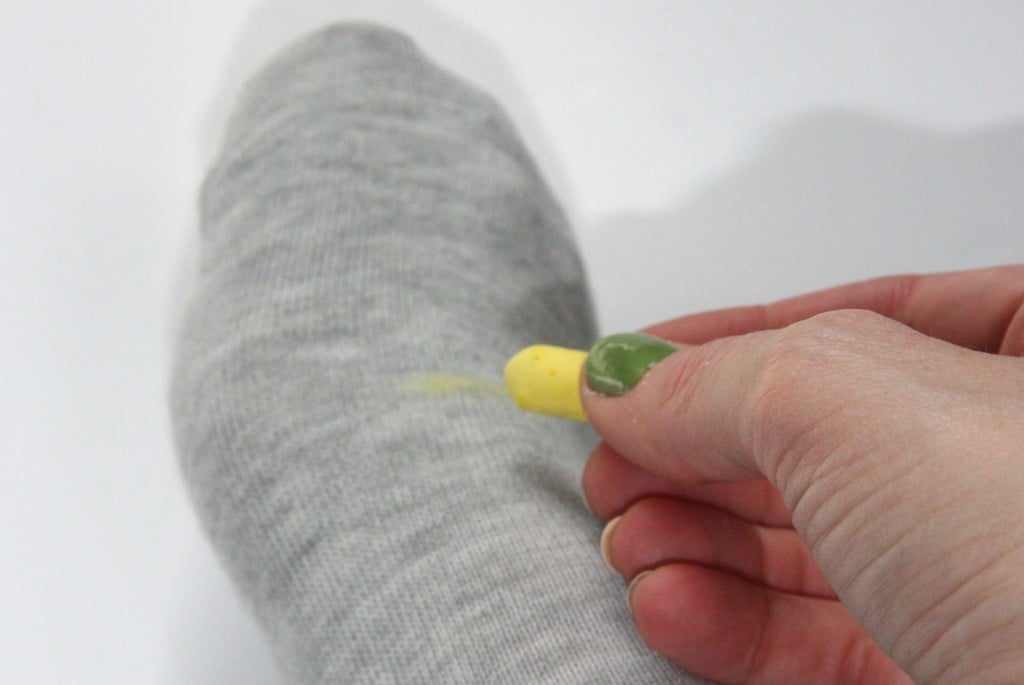
1. Try one sock on, and mark where you want to cut off the toe.
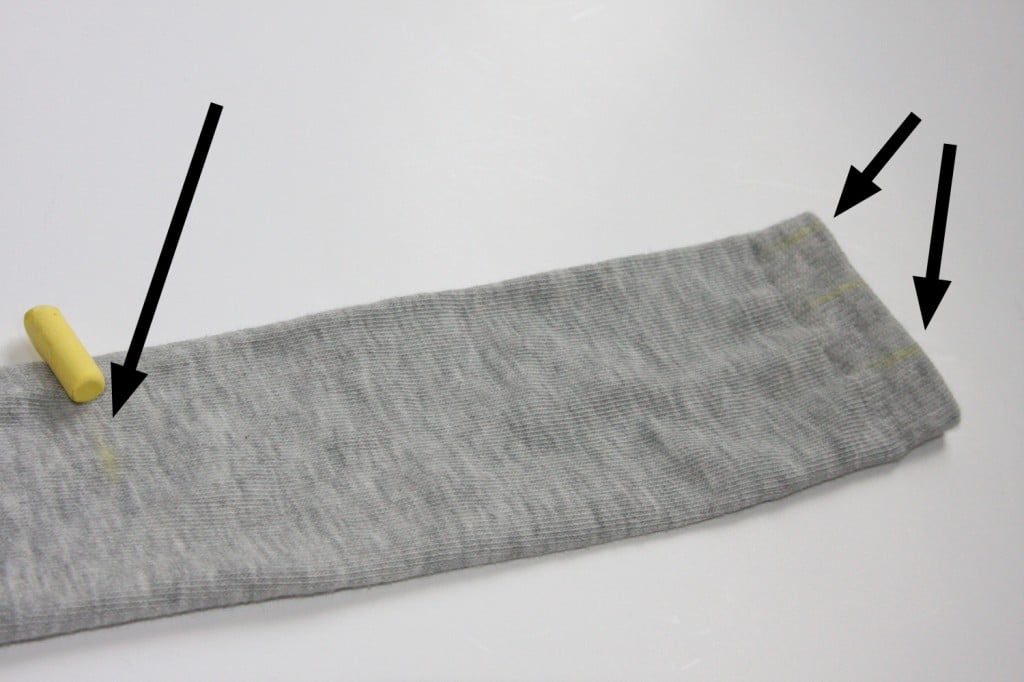
Also mark the back of the sock at the widest points you want your cut-out to be…and at the lowest point you want it to reach.
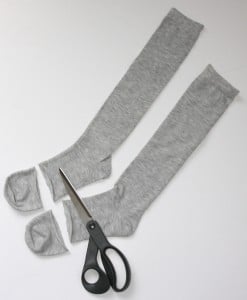
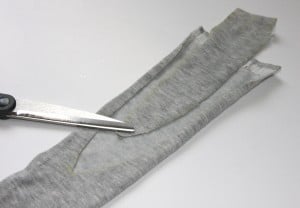
2. Take off sock and cut off toe, straight across. Draw a curve on the marks you made at the back of the sock in the previous step, and cut out along the curve.
Cut the other sock in the exact same way.
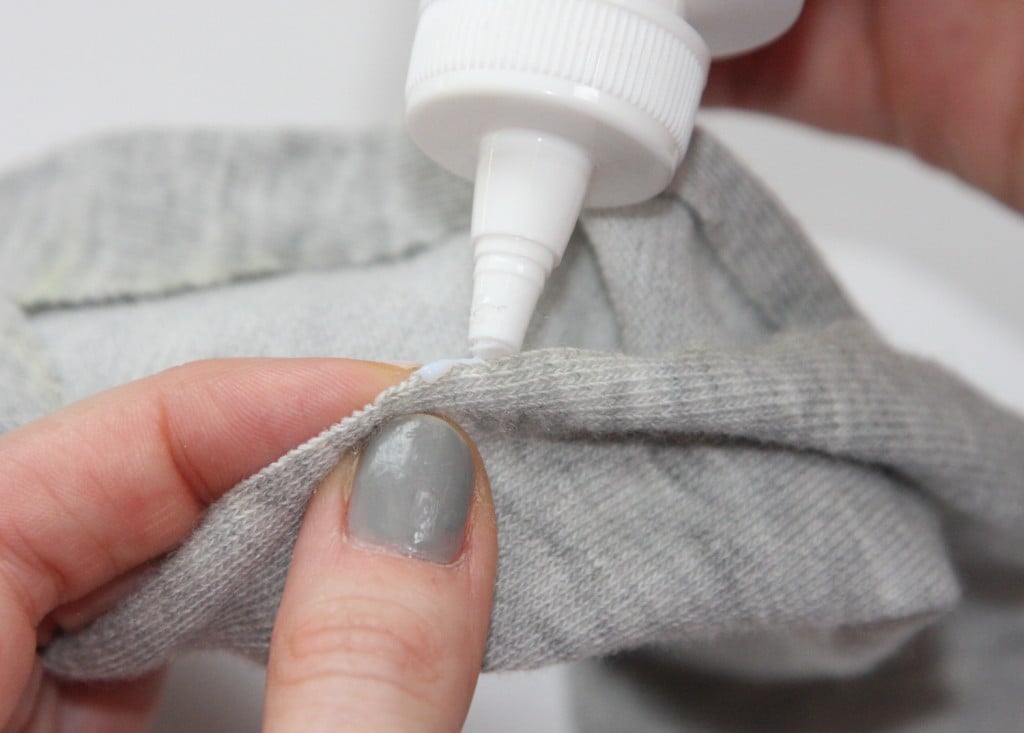
3. Apply Stop Fraying to cut edges and allow to dry according to instructions. (If you can use a sewing machine or overlocker, overlocking the edges will create a permanent, washable piece! With the fabric sealant these are more special-occasion-only socks, and probably won’t stand up to much washing.)

4. Sew one end of elastic to one side of the cut part of the sock. Try on sock again to see the fit, and stretch the elastic to the other side of the cut. Anchor elastic with your needle and take off the sock again. Sew other side of elastic down.
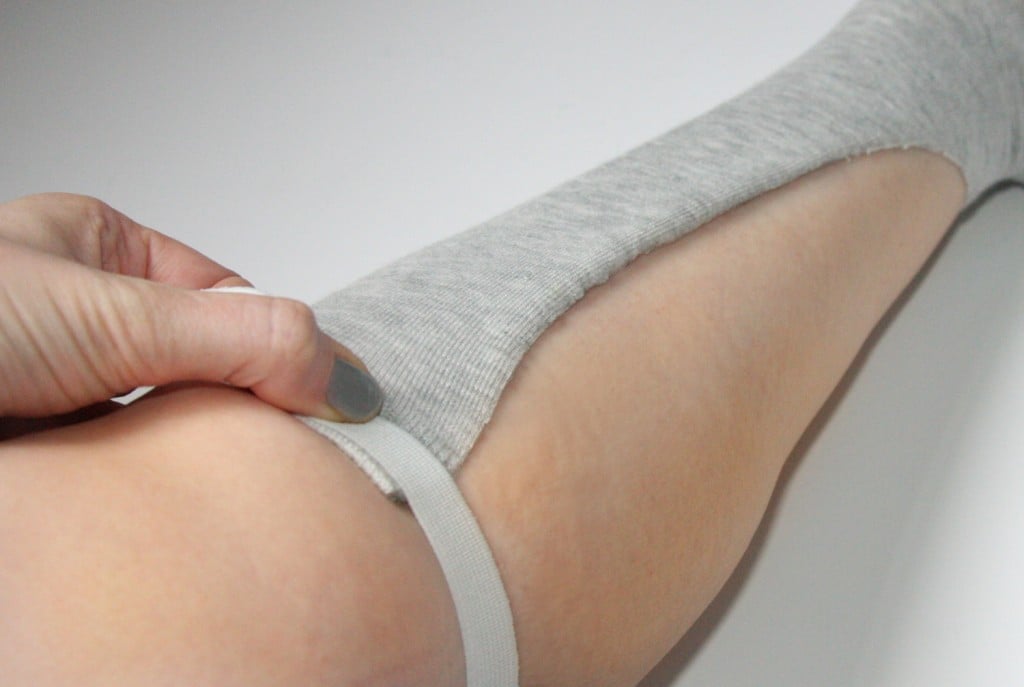
5. Trim elastic. Cut other piece of elastic the same length and sew both sides to the other sock.


Wear with a pair of clogs, mules, oxfords, sandals, or anything that acts as a straight-laced counterpart to this sporty legwear.


Happy DIY’ing!
xoxox
Carly
*I actually wrote this tutorial for Foam Magazine online, in May 2010. It unfortunately has been lost somewhere out on the Internet…if anyone has seen it, please let me know! I also found another tutorial for these exact same stirrup socks, done by the fabulous Jazzi McG, long, loooong prior to me ever doing mine…which I was totally unaware of when Foam asked me to do a tutorial for these socks. So sorry, Jazzi – you deserve the credit for first DIY!
**and thanks to reader Ejiro for reminding me to post this!
Save
Leave Comment
Jan 16, 2011 | DIY
I spied this in the store the other day and promptly snapped up 2 to try!
I’ve bought the Nail Rocks nail sheets (that need to be set with the heat of a dryer, which I haven’t experimented with just yet), and tried out the Incoco-brand Color Enamel Strips in the past, which I enjoyed but were a bit tough to apply.
Look at all the beautiful colors and patterns the Salon Effects come in!
The Sally Hansen version of this idea takes the difficult application inherent with other brands and makes it super-easy, with an orange stick and nail file included in each set. And what I haven’t seen before with these stick-on nailpolish sheets is the amazing range of colors: Sally Hansen is offering glitter, photo-realistic effects, fun patterns, and bright colors. And they’re super-easy to use!
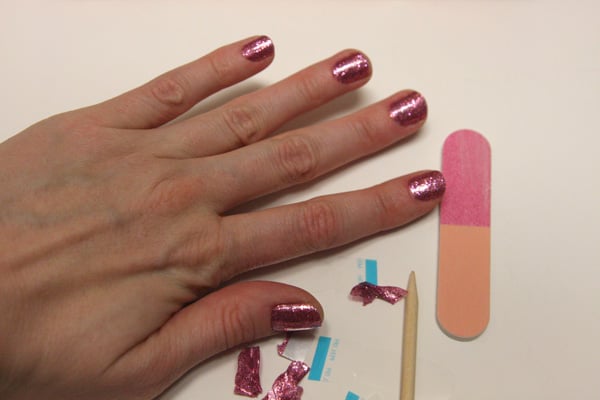
There are 16 sheets in a packet (and though you could probably use a single sheet for 2 nails if you were super-careful and enterprising); they’re meant to be used one sticker = one nail. You need to find stickers that approximate the shape of your nail bed, peel off the protective coat, peel off the back, snap off the paper tip (I found it easier to do the last two steps in reverse order), and place onto your nail.
You use an orange stick (included in the set) to press down the edges, and then the included nail file to crease the sticker sharply at the nail tip, and the sticker rips off.
Pros: Easy to use, fast (once you get the hang of it), brilliant colors and effects, long-lasting (I hope – the package says 10 days!), no drying time required, no need for other things to buy to do your manicure (topcoat, base coat, etc), no bumpiness to the glitter; DBP, toluene and formaldehyde-free.
Cons: A little smelly (like real nailpolish), packs come vacuum-sealed so they’re kind of hard to rip into, stickers prone to ripping if you press too hard with the orange stick, difficulty in finding a shape match to your nail bed, waste of sticker part that you rip off, a little pricey.
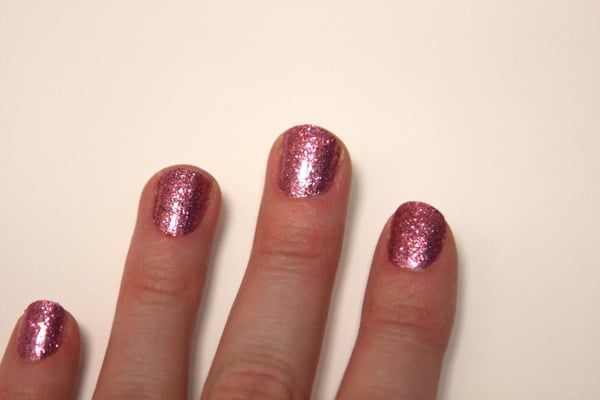
At about $9.99 a pack they’re a little more expensive than your average nailpolish, and they’re only single-use, so once they’re done, they’re done. But the effects are amazingly bright, pure color, with a streak-free and consistent finish, and the tops are smooth without the need for a topcoat!
Right now I’m trying out the pink glitter (“Bling It On”) and the blue glitter (“Blue Ice”) is next on my list!
Already in stores like Walgreen, Target, and CVS, this product is supposed to be available throughout drugstores in the U.S. by February 2011.
What do you guys think? Something cool you’d like to try? Or a little too pricey and bothersome to mess around with?
xoxox
Carly
~If you liked this post, please share it!~
Save
Leave Comment