Jan 14, 2011 | DIY
Seen on the runway in John Galliano’s Christian Dior Fall 2010 RTW Collection were whimsical, feminine knitwear pieces with satin ribbons woven and braided throughout.
Photos: Monica Feudi, GoRunway.com
Within weeks of appearing on the runway, many Japanese clothing brands picked up on the design, re-interpreting the idea and selling them en masse to a demanding public, creating a micro-trend stat.
In the U.S. I haven’t seen any clothing brands create their own version of this – which is just begging to be DIY’d! (Check out Outsapop and A Pair and a Spare for their coverage of this idea; and The Hearabouts’ DIY version.) It’s amazingly simple, and the best part is that next year when fashion marches on…you can just pull out the ribbon, fluff out the yarns in your sweater, and nothing’s the worse for wear. The only thing that’s better than a DIY is a DIY that is only permanent as long as you need it to be!
Difficulty: (Easy/Beginner)
You Need:
*chunky-knit sweater (I chose one with cabling, from YesStyle.com. If you can find something with mohair or angora blended in, it adds a soft femininity to the piece.)
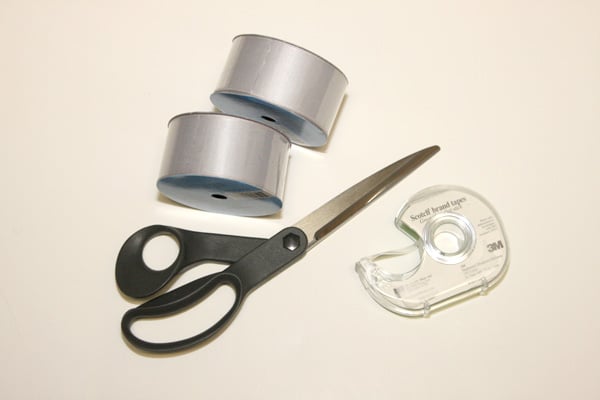
*double-face satin ribbon (I chose 1.5″ wide)
*tape
And…
*scissors
*measuring tape
*hand-sewing needle & matching thread (not pictured)
How To:
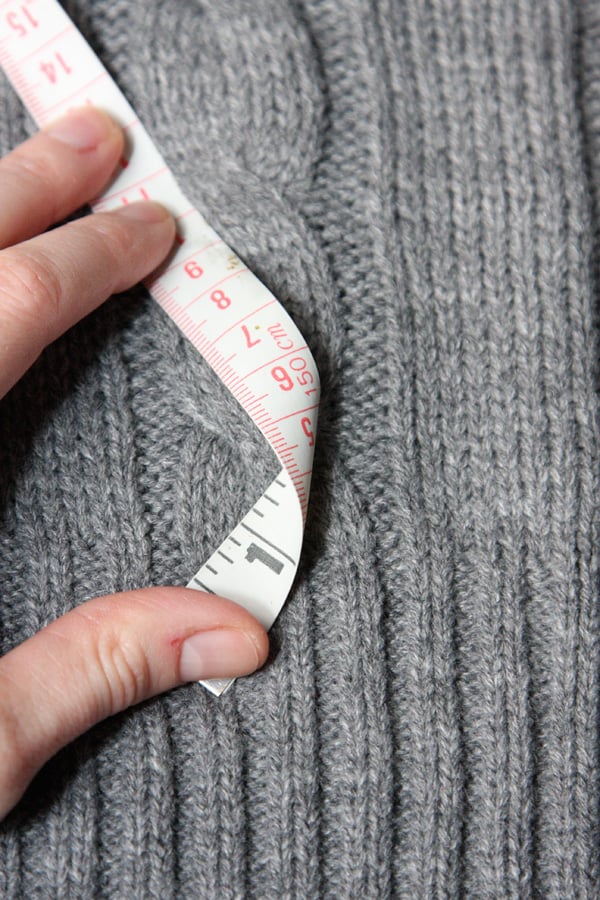
1. First, even before buying your ribbon, you need to measure your sweater to find out how much you will need. Use a flexible measuring tape and, starting at the bottom of the sweater, start measuring upwards, zigzagging the tape back and forth to mimic how the ribbon will cross over once woven.
At the top of the track of weaving, note the measurement on the tape. Double it to get the full length of ribbon for the weaving part.
If you are going to create bows at the bottom of the weaving track, create a bow in the measuring tape and add that length to the total length of the track. That is the entire length of ribbon you will need for one woven area. I chose 2 areas of ribbon; thus I doubled the measurement for the total amount of ribbon I needed to buy. (But since I’ll be doing two rows, I’ll need 2 continuous lengths for each track – something to keep in mind when you’re doing your calculations.)
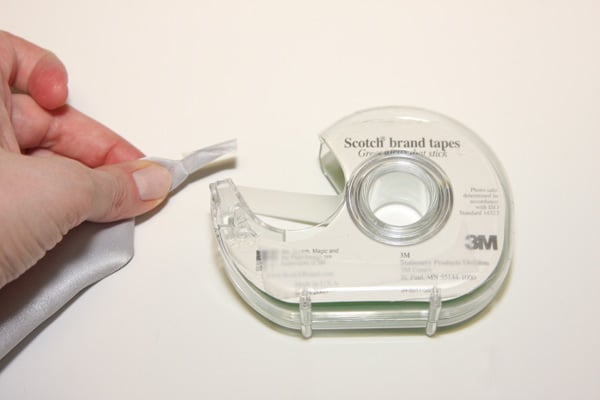
2. Cut your ribbon into the length you need for one row of weaving (+ a little more if you can). Wrap a piece of tape around both cut ends tightly, into a cone shape. This should work in place of a needle for your ribbon (though you can use a large-eye needle, yarn needle, or a safety-pin for your ribbon if you want).
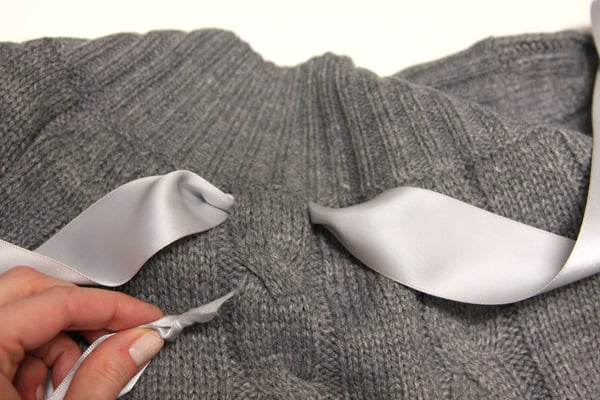
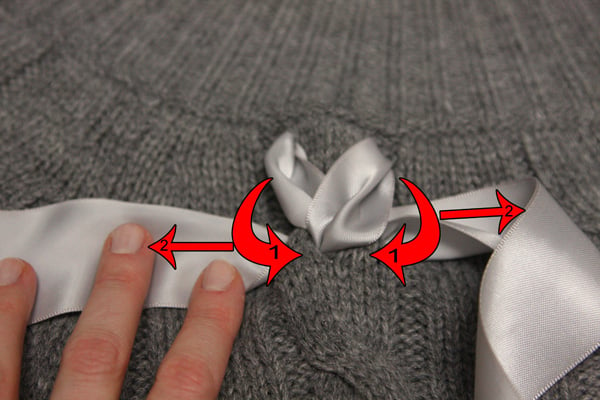
3. Start at the top of the woven row, in the center of one of the cables, from the back of the sweater. Poke a small hole between the knit on either side of the cable, and bring the ends of the ribbon to the front of the sweater.
4. Poke a small hole at the bottom of the first cable knot, in the center. Bring both the ribbon ends into the hole and to the inside of the sweater.
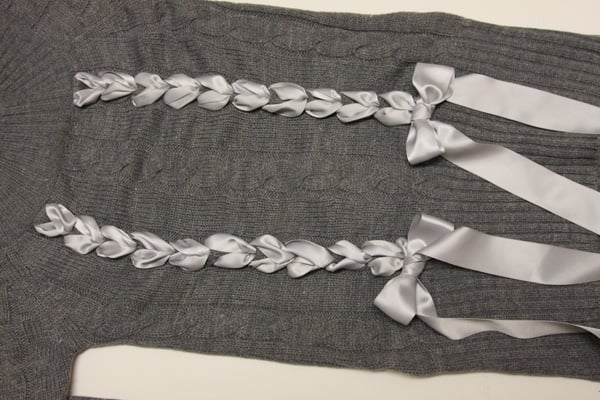
5. Repeat to create a ladder of “V’s”, made in ribbon, down the front of the sweater. As you go, fluff out the ribbon that shows on the front periodically, and flatten the sweater so that you aren’t “scrunching” the cable too much.
6. At the bottom of the row, tie ribbon into a bow.
7. Repeat for the other side.
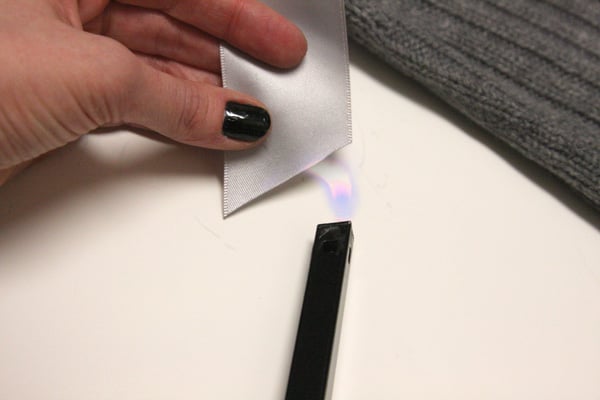
8. Try your piece on, and eyeball where you want the ribbon ends to fall. Cut, and then seal the cut ends with a flame.
9. To make the bows more permanent, hand-sew a couple stitches into the backs of the bows so they don’t loosen on you as you wear it. Hand-wash and lay flat to dry when it’s time for the laundry.;-)
Pretty easy, right?
Let me know if you try this out…I’d love to see your version!
Happy DIY’ing!
xoxox
Carly
~If you liked this post, please share it!~
Leave Comment
Jan 6, 2011 | DIY
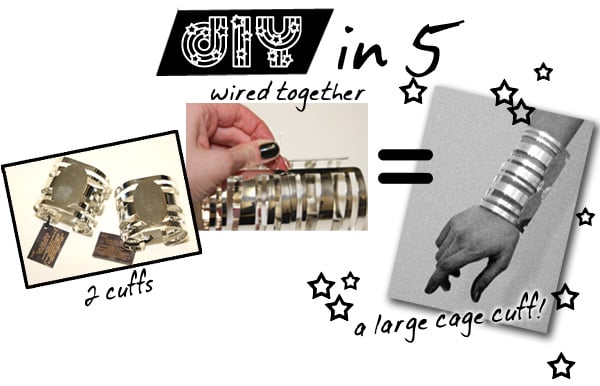
Yesterday I mentioned it as a more realistic alternative project to the New York Times‘ labor-intensive 3-hour DIY (!), so today I’m going to show you how to make it. It’s DIY in 5 – minutes, that is. The easiest, quickest ways to take a piece from blah to fab and update it to current trends.
Wherever I go I’m always on the lookout for clothing, accessory, or jewelry components that can be used in quick ‘n’ simple DIYs. That’s why
these silver cuffs I spotted in the jewelry-making section at Jo-Ann Fabrics, from the brand-new
Dazzling Geodes line of findings (from Plaid Enterprises) caught my eye. (Technically they’re supposed to be used as a base for adding geode slices and embellishments.) And incidentally, like most of the fashion- and culinary-obsessed, I am a frequent visitor to Luxirare.com. and the Dazzling Geodes cuffs reminded me a lot of
the arm-cuffs she sells in her web-store.
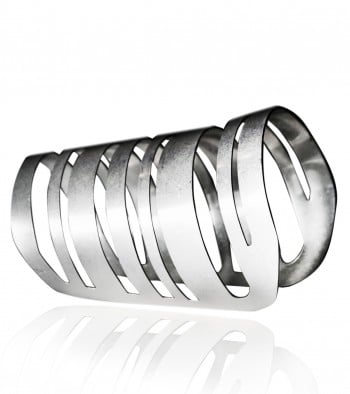
A Luxirare Cuff.
$95 for one of these cuffs is pretty reasonable considering she designed these and has these custom-cast with embossed LUXIRARE logo, and they look pretty hefty and durable…but if you’re in the market for something similar you can use 2 of these affordable findings to make your own version.
You Need:

*2 silver cuffs from the Dazzling Geodes line (available at Jo-Ann Fabrics & Crafts stores)
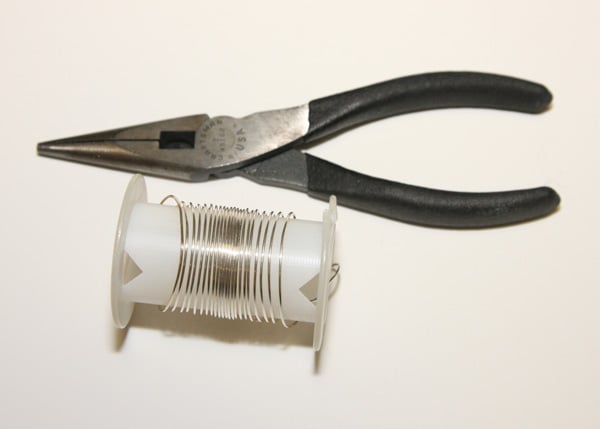 *silver-colored dead-soft jewelry wire
*wire cutters/pliers
How-To:
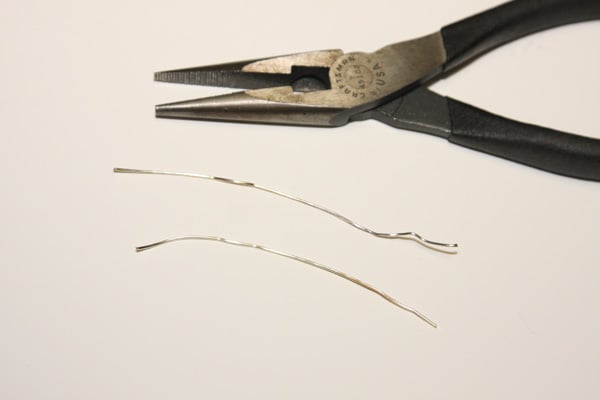 1. Cut 2 short pieces of wire.
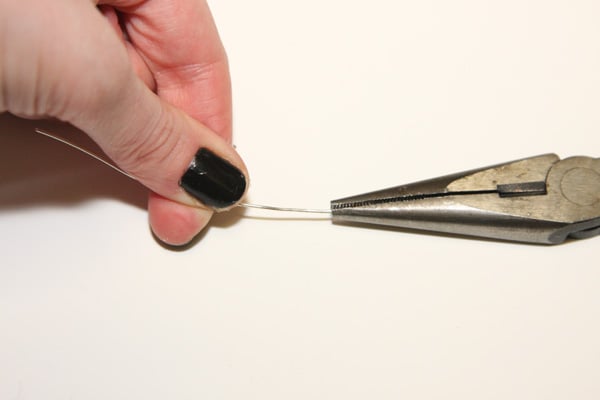 If your wire is kinked at all, close the pliers on it and drag in order to straighten it.
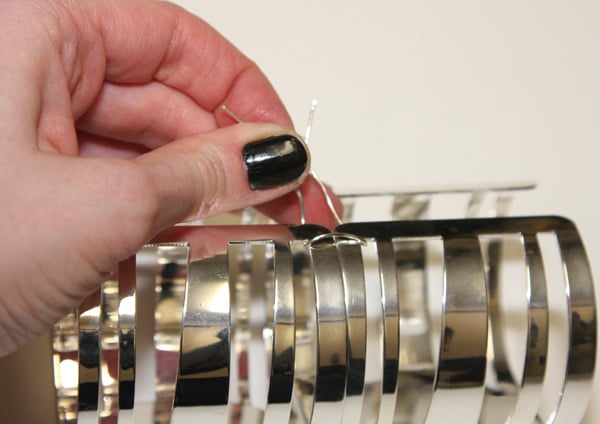 2. Line the cuffs up side-by-side and wrap a wire piece around the outer edges where the two cuffs meet.
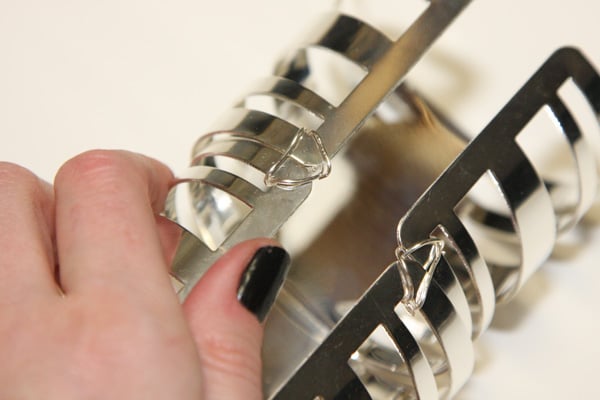 3. Weave the wire around the edges (I made a “V” shape as I wrapped), trim the ends down, and use the pliers to push the sharp ends back out towards the outside of the cuff so they won’t scratch you.
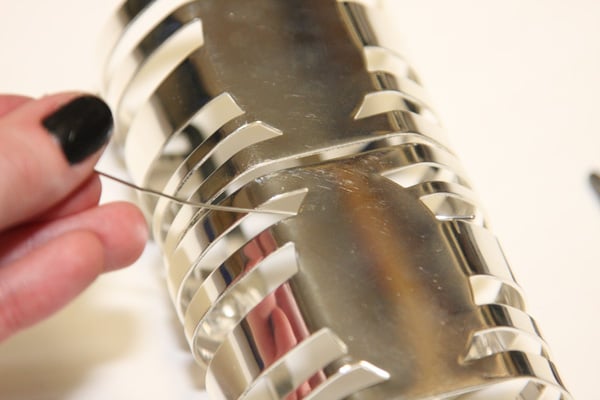 3. Cut a longer piece of wire and secure the center of where the cuffs meet. Twist the ends around each other on the inside, pull ends towards the outside and trim appropriately.
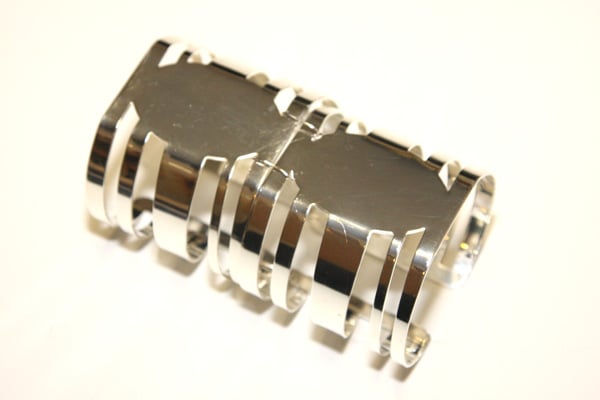 You’re done! And it may have taken you all of 10 minutes.;-)
Wear with minimalist clothing, sharp contrasts, and architectural details…and stay cool, calm, and cagey with this on your wrist.
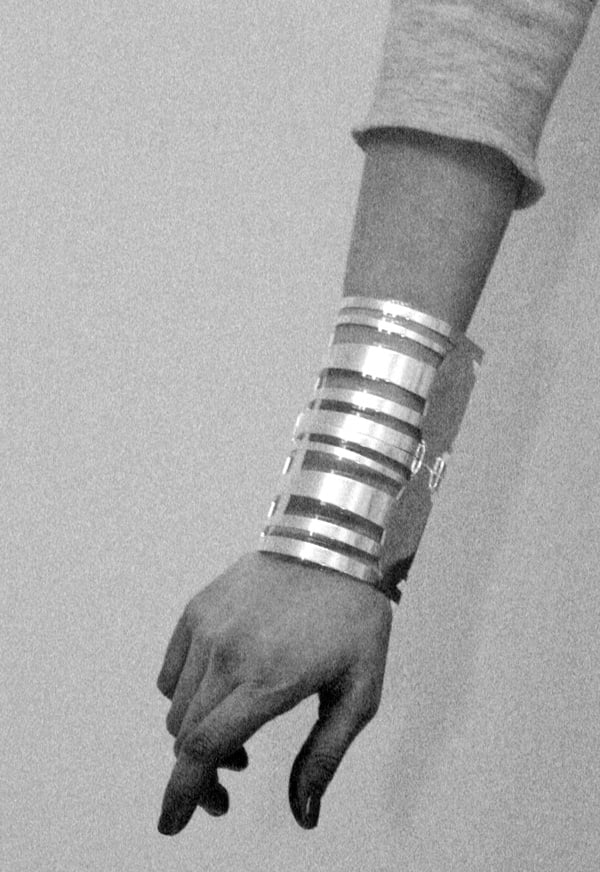 Happy DIY’ing!
xoxox
Carly
~If you liked this post, please share it!~
Save
Leave Comment
Dec 25, 2010 | DIY
Have a couple bows left over after the wrapping-extravaganza? Have a whole bunch ripped off of presents in the aftermath? Craft a smaller, point-ier wreath as a counterpoint to a larger piece…as your final Christmas handmade project. I got all my materials at the Dollar Tree, so it only cost me $5 to make – but it’s also a great way to recycle those bows from presents if you don’t want to re-use them next year. Here’s how:
You Need:
*2 packages of small stick-on pointed bows
*one larger stick-on bow
*1 small wreath base (styrofoam)
*red ribbon
And…
*glue gun & gluesticks
*scissors
How-To:
1. Cut a length of ribbon long enough to hang the wreath. Wrap it around the top of the wreath base and secure with glue.
2. Glue the small present bows onto the base, filling the base up completely and staggering them to cover any gaps.
3. Glue the largest bow top center onto the red ribbon.
4. Tie the ribbon to a wreath-hanger or hook to display.
DIY Tutorial for my
Super-Easy $8 Holiday Wreath (the larger wreath, pictured above)
is here.
Happy DIY’ing…and Merry Christmas! Hope it is wonderful!
xoxox
Carly
~If you liked this post, please share it!~
Leave Comment
Dec 22, 2010 | DIY
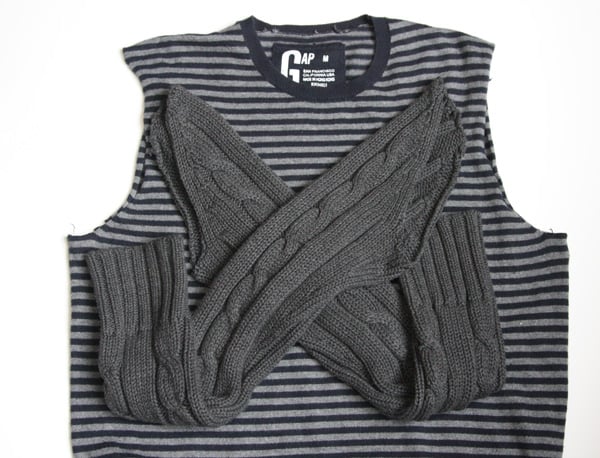
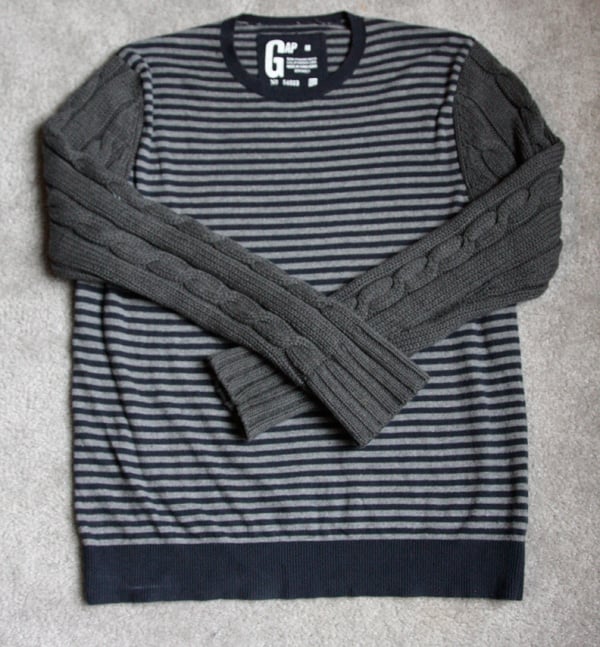
After seeing this post on one of my new favorite blogs, A Pair and a Spare, I decided to make my own sweater by combining two that had coordinating colors. I loved the combination of striped and chunky cable-knit sleeves!
I wore my finished creation for Day 23 in my 30 Days of Outfits Challenge last month. So here’s how to make your own:
Difficulty: (Medium)
You Need:
*2 sweaters in coordinating colors (I think one of mine is men’s – it honestly doesn’t matter as long as you can fit into both)
*thread matching sweaters
And…
*seam ripper
*pins
*sewing machine ( if you do not have a sewing machine, this can also be sewn by hand, though it will take a little longer)
*machine needle (for knits or wovens; it doesn’t matter)
How-To:
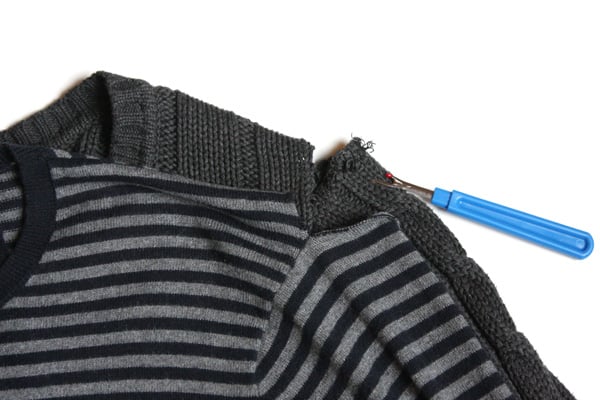
1. Separate the sleeves from each sweater. You need to find the thread that binds the sleeve to the armscye, and cut it with the seam ripper, opening up the seam a little.
Then, working from the center of the seam, try to pull the thread from in-between the sleeve and the armscye. If you get it just at the right area where the thread end is in-between the two (it’s a little tricky), you can pull the thread and the whole seam will come apart – zzzzzpth!! (*that’s my sleeve-coming-apart sound effect*). It’s a lot easier than going all the way around the seam on the outside, picking and ripping each stitch as you go.
2. Pin the sleeves from one sweater to the armscyes of the other sweater, matching the side seams, and easing any fullness (sweaters are stretchy, so easing is…well, easy!). Pin from the inside, with sleeve inside the body of the sweater, right sides together.
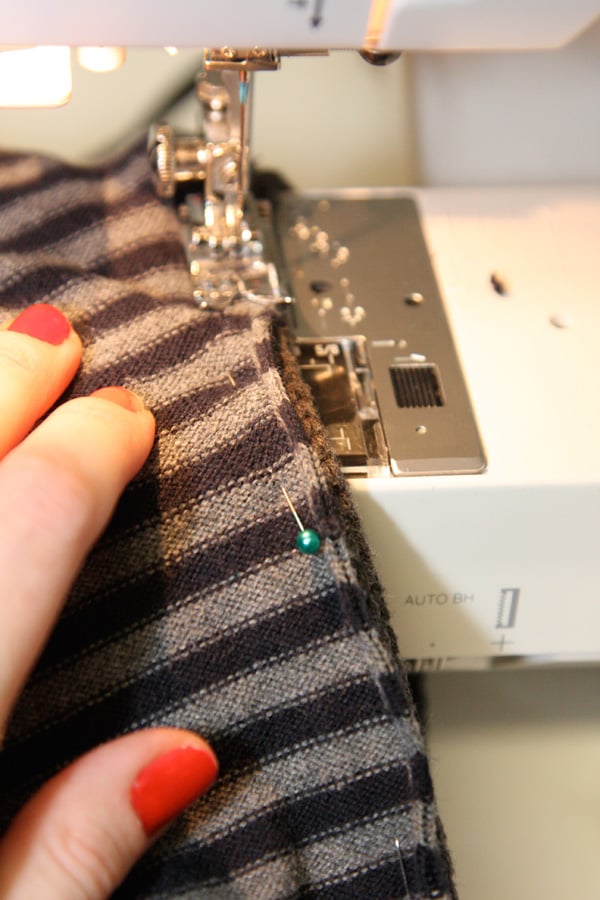
3. Stitch on your machine around the armscyes, using a shorter stitch. If you like, going over the edges again with a zigzag stitch or overcast stitch will add extra strength.
If you’ve sewn close to the edges, the new seam will be virtually indistinguishable from the outside.
4. Wear and enjoy! Don’t forget to dry flat whenever you wash your piece – you don’t want undue stress on the arm seams ripping your new arms off! (although that visual makes me a little squeamish…;-)
Happy DIY’ing!
xoxox
Carly
~If you liked this post, please share it!~
Leave Comment
Dec 13, 2010 | DIY
My tutorial for this sparkly, holiday-style jeweled DIY cardigan clip was featured in the Nov/Dec 2010 issue of Style Sample Magazine (see pg. 20!). It’s super-easy to make – with just a glue gun, some sparkly buttons, and some trim scraps you too can make one in no time.
As the holidays approach, we’re all looking for that perfect accessory to elevate a blah outfit into FABulous; office-wear into party attire; the everyday into elegant. And what better than a functional closure to your sweater (or jacket, or scarf) that can double as a statement brooch? Clip it on, bling it out – however you wear it, it’s sure to be the focal point of any outfit!
Materials:
*stiff felt, cut into 2 circles (each about 1.5″ diameter)
*scrap of lacy ribbon
*assorted jeweled buttons
*2 shoe clips
*short length of chain (about 3″)
*Optional: 2 jump rings
*Optional: 2 brooch pinbacks
Tools:
*scissors
*glue gun & gluesticks
*pliers
*needle &thread
How-To:
1. Start by stitching the lace around the edge of each felt piece, in a spiral. (Although you can use the hot glue for this, the stitches look neater.)
2. Hot-glue the buttons on top of the lace.
3. Turn each felt piece over, and hot-glue a shoe clip onto its back. Keep in mind that in order to wear at the front of a jacket or cardigan, each clip has to open outwards, so make sure they face the right way before you glue them down.
4. Add the chain to the bottom of the felt pieces. I attached it using jump rings, but if you like you can just use hot glue to affix it, hiding the ends underneath the lace.
5. Optional: If you’d like to wear this piece as a brooch, also glue a pinback to the back of each felt piece.
You can try a number of configurations, using ribbons, soutache braid, fancy trims, different chains, studs, vintage findings, or even stick-on jewels (form the scrapbooking section of the craft store!) The sky’s the limit!
And make sure the very next time you rock it out – you tell everyone that you didn’t buy it…you DIY’d it!
I love how it looks like a little smiley face! (Once you see it..you can’t UNsee it!:-/)
And if you’re interested in the other features in this issue (like an interview with Project Runway Season 6 finalist Althea Harper and the how-to on making your own badge for your blog)…
Read the full issue online here
Thanks so much to Tamia and the team at Style Sample! I truly appreciate the inclusion and am honored to be a part of this great publication.
[And since they are the only magazine currently dedicated to bloggers and the art of style blogging, please help support this great publication by reading, contributing, or even purchasing the print version online. Thanks so much!]
xoxox
Carly
~If you liked this post, please share it!~
Save
Save
Save
Leave Comment