Oct 26, 2010 | DIY
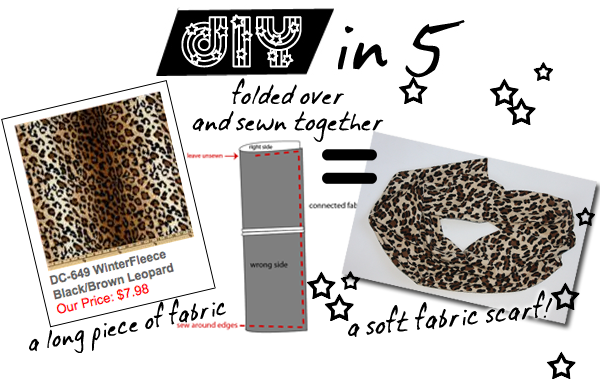
Fold a piece of fabric over and stitch around the edges to make a long rectangular scarf.
Earlier this month I posted some ideas how to style it, today I’m going to DIY it. It’s DIY in 5 – minutes, that is. The easiest, quickest ways to take a piece from blah to fab and update it to current trends.
Animal-prints are still BIG for Fall… and if you’re not ready to go full-on animal, you can try just adding a pop of print to your outfit. I’ve chosen to craft a scarf – made out of fabric in just the print I chose – in order to dabble in this trend.
How To Make a Quick Folded Fabric Scarf
You Need:
24″ (2/3 of a yard) of 60″ wide printed fabric // sewing machine // needle matching fabric type // thread matching fabric // fabric scissors // measuring tape
How To DIY:
1. Cut the fabric in half lengthwise so you have TWO pieces that are 12″ wide by 60″ long.

2. Sew the short ends of the two long pieces together. Cut the short ends of the fabric piece so the whole length of the piece is either 72″ or 80″, depending on how long you want your finished scarf.
3. Fold the scarf in half along the super-long end, right sides together.
4. Sew all around the edges, leaving the last 2″ or so unsewn.
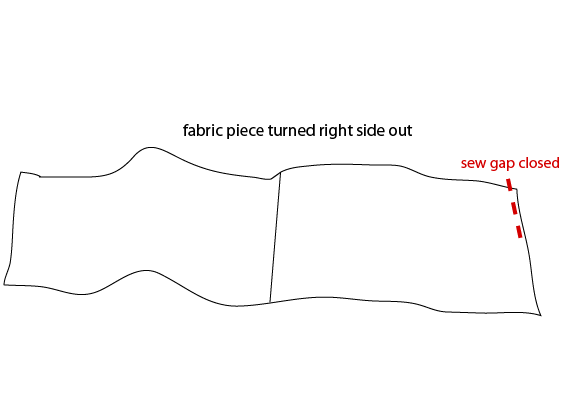
5. Turn the fabric right-side out.
6. Sew along the edge to stitch the gap closed.
7. (optional) Iron the scarf flat to set the seams.
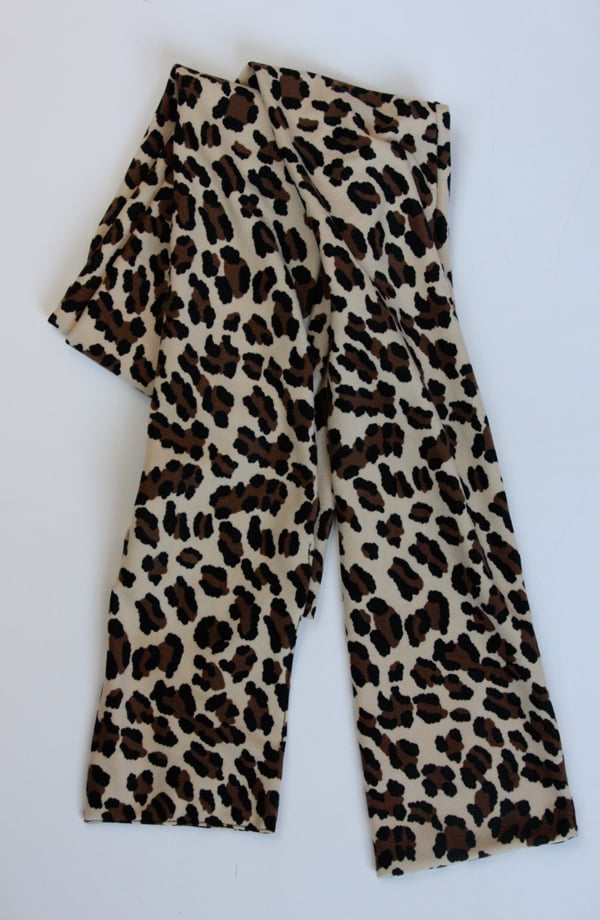
And voila! A new, on-trend scarf in just the print you wanted! (And yes, this really does take only a few minutes [though it may be closer to 10-15]…and it’s very, very easy!)
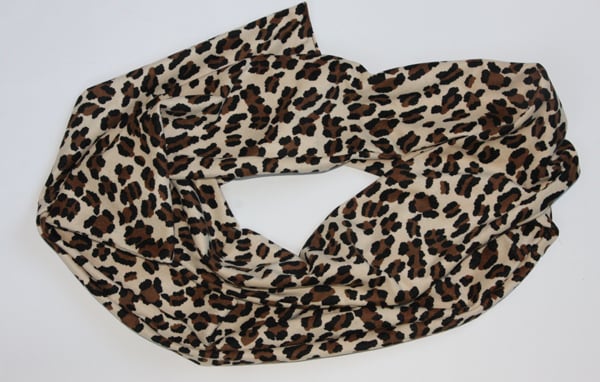
You don’t have to do leopard, of course – though I’ve made a version with leopard-printed velour and one with striped jersey.

(Sometimes I even wear them together when I’m feeling frisky!;-)
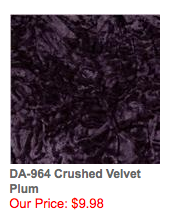
Make sure the fabric you choose is “puffy” or has some tactile sense to it; otherwise, it will stretch flat like a long, skinny scarf (which is also a great possibility!) You can try making your scarf wider thank mine by cutting your fabric at 18″ wide (thus, folded over, it will be 9″ wide). You can even try with faux fur (though cut your fur from the back using a craft knife and NOT a pair of scissors!) Some fabulous options for your fabric:
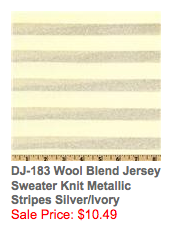
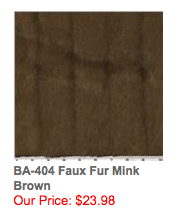
Hope you have fun making your own easy printed scarf!
xo
Carly
Save
Save
Leave Comment
Oct 6, 2010 | DIY

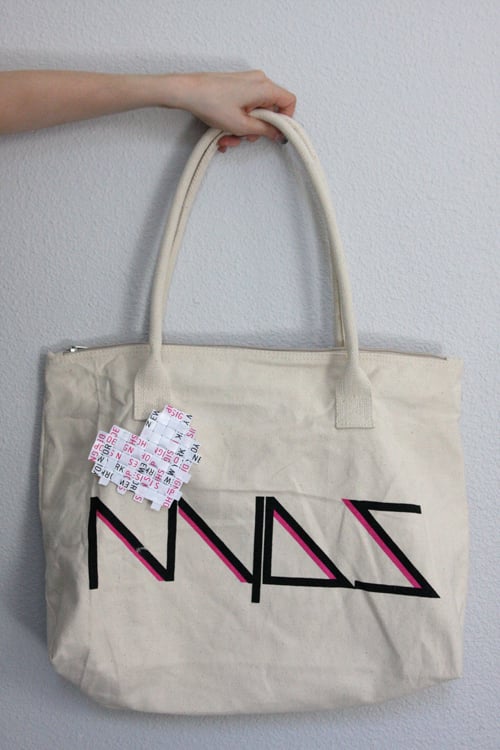
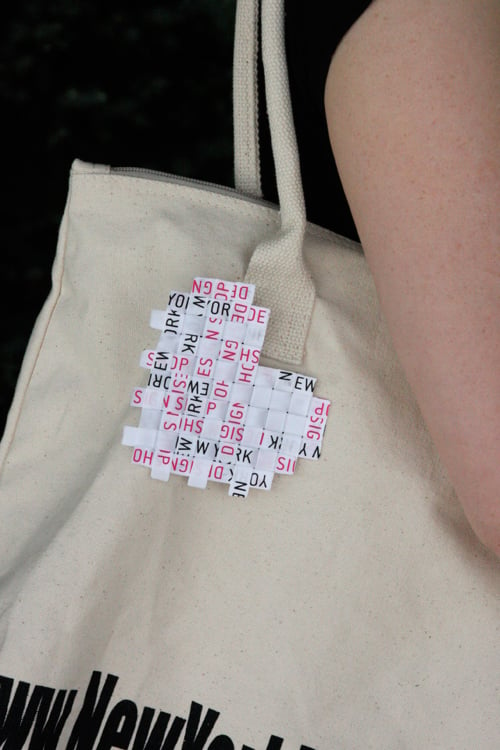
So this is the last of my submissions for Style Sample Magazine and New York Design Shop’s Create Couture Challenge back in early August! Whew! Can’t believe it’s taken me this long to post them all…I wanted to make a final DIY piece from the box of materials I received and my eye lit upon the beautiful “NEW YORK DESIGN SHOP” printed ribbon. I love white, pink, and black together! So I crafted up this sweet, modernist design pin – that could easily be used as a hair accessory, bag charm, ring, you name it – just by varying the size, shape, and finishing. (The weaving of the ribbon does take awhile, but the results are fantastic!
You Need:
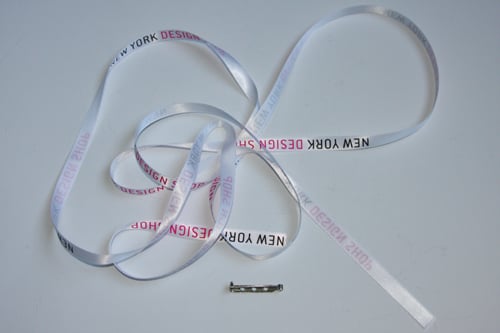
*NYDS Branded Ribbon (or any 1/4″ wide satin ribbon) – the NYDS-branded ribbon comes wrapped around the box when you place an order with New York Design Shop!
Additional Tools/Materials:
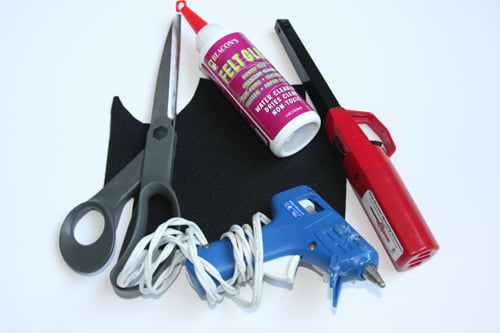
*scissors
*fabric glue
*stiff felt
*pin back
*lighter
*iron (optional)
*piece of paper (optional)
[prep: iron ribbon if kinked or curled; draw a shape as a template on a piece of paper]
How to:
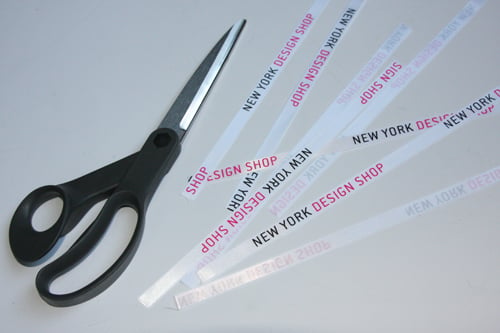
1. Cut ribbon into eighths to start out.
2. Seal ends of two of the ribbons with an open flame.
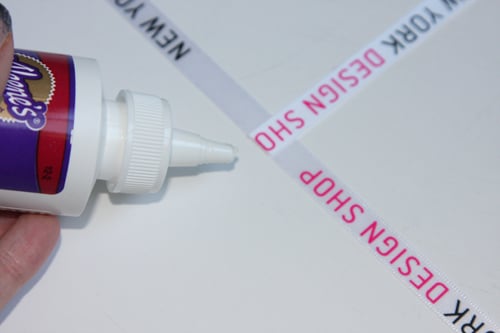
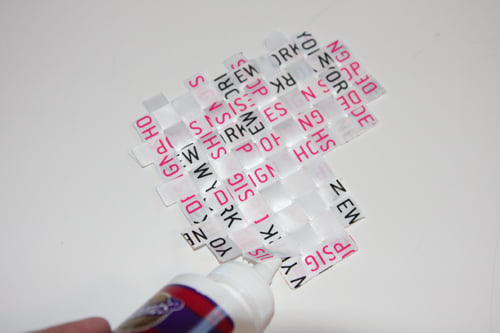
3. Glue two ends of ribbons together, overlapping them at a right angle.
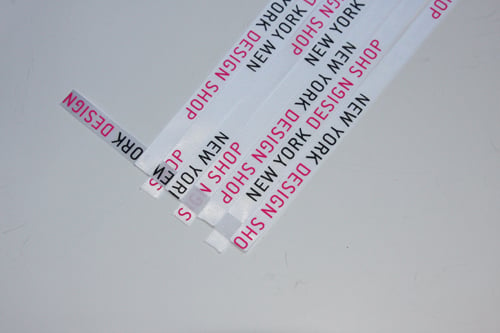
4. Seal the ends of more of the ribbons, and glue them parallel to the first ribbon, alternating the underlap and overlap of their edges.
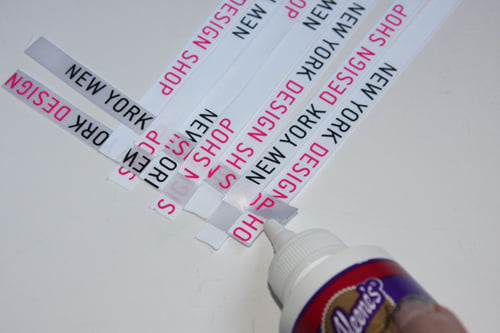
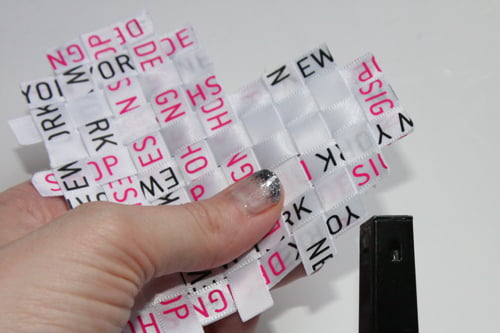
5. When you have enough ribbons to work with, start weaving in ribbons in the opposite direction, heat-sealing and gluing down the ends as you add them in.
6. When you’ve run out of ribbons, start trimming the ones you’ve already woven, in order to create the desired shape.
7. Continue with trimming, heat-sealing, gluing, and weaving until your shape is what you like. Make sure all edges are glued together.
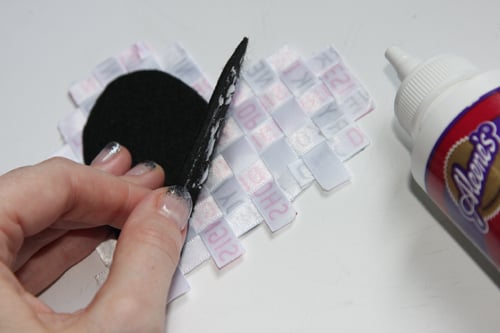
8. Cut piece of felt slightly smaller than your woven shape, and glue together with fabric glue.
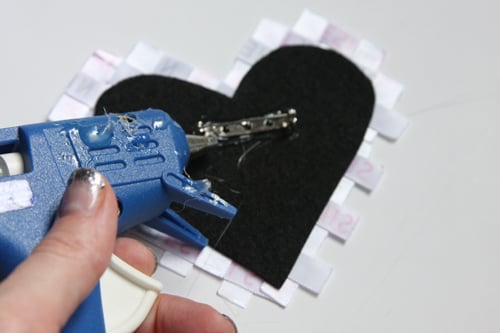
9. Hot-glue pin back to wrong side.
Now anyone can wear their heart on their sleeve…or on their NYDS-branded tote!!
xoxox
Carly
Save
Leave Comment
Oct 3, 2010 | DIY
I had purchased a bag of Bing cherries a little while ago, and they languished in my fridge for awhile. I guess I kind of forgot about them.
So when I pulled them out I realized that I had to use them up fast since they were turning a little brown here and there.
I made this Berry Cherry Pie to use them up.
I love that it doesn’t use canned pie filling (I like some cherry pie filling but not all – many are super-sweet and too syrupy, and make my throat hurt). Since this version uses fresh cherries, it has an interesting, subtle taste. And it doesn’t need a lot of sugar either – which is why I’m sharing with all of you! (As you may have noticed – the recipes I’ve begun to share here are basically adapted recipes of sweet and decadent things…just made lower in fat and sugar and better for you. I love my sweets – but I love them even more when they have more “good” than “bad”!)
Here is the recipe, which I found on Recipezaar.com (now Food.com) and adapted.
DIY Low-Sugar Berry Cherry Pie Recipe
(serves 8)
Ingredients:
*1 store-bought frozen pie crust
Filling:
*4 c berries (I used cherries and frozen blueberries that I thawed in the microwave)
*1/2 c sugar (or you can use powdered fructose, but decrease to 1/3 c OR to taste)
*1/4 c water (I used the juice that drained off the blueberries when I thawed them)
*2 T cornstarch
*1 T lemon juice
*1 T vanilla
*1 dash salt
Topping:
*1/2 tsp cinnamon
*1/2 c brown sugar
*1/2 c flour
*1/2 c oats
*1/4 c butter, melted
1. Bake the pie crust according to directions for a “one-crust filled pie” (usually 400 degrees for 10 minutes). DO NOT PIERCE PIE CRUST WITH A FORK PRIOR TO BAKING – if bubbles form, push them back down.
2. Meanwhile, cook all the ingredients to the Filling EXCEPT the berries together in a saucepan on medium heat, whisking, until well-blended (about 5-7 min).
3. Stir in the berries.
4. Fill baked pie crust with Filling. Preheat oven to 375 degrees.
5. Stir all the ingredients for the Topping together EXCEPT for the butter.
6. Add the butter to the Topping and combine.
7. Sprinkle the Topping over the pie so there are no gaps.
8. Place some tinfoil around the edges of the pie crust to prevent browning and bake for about 45 minutes until Topping is golden and crunchy, and filling congealed.
Hope you try this some time when you have a lot of berries, fresh or frozen (strawberries? blueberries? blackberries?) to use up!
xo
Carly
Leave Comment
Sep 30, 2010 | DIY
Inspired by Candace Ang‘s ruffle necklaces, I created a super-simple, super-affordable version for one of my submissions for Style Sample Magazine and New York Design Shop’s Create Couture Challenge back in early August.
You Need:
*Cream Sweater Style Stretch Trim
*Large Silver Pyramid Studs
Additional Tools/Materials:
*silver necklace or chain
*sewing machine
*hand-sewing needle
*matching thread
*pliers
*chain-cutting pliers
How to:
1. Cut the Stretch Trim in half.
2. Zigzag stitch the two halves together along the long sides on the sewing machine. (Slightly overlapping them is best.)
3. Securely knot a long piece of thread on your needle, and make long, basting stitches along the long side of the trim piece you just made.
4. Pull thread tight to gather the trim – and knot securely on the other side.
5. Sew back through the top gathers to secure.
6. Stud the trim and fold the stud prongs down on the underside.
7. Cut chain necklace in half, and stitch both ends of it to the top ends of your ruffle piece.
Fuzzy and fun – this was sooooo quick to do.
Totally tactile, this fuzzy trim makes an edgy statement with all that metal peeking out!
xoxox
Carly
~If you liked this post, please share it!~
Leave Comment
Sep 27, 2010 | DIY
So sorry no post yesterday…I actually took Saturday off! Like, completely off from the blogosphere. I haven’t done that in a long time. (Felt a little guilty, though!;-)
But I let it go and had a great day, taking Lil Tot to a birthday party at a really cool community center I’ve never been to before (with a swirly 2-story water slide and multiple fun-showers in the toddler pool!! And free fitness classes!) and then the Oregon Fiber Arts festival, where I bought a huge skein of mohair since I think I’m going to attempt knitting this sweater…and maybe one of these sweaters or dresses too…someday…and Lil Tot petted the many goats, bunnies, and alpacas there.
Now that he knows alpacas are neither caramels nor tax forms nor fish but are indeed animals…they are his favorite animal recently!
They are so adorable, and make this tiny hiiiiiin, hiiiiiiin sound. I’ve never heard an alpaca cry before. Lil Tot has even renamed his fave game “Duck, duck, goose!” to “Alpaca, alpaca, capybara!” (and the inclusion of the capybara is an even longer story;-)
But I digress. Even though I didn’t post on my blog yesterday, I still DIY’ed!
Following up on my $4 Easter Wreath that I made for…um, Easter…earlier this year, I decided to hit up my local Dollar Tree once again in order to create a beautiful leafy Fall wreath bursting with color. It’s soooo cheap, and it will take you 30 minutes, tops!!
Dollar Store $4 Fall Wreath
Project Difficulty: (easy/beginner)
You Need:
*medium-sized wreath base ($1)
*3 leafy garlands ($1 apiece – I chose a variety that had tiny pumpkins, acorns, berries, and wheat sheaves attached)
*floral wire (I had on hand, but I saw it at the dollar store as well)
*wire-cutting pliers
*hot glue gun + gluesticks
How To: (the photos are not of the step-by-step since it’s pretty self-explanatory)
1. Cut a small piece of wire and thread it through the end of one of the leafy garlands. Twist it around the wreath base and twist the ends together, hiding the sharp ends inside the wreath.
2. Cut more pieces of wire and tie around the leafy garland in various places as you place it in a circle on top of your wreath base.
3. Continue in the same manner until you’ve layered all 3 leaf garlands atop one another, going round and round the wreath circle.
4. Use hot glue to glue down the leaves to hide any of the wire or stems that may show.
Hang up on your front door and enjoy! The wonderful thing about this wreath is that the color is so vibrant…and it will last FOREVER. (And that it’s about $15 less than similar decorations you might find at Target…or $30 less than those you might find at Pottery Barn…;-)
Happy DIY’ing and Happy Fall!
xoxox
Carly
P.S. I’m not doing a Style it Chic! post today since I’ve got a huge post with ONE WEEK of styling options coming up…hopefully will post tomorrow…
~If you liked this post, please share it!~
Leave Comment