Dec 10, 2010 | DIY
Feathered things are experiencing a revival lately – and I’ve been hankering after a maribou feather clutch for awhile. But I’m not going to buy when I can DIY for much cheaper! It’s sooooo easy too…
DIY Marabou Feather Clutch
Difficulty: (Easy/Beginner)
You Need:
*old clutch-style purse
*tacky glue
*marabou boa
*scissors
How-To:
1. Lay your clutch flat and visually estimate how far apart the pieces of your boa need to be to get the kind of coverage you want.
2. Spread the tacky glue in vertical lines down the front of your clutch, and across the top below the clasp.
3. Starting from one side, lay one end of the boa onto the glue at the bottom of the clutch.
4. Fold the boa piece over at the top of the clutch, and then loop it down towards the bottom. Snip at the bottom of the clutch.
5. Repeat for all the lines of glue until the front of your clutch is completely covered. Allow to dry and then trim the ends so they’re all one length.
Pretty easy, right? To cover both the front AND the back using this method, you’ll probably need two boas. And you could use any type of feathers that suit your fancy…they don’t have to be marabou, and they don’t have to be in boa-form, either.
Did You Know?
“Marabou” is a term for fluffy feathers – and most “marabou” feathers available for crafting, fishing lures, garment trims, or millinery supply are actually turkey or chicken feathers, not feathers from the Marabou Stork (which are extremely expensive). Feather supply companies may obtain their feathers from birds that are killed by the meat industry, or the down may be plucked from the bird as the seasons transition and it has no need of it anymore (termed “live-plucking”). Feathers also may be collected as they naturally molt (like peacock feathers), or from birds’ nests (like eider down).
So finally, welcome to DIY Roundup 8! If you’re unsure how to link up your tutorial (or finished project), here’s how:
Just click the light blue “Add Your Link” button that appears to the bottom left below. Follow the instructions in the Inlinkz window, pasting in the URL of your project or tutorial (from your own blog, Facebook page, Flickr account, Craftster.org, CutOutandKeep.net, etc). Don’t forget to write the NAME/DESCRIPTION of your project – like “Bow T-Shirt” or “DIY Lanvin Necklace” – not your own name or your blog’s name!!! You can link up any piece you’ve made or tutorial you’ve written from any time, not just in the last two weeks (though it would be nice if it’s a recent project, just to keep the content fresh). It’s all about sharing and bringing in more like-minded visitors to your site!
So now you get to share your own DIY’s! If you have a DIY project or tutorial that you’d like to share, please feel free to link below! (However you can only link YOUR OWN PROJECT. Please do not link others’ projects!)
If you’ve linked up your project to the Roundup, feel free to grab the button below.
Can’t wait to see everyone’s projects!
xoxox
Carly
~If you liked this post, please share it!~
Leave Comment
Nov 29, 2010 | DIY
Earlier this month I wore it in an outfit, today I’m going to show you how to DIY it. It’s DIY in 5 – minutes, that is. The easiest, quickest ways to take a piece from blah to fab and update it to current trends.
Fur trim is applicable for anything hooded: a sweater, hoodie, or jacket. (Or even on pocket edges, lapels, flaps…you get the idea!;-) As the temperatures drop, the need to bundle up increases – and adding a layer of furry material adds a ton of warmth. I always shop cheap when I can – but often affordable prices mean skimpy manufacturing techniques and minimal trim and details. Add more value to your bargain pieces by adding a quick-and-easy line of faux fur trim to your favorites.
You Need:
*hooded piece to embellish
*faux fur trim long enough to go around the hood – mine was 5″ wide (or a strip cut from faux fur by the yard)
And…
*scissors
*measuring tape
*sewing machine and thread matching fur
*hand-sewing needle and thread matching your hooded piece
*skewer, knitting needle, or chopstick
How-To:
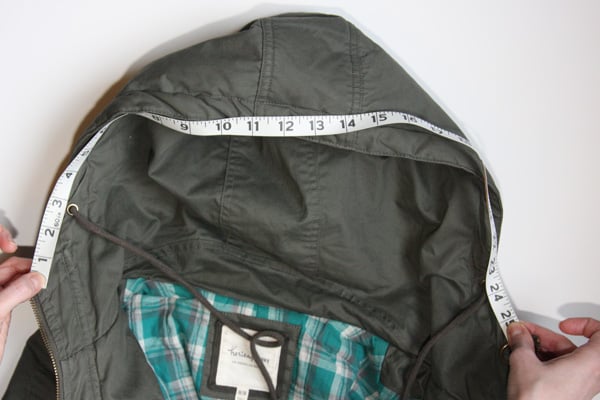
1. Measure around your hood to find out how long your trim needs to be. (Add about 3/4″ to each end so you have enough trim for the seam allowance.) Cut trim according to measurement.
2. Fold the trim over on itself lengthwise and sew into a tube on your sewing machine, leaving about 2″ unsewn in the center of the seam. Taper the ends.
3. Trim the excess at the ends.
4. Turn right-side-out using a skewer, knitting needle, or chopstick.
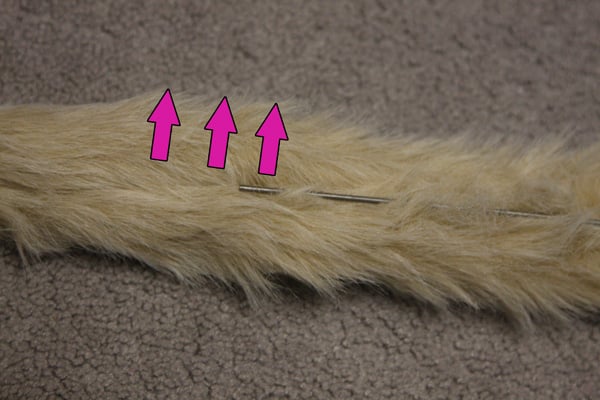
5. Use the skewer to pull any fur our of the seam if it was caught in there while sewing.
6. Use a hand-sewing needle to stitch the trim around the edge of the hood, stitching the opening in the trim tube closed as you go.
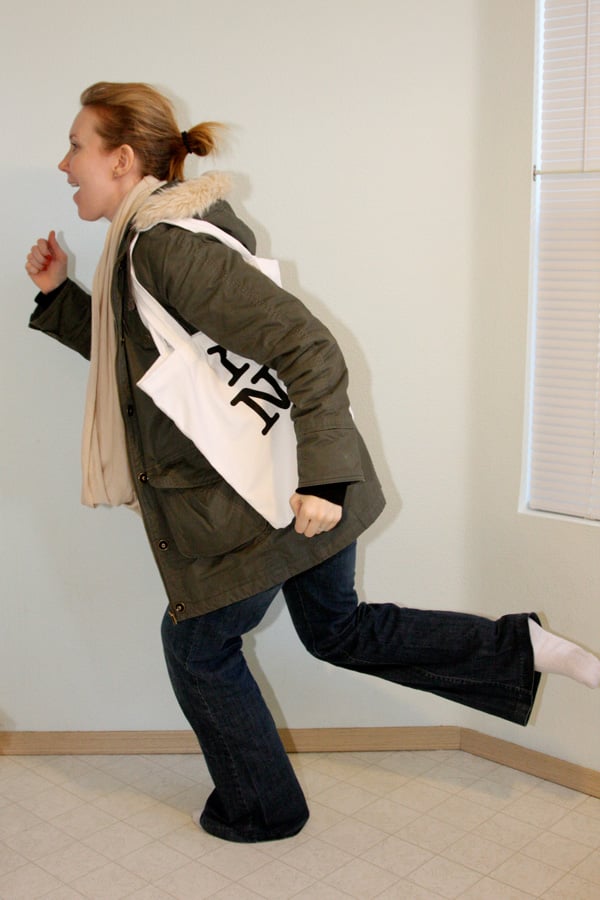
This is a super-easy way to add some wintery furriness to your favorite jacket or hoodie – and even if it takes more than 5 minutes to complete – it will most certainly take no longer than 15!
Happy DIY’ing!
xoxox
Carly
~If you liked this post, please share it!~
Leave Comment
Nov 24, 2010 | DIY, Fashion
LS Tee: Petit Bateau
Draped Rose Chiffon Skirt: DIY
Studded Cuff: Target
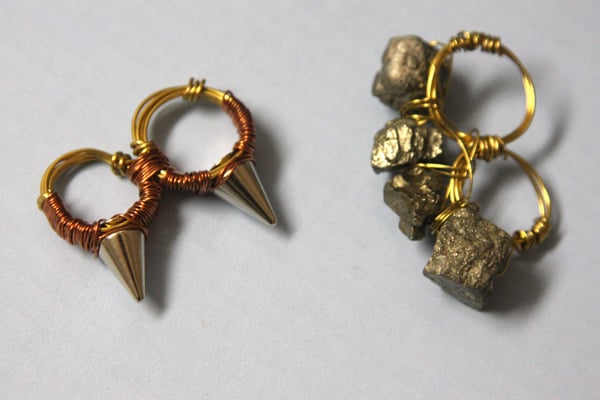
2-finger Pyrite Ring and Spike Ring: handmade by me
Diamond-pattern pale blue tights: unknown
Suedette Tie Shoes: Lela Rose for Payless (2009)
Quilted Bag: indio (Japan)
Pierced Rose Brooch: DIY
Day 21 in my 30 Days of Outfits Challenge: November 21.
Sunday at home recuperating from the long shoot from the day prior. But I still wanted to take a couple DIY items for a spin – and put together an outfit in dreamy pastels.
When I first saw luv aj‘s pieces, I thought they were a wonderful solution to connecting large statement pieces onto ring bases without soldering. Many jewelry artisans cannot solder (myself included). Not being able to do this simple construction method (though goodness knows I’ve tried!) often limits the designs you can create, especially when it comes to rings (which usually need to be soldered together lest the stone pop right off the base).
But wire-wrapping is an ingenious solution to the problem of connecting the top to the ring, and completely eliminates the need for soldering! I tested it out on a couple similar designs. (The drawback is the rings are incredibly uncomfortable on the fingers. I wonder if luv aj’s versions are easier to wear?)
This skirt I made from a curtain valance. Yes, a curtain valance!! If you ever check out Goodwill (or any thrift store that sells home items), you can probably find some curtain valances that have chiffon overlays to them. I was struck by how beautifully they were draped – so I bought the pair ($3.99) and made a skirt out of one. When I draped it onto my body I found the waistband wouldn’t sit right, so I did have to make some darts at the waist…and sew a front-seam and hidden fly. It’s not perfect – it’s DIY, after all!
But if you have any valances at home lying around, or spot any at the secondhand store – they really look lovely as a draped, twisted skirt – a style of skirt that is so popular now (just look at the recent collections of Alexander Wang, Burberry, and Celine, for example).
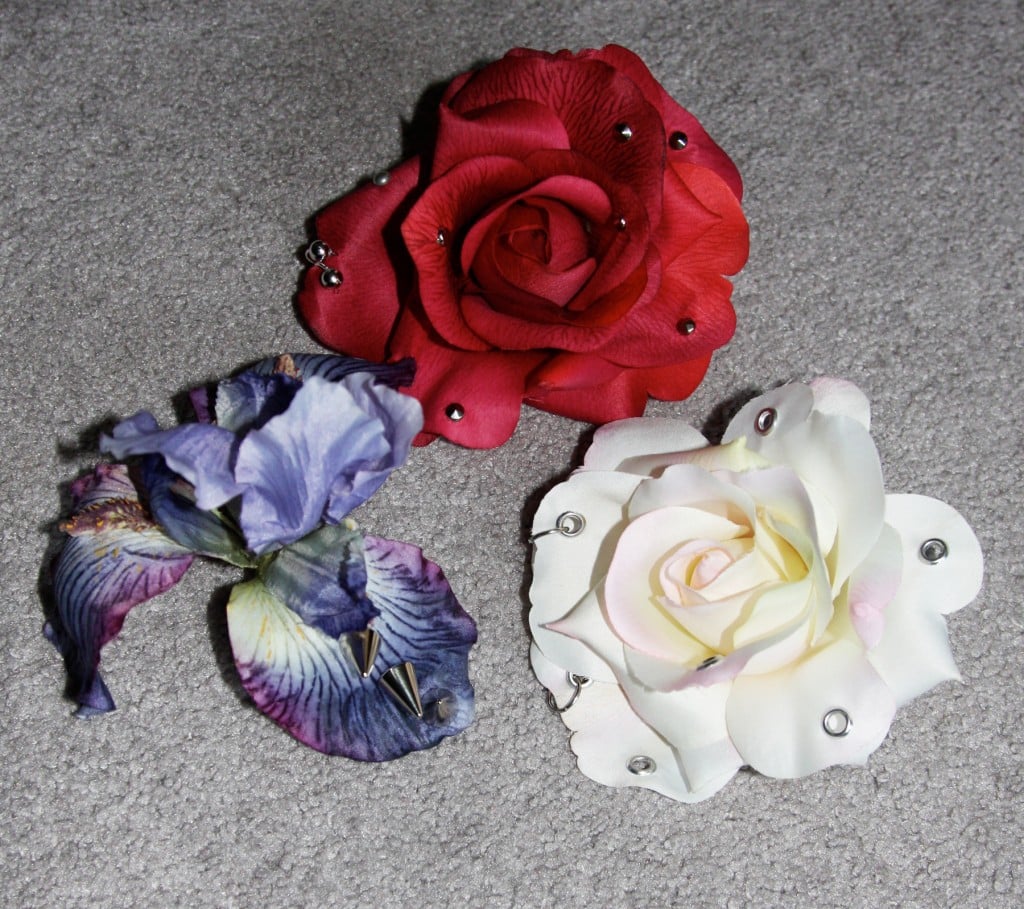
The Pierced Flower Corsage is so easy to make: just a silk flower from the craft store, with rings threaded through it, or grommets added and rings and ball beads through those. I made two and thought the rose one went better with this outfit.
Hope everyone had a great Sunday!
xoxox
Carly
~If you liked this post, please share it!~
Leave Comment
Nov 19, 2010 | DIY, Fashion
Scottie-print scarf: DIY. Chiffon ruffle blouse: Victoria’s Secret. Denim bustier: Forever 21. Assorted pins: vintage; from Japan; Lamb Tac Pin: Girlprops.com; kilt pin handmade by me. Pebble-print silk skirt: Banana Republic. Dainty Lace Ankle Socks: SockTheory.com. Striped espadrille wedges: Old Navy.
Day 17 in my 30 Days of Outfits Challenge: November 17.
Can you tell what runway show I was inspired by?
photos by Marcio Madeira, Style.com
Yup! Miu Miu S/S 2010. It was such an amazing collection with so many fabulous pieces…you could really take each look apart, bit by bit, and find yourself with so many versatile and chic accessories, jewelry items, and unique clothing.
I felt somewhat springy today (even though the weather was anything but)…and so wanted to try mixing patterns and colors and just going crazy with my outfit.
Can you guess what I made my scarf from?
…A pair of little girl’s pajama pants!!!
Yes, I found the pants at the Goodwill Outlet in Spring. The print reminded me of the Miu Miu collection, they felt satiny, and were still in great condition.
So I washed them and then did the following:
1. Separate the legs into two separate pieces by cutting all the seams apart.
2. Sew the legs together at the waist, so you have one long piece. Cut the ends on an angle so they look more “scarf”-like.
3. With right sides together, stitch around the edges, leaving about 2″ free.
4. Turn right-side-out and press.
5. Stitch remaining hole closed.
Very, very simple! I had been searching in fabric stores for a silky print similar to the ones in the Miu Miu show, but the fabric stores here aren’t progressive to carry anything similar. Silky pajamas have a number of great, fun prints – that are definitely very Miu-Miu-esque and look fabulous as an accent piece!
I bought this blouse something like 15 years ago and have not worn it once. Not once! The tag is still on it, I’m ashamed to say. Well, now I’ve worn it!;-)
A great way to jazz up a top is to pin on a variety of brooches and pins. I chose to do so smack-dab in the middle, which is a bit unusual, but (I think) it works. I made the bottom brooch from a kilt pin and bits of rhinestone jewelry, beads, and findings I had lying around.
And espadrille wedges are so not confined to summer! You can certainly wear them all year round (though you may have to switch up your leg-coverings;-)
What do you think? Is anyone going to try embellishing with brooches differently…or start searching for that perfect pair of pajama pants to repurpose into a scarf?;-)
Oh, and Katarina from She sells sea shells has posted more of her outfits in this Challenge. Have you checked out her blog yet? Please visit and say hi!
xoxox
Carly
~If you liked this post, please share it!~
Leave Comment
Nov 18, 2010 | DIY
This post contains affiliate links – and I receive a small commission on sales from readers clicking through these links. My full
Disclosure Policy is here.
So to break up the monotony of my 30 days of outfits…I thought to share with all of you this cute and easy DIY.
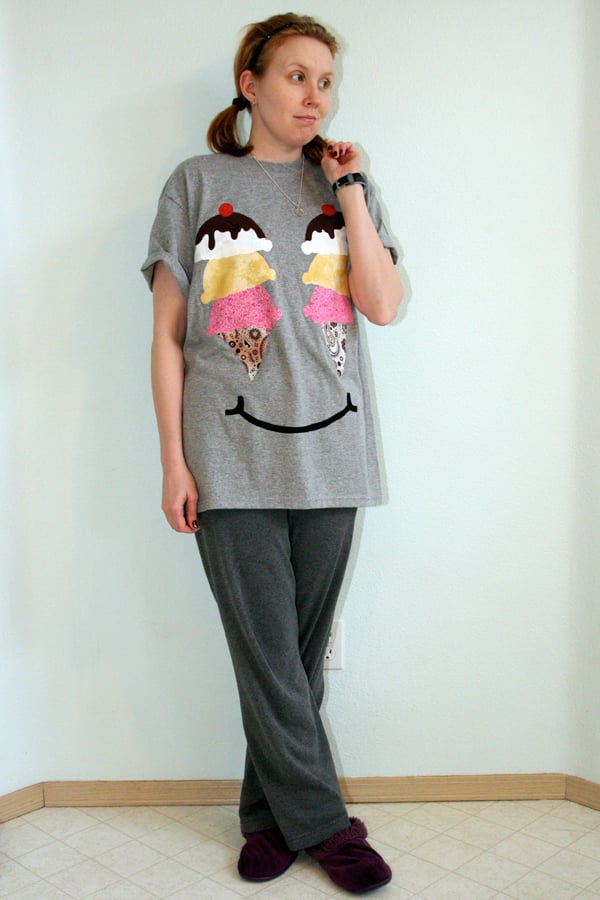
I first saw this on Ramblings from the Sunshine State, where Wendy shared her how-to for a 6 Scoop T-Shirt for her daughter’s ice-cream-themed 6th birthday party.
I loved the idea of adding brightly-colored quilting fabric to a t-shirt!
I’m always dreaming of screenprinting designs into tees…The colors! The vibrant blacks! The limitless designs!…But face it, screenprinting ONE t-shirt (even with a Yudu) is a huge time commitment. There isn’t much point if you’re just going to make one.
Fabric paint I don’t like very much, as even the “soft” fabric paint adds stiffness to the shirt, and you can’t get very crisp lines.
The iron-on transfers they sell at the sewing store also leave a distinct and ugly “sheen” to them…it’s obvious you’ve stuck something on your shirt. No thanks.
But applique?! Never thought of that!
Now the world is my oyster…or at least, the design possibilities are limitless when you start to think of re-creating your favorite screened t-shirt design with cutouts of bright fabric and patterns. The edges to the appliques are crisp, and the applying is so easy! (Plus it’s a great way to experiment with color and pattern…and use up the scraps of fabric you may have laying around in your scrap bag.)
You Need:
a t-shirt (I originally was going to use the white one above, and changed my mind after I took the photo) / brightly-colored fabric for your design (I picked out some quilter’s fat quarters at my local Jo-Ann Fabrics, paying attention to the coordination of the patterns and prints) / black fabric for your details (mine is a woven lightweight cotton suiting)
double-sided fusible web for applique / (optional) black embroidery thread
Tools
scissors / iron & ironing board / pen / paper to make your pattern
How-To:
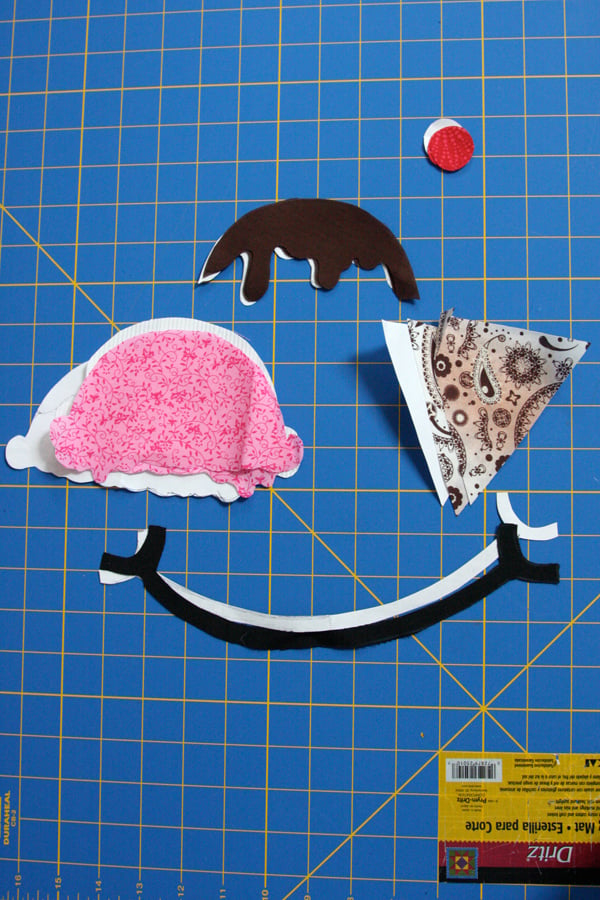
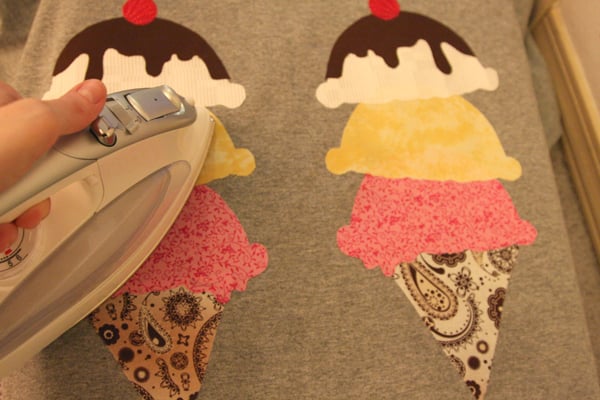
1. Make a pattern for your ice cream cones. I made one that I used for each scoop, one for the cherry, one for the chocolate sauce, one for the ice cream cone, and one for the smile.
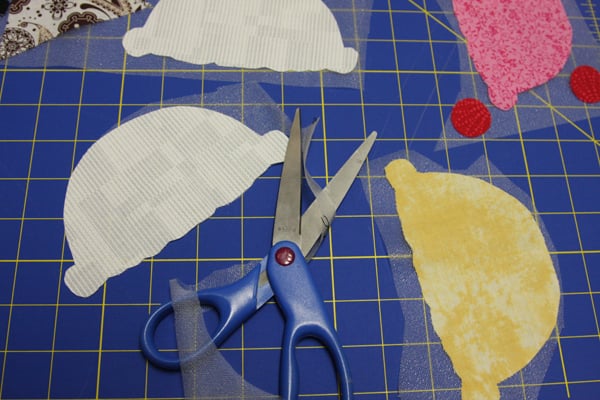
2. Place your pattern on your fabric (folded over). Trace and cut 2 pieces for each part of the ice creams, and one piece for the smile.
3. Follow the instructions for fusing the pieces to the front of your shirt. (Usually sticking the applique onto the sticky front, peeling off the back, pressing to the shirt, and ironing for 15 – 30 seconds, applying pressure and making a few passes. The instructions said to stick the entire piece of fabric onto the sticky front of the web and cutting through both layers just once…I don’t think it really matters how you do it.)
4. (Optional) To make your creation more “polished,” you could go over the edges of each fabric piece in a satin stitch (closely-spaced zigzag stitch on your machine), in black embroidery thread. (I didn’t because I was feeling lazy.) This will make your tee look (from a distance) like a cartoony ice cream face, without all the hassle of the screenprinting!
But even without the outlining, it looks pretty cute as is!
Cool down on a hot summer’s day quickly in this…or just have a sweet sense of humor while relaxing at home.
Happy DIY’ing!
xo
Carly
Leave Comment