Sep 8, 2010 | DIY
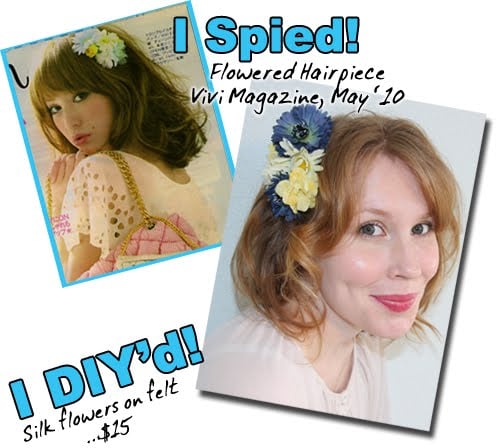
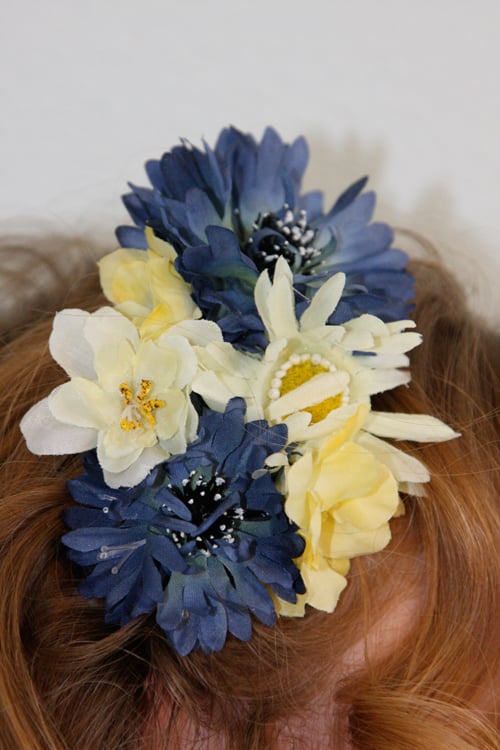
I have such a thing for accessories, and Japanese magazines such as Vivi never fail to supply an endless source of ideas and inspiration. Always torn between whimsically feminine and punky/edgy, I constantly vascillate back and forth in my own outfits…but when it comes to frilly, flowery, and girly pieces Japanese mags always beat the rest. This flowered hair clip (similar to one featured in Vivi May 2010) is super-easy to make, but lends a pretty and feminine vibe to anything you’re wearing.
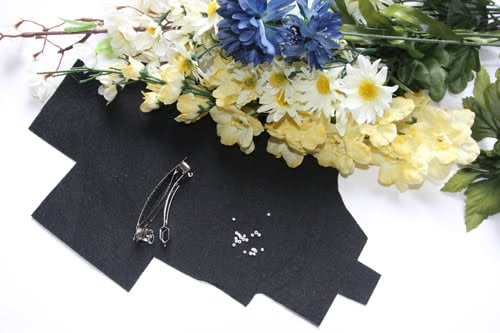
You Need:
*silk flowers (mine were cornflowers, daisies, and forsythia…and a white plum or something but I’m not sure)
*tiny white seed beads
*stiff black felt
*hair clip
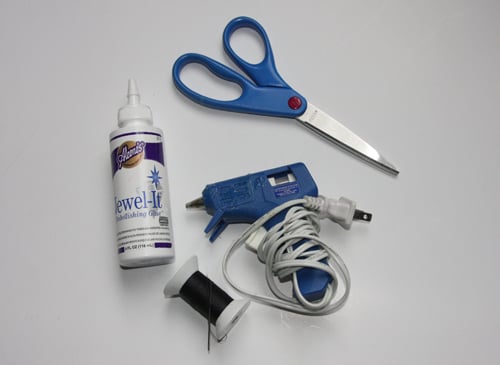
and…
*hot glue gun + glue stick
*hand-sewing needle
*black thread
*scissors
*toothpick
*craft glue
How-To:
1. Separate the silk flowers from their stems.
If the flowers have jutting base stems, cut those off.
2. Cut a small piece of the felt in a oval shape. Mine was about 4″ long by 3″ wide.
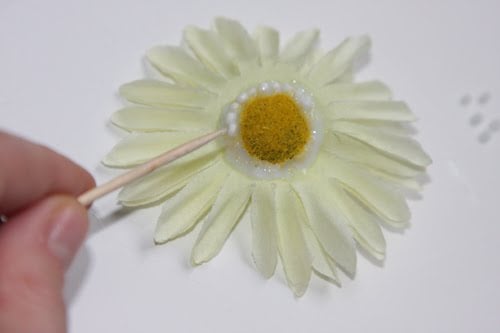
3. Spread a tiny amount of craft glue around the center of the main daisy. Use a toothpick to position the seed beads in a ring around the center. (You could also potentially do this after you’ve glued the daisy to the felt base, but I found it easier to do it first.) Allow to dry.
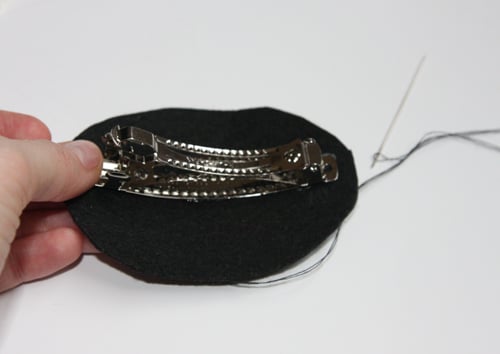
4. Use a needle and thread to anchor the hair clip to the felt oval. (Remove the center prong first and then loop the thread around the clip base.)
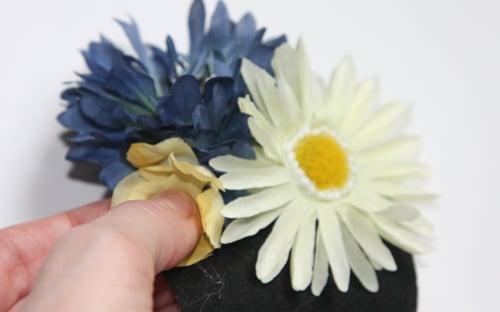
5. Spread some hot glue on the underside of a flower and press onto the felt. Add more flowers, clustering them close together. If the petals begin to separate, add more hot glue in-between the layers of petals.
Use the toothpick to prevent the petals from tangling on one another. 
6. Trim the edges of the felt base so it can’t be seen from the front.
And that’s it! Soft, slightly curled hair works best with this piece – or you could try this in front of a ponytail (again, going for the soft look).
If you want more security, you could also make this attached to a thin headband, or add a pin-back to use it as a corsage pin on a jacket or a bag.
I’d love to see your combination of flowers and colors on this little piece!
Happy DIY’ing!
xoxox
Carly
~If you liked this post, please share it!~
Leave Comment
Sep 5, 2010 | DIY
Yes, another project I submitted for Style Sample Magazine and New York Design Shop’s Create Couture Challenge back in early August. I’ll get all of these posted if it kills me!!!
You Need:
*Mocha Suedette Fringe
*Mini Gold Pyramid Studs
*Large Gold Pyramid Studs
Additional Tools/Materials:
*faux suede or leather strappy sandals (American Eagle Tomahawk Beaded Sandals from Payless)
*pliers
*leather glue
*awl (optional)
*moleskin (optional)
[prep: remove any embellishments from shoes first]
How to:
1. Push studs into the straps of the shoes, using pliers to bend the prongs over on the underside. If you have trouble pushing the studs through the shoe material, an awl can be helpful to punch holes first. You can also use small pieces of moleskin on the inside of the shoes if any prongs scratch your feet when you are wearing them.
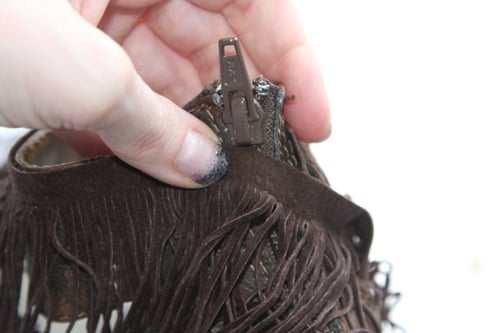
2. Measure length of fringe needed by wrapping it around top of sandals. Cut.
3. Apply a thin strip of leather glue to the tops of the sandals, and press the fringe into it. Allow to dry.
And that’s it!
Gladiatrix, boho, SoCal…however you say it, these sandals are FAB!
xoxox
Carly
~If you liked this post, please share it!~
Leave Comment
Sep 3, 2010 | DIY
This is a long one, so hang on for the ride…
We’ll be using one ENTIRE shirt – and leave only the tiniest scraps behind when we’re done. It will take awhile, and this tute is probably not for beginners.
Project Difficulty:  (EXPERT)
You Need:
(more…)
Leave Comment
Sep 1, 2010 | DIY
Since I’ve been attempting to write the tutorial for my Men’s Shirt to Romper project for the last 2 hours and I’m now going cross-eyed with no end in sight, I think I’ll instead share yet another project I submitted for Style Sample Magazine and New York Design Shop’s Create Couture Challenge.
Materials:
*White Rose Pin (leaves only)
*Cream Rose Pin (leaves only)
Additional Tools/Materials:

*chain earrings (basically just some french hooks and some lightweight chain)
*pliers
*2 jump rings
*scissors
*awl
How to:
1. Remove leaf sections from undersides of both rose pins.

Separate leaves and trim tops.
2. Stack 4 leaves atop one another and poke a hole in their tops using the awl. (You can also use small sharp scissors or a pin.)

3. Thread the bundle of leaves onto a jump ring.

4. Add jump ring to earring. Repeat Steps 2-4 for the remaining leaves and other earring.

Pretty easy, huh?
Fun, dangly, and lightweight – these are perfect for summer!
xoxox
Carly
~If you liked this post, please share it!~
Leave Comment
Aug 30, 2010 | DIY
Another project I submitted for Style Sample Magazine and New York Design Shop’s Create Couture Challenge. (I’m getting around to posting them all…sloooowly….)
You Need:

*Large Iron-On Butterfly
*Mini Gold Pyramid Studs
*Large Gold Pyramid Studs
Additional Tools/Materials:
*1 tanktop (mine is Converse One Star Women’s Tanktop in White from Target)
*iron & ironing board
*pliers
[prep: wash and dry tanktop to remove sizing and chemicals]
How to:
1. Iron Butterfly applique on to tank. (Iron on medium setting by pressing on the applique for 10 seconds, then iron slowly, using pressure, in vertical passes over applique until it is fused to the fabric.)
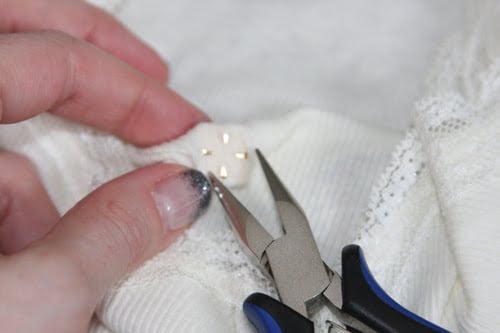
2. Add studs to shirt, pushing prongs through fabric, and using pliers to fold prongs over on the inside.
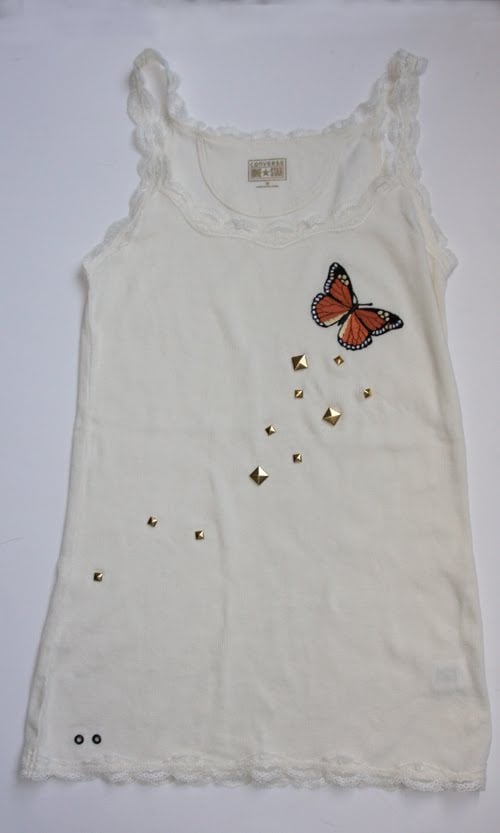 And that’s it:-)
 I’m all a-flutter in this cute little tank!
xoxox
Carly
~If you liked this post, please share it!~
Leave Comment