Aug 24, 2010 | DIY
Yet another of the projects I submitted for Style Sample Magazine and New York Design Shop’s Create Couture Challenge.
You Need:
*Rust Suedette Fringe
*Mocha Suedette Fringe
Additional Tools/Materials:
*double-chain necklace
*hand-sewing needle
*matching thread
*scissors
How to:

1. Start on bottom chain of necklace. Stitch chain links onto top of Suedette Fringe (I stitched through every other link).
2. Cut fringe once you’ve reached the end of the chain.
 3. Repeat for the lighter-colored fringe and the top chain.
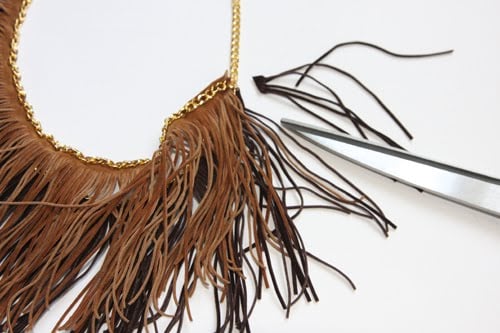 4. If desired, trim edges of fringe so they hang better whilst wearing.
 Sometimes the best thing about DIY is the fringe benefits! 😉
xoxox
Carly
**This was actually the project that the person who won the random commenter drawing commented on, saying she loved it! (I know that sentence doesn’t seem to make sense, but my brain is feeling muddled right now:-) So I sent this fringed necklace to the winner – and I hope she likes it! Congrats, Monica!
~If you liked this post, please share it!~
Leave Comment
Aug 22, 2010 | DIY
Once I saw this bow tunic dress in Vivi Magazine, it was all over. I’m such a sucker for bows and anything really girly – especially when it’s multifunctional! This sweet little piece you can wear with the bows running down your back or down your front depending on your mood. Fashioned from an oversized man’s long-sleeved shirt, with a couple fixes it becomes a cute A-line batwing tunic dress – paired with pretty tights if you like your dresses super-short, or perfect over a miniskirt or leggings.
You Need: (more…)
Leave Comment
Aug 6, 2010 | DIY
Myself and 9 other DIY bloggers were selected to compete in Style Sample Magazine and New York Design Shop’s Create Couture Challenge.
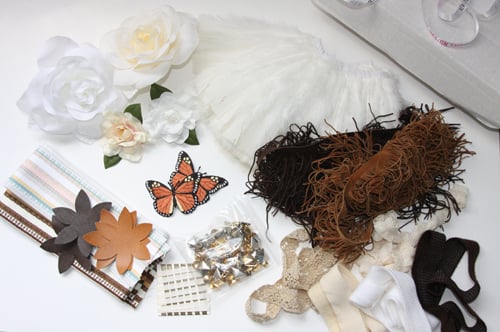
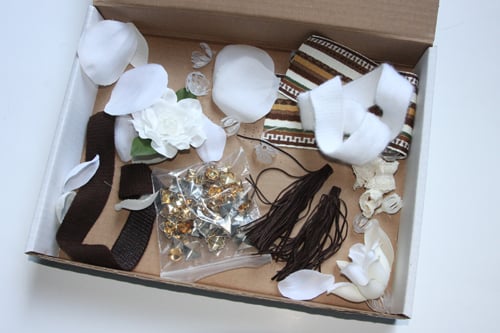
We were all sent the same box packed to the gills with trims, studs, and flowers, and were asked to make “one or more projects.” I made 12!
The leftovers.
I used almost the entire contents of the box, hoping to create as many different projects as possible that could appeal to a wide range of ages and styles, as well as making the projects as simple as possible (so anyone could replicate them) and using as few outside materials as possible, in order to truly showcase New York Design Shop’s products. But I wanted my finished creations to be durable, wearable, and look polished – and be pieces that could potentially stand up to scrutiny in any retail store.
So here’s another of my projects:
Feathered Cape
You Need:
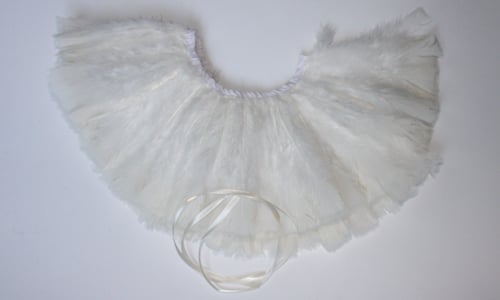
*White Feather Fringe
*Baby Single Face Satin Ribbon in Cream
Additional Tools/Materials:
*scissors
*fabric glue
*hot-glue gun
*lighter
How-to:

1. Cut Ribbon in half.

2. Squeeze a small amount of hot glue into the ribbon opening on the top of the Feather Fringe, and stuff the end of one piece of the ribbon inside. Do the same for the other piece.
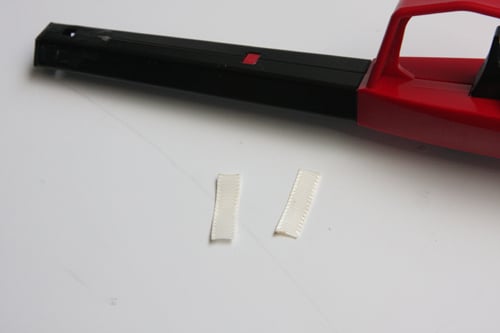
2. Cut a small piece about 1″ long from either end of the ribbon, and heat-seal raw edges with the lighter.
3. Use fabric glue to glue the small pieces of ribbon around the raw edges of the Feather Trim top.
4. Cut the ends of the long ribbon pieces on an angle and use an open flame to seal them.
You’re done!
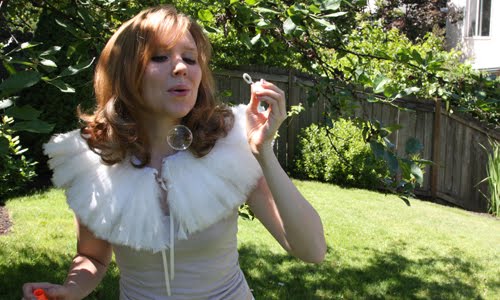
Feeling angelic and light as air all swathed in feathers…
If you enjoyed this project I’d love to have your vote!
(One vote is allowed per unique IP address, anywhere in the world. You don’t have to register or leave your name or anything! But if you do leave a comment in your vote, you are automatically entered to win one of the projects by the Contest Winner. Now that’s a great way to share the love!!:-)
Thanks for looking!
xoxo
Carly
Save
Leave Comment
Aug 5, 2010 | DIY
I probably won’t be able to post all of these because the contest is only open until the 10th of August.
But I’ll do my best!
Myself and 9 other DIY bloggers were selected to compete in Style Sample Magazine and New York Design Shop’s Create Couture Challenge.
We were all sent the same box packed to the gills with trims, studs, and flowers, and were asked to make “one or more projects.” I made 12!
The leftovers.
I used almost the entire contents of the box, hoping to create as many different projects as possible that could appeal to a wide range of ages and styles, as well as making the projects as simple as possible (so anyone could replicate them) and using as few outside materials as possible, in order to truly showcase New York Design Shop’s products. But I wanted my finished creations to be durable, wearable, and look polished – and be pieces that could potentially stand up to scrutiny in any retail store.
So here’s the first of my projects:
Petal-Front Top
You Need:
*White Rose Pin (petals only)
*Cream Rose Pin (petals only)
Additional Tools/Materials:
*t-shirt
*scissors
*fabric glue
[prep: wash and dry shirt to remove sizing and chemicals]
How to:
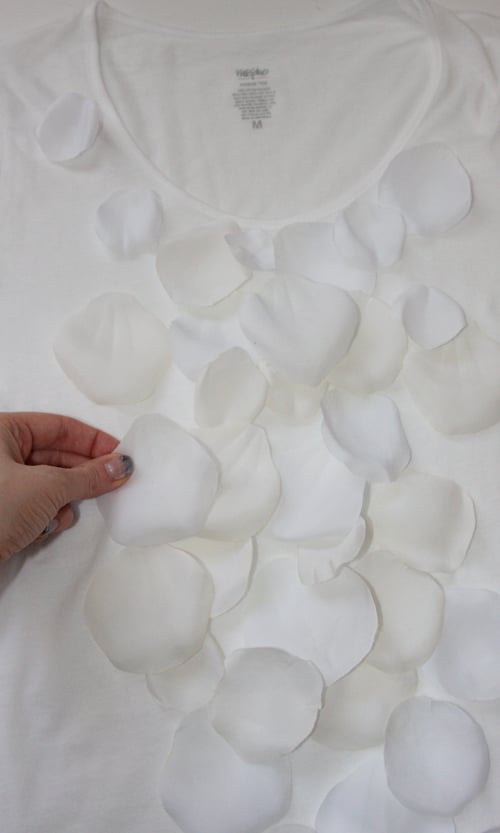
1. Pull apart Rose Pins, and separate into petal pieces.
A pile of petals!
2. Trim petals apart, and round their tops so they are really “petal”-like.
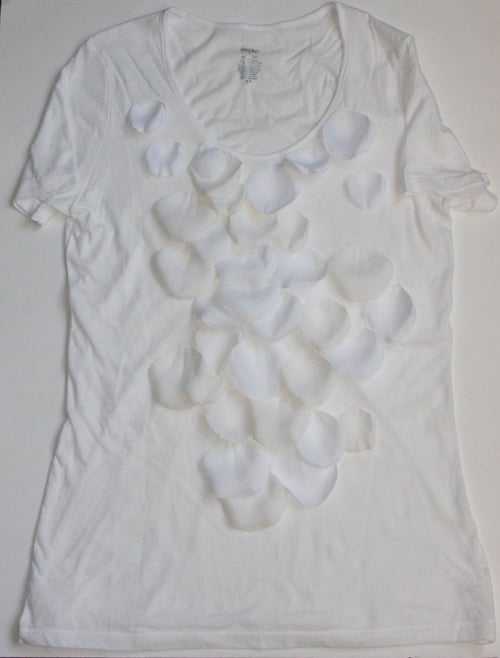
3. Use fabric glue to glue petals onto t-shirt. (You can sew their tops instead for a more RTW look.)
You’re done!
This top also looks sophisticated tucked into a slim skirt for work or under a soft cardigan.:-)
If you enjoyed this project I’d love to have your vote!
(One vote is allowed per unique IP address, anywhere in the world. You don’t have to register or leave your name or anything! But if you do leave a comment in your vote, you are automatically entered to win one of the projects by the Contest Winner. Now that’s a great way to share the love!!:-)
Thanks for looking!
xoxo
Carly
linked to
Leave Comment
Aug 3, 2010 | DIY

Louis Vuitton runway photos by Roberto Tecchio and Gianni Pucci, Style.com
That title was a mouthful!:-)
Rabbit-ears have infiltrated the fashion fray since Marc Jacobs threw them down the Louis Vuitton runway for Autumn/Winter 2009-2010. Though the black lace version has been donned and DIY’ed in numerous reincarnations since then, the scarf headband (with a little wire inside to hold its shape) is the grown-up version of this enduring trend. Take a favorite cotton handkerchief and make your own in a few simple steps right at home, and hop on outta there in style.

You Need:
(more…)
Leave Comment


 4. If desired, trim edges of fringe so they hang better whilst wearing.