Jun 20, 2009 | DIY
I’ve been hankering after a cutout skull tee since I saw some in last year’s S-Cawaii Magazine [Japanese] from the brand Barak (nothing to do with Prez Obama, I assure you). Trendy Tokyo girls wearing pastel-colored lightweight tees with skull-shaped cutouts over striped tees? Lovely!
(And ironically, Childhood Flames posted her own DIY cutout skull tee inspired by a Pleasure Principle shirt a few months later that had the blogosphere all agog.) How did I go about making mine? (Okay, I know, it’s kind self-explanatory, but…keep reading…)
Regardless of who was first and all that rubbish (likely Barak ripped it off from Pleasure Principle, though they probably took it from the cutout skully tees from the 80’s that just about every hair metal band had back then…), I decided to make my own Barak-style tee, with two el cheapo tees from Target (the striped one, incidentally, is not sewn from striped fabric…the fabric was actually screenprinted with a striped pattern and then sewn together. Like that was cheaper for the manufacturers than actually sourcing a black-and-white stretch striped fabric. Sheesh.) Though I’m technically a Medium, I bought a large for my skully tee, so it will be loose enough to drape over the second layer. Here is the skull that I drew for my pattern:

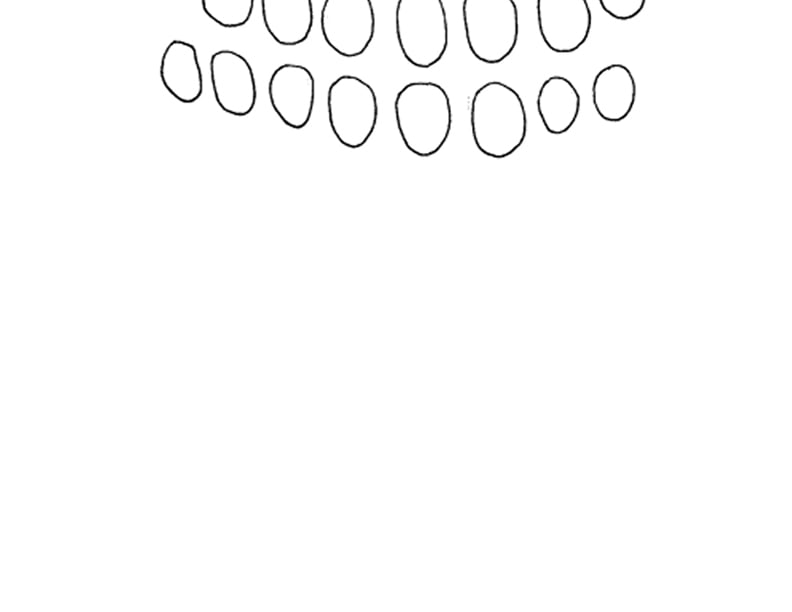
If you’d like to use these drawings as a pattern for your own T-shirt, right-click on each above [or control-click if you don’t have a 2-button mouse] to save each drawing, and print out landscape format on TWO 8.5″ x 11″ pieces of paper. Alternatively, you can just print out the entire PDF pattern + instructions here.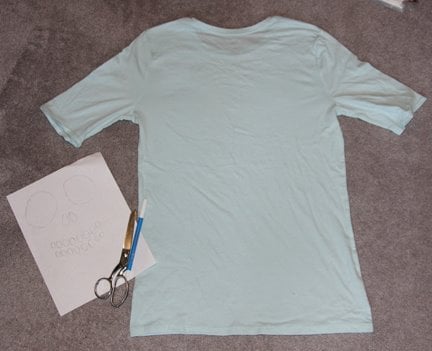
Line up each paper under your tissue-wight tee…

…trace the outlines lightly with sewing chalk or a fabric pen…
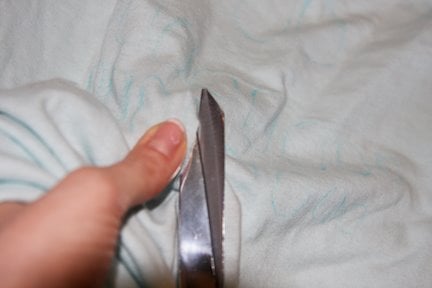 …and cut with fabric scissors!

Couldn’t be easier!
I also tried layering the Skully Tee over a black t-shirt for a more Gothic look, and a white tank for a summery ensemble. You could also try with just a bra if you’re daring!
Have fun cutting and slicing, and Happy DIY’ing!
xoxox
Carly
Leave Comment
Jun 7, 2009 | DIY
(photos: elle.com)
So I posted about these Junko-Watanabe flower-basket-like confections on FashionTribes.com quite a while ago….
 And I wanted to post photos and a how-to for what I made, inspired by said flowery things.
Everything’s coming up flowers in the garden…the rhododendrons are beginning to drop…I have a mutant foxglove that’s like 9 feet tall…my rosebushes are slowly succumbing to rose-slugs….but whatcha gonna do. I made these for my feet in-between all the yardwork – and they’re completely maintenance-free.
 Here’s how I did it: (sorry for no step-by-step photos; I figured it was self-explanatory;-)
1. To get the look, pick up some inexpensive nude wedge sandals (try Payless, Go Jane, Target, Dorothy Perkins, Charlotte Russe, Topshop) with an earthy or natural vibe such as bamboo or jute espadrille. (Mine are very similar to what I think was I think a Gucci style from like 2003…remember that bamboo heel? Well, they’re TwoLips, and the heel is plastic, so to make it look more bamboo-y, I drew little vertical lines on the heels with my Sharpie. I just love the result!)
2. Using faux flowers from the craft store (Michael’s or Jo-Ann Fabrics, where I grabbed a bunch of morning glories for $2.99), cut and attach to the undersides of the straps and twine them around the heels, affixing with a glue gun.
3. Keep the flower stems from rubbing on the inside of your straps with a strip of moleskin.
4. To prevent unraveling (cuz that’s a lot of strain in a flower stalk that’s technically not supposed to be bent that much!), secure by wrapping the heels with green floral wire here and there (which I realized I forgot to do *before* I took the photo, hello!).
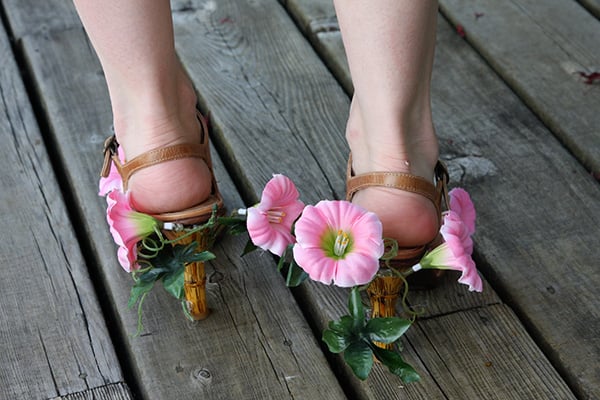 For maximum impact, wear with a breezy frock or sassy short shorts…or a flowered frock for total floral overload!!
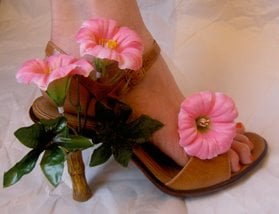
Easy, breezy, Springy, and totally chic! What do you think?
Happy DIY’ing!
xoxo
Carly
Save
Leave Comment
May 27, 2009 | DIY

I’m in love with
Subversive Jewelry, designed by
Justin Giunta. If you haven’t seen his work, it’s been featured in just about every mag you can imagine, starting sometime around 2003. And he was nominated for an CFDA award in accessory design just this year.
His work really fueled the whole mish-mash tangle of necklaces, vintage, costumey overload (not in a bad way!) that we’re seeing designers copy be inspired by ever since, even for Fall 2009. (Dolce & Gabbana, I’m looking at you😉
 (Me when I had long hair and was 10…alright, 12 lbs. lighter. Ah, those were the days.)
However, I could never,
ever afford one of his pieces. Maybe aspire to, someday. So I made my own from a bunch of findings I had laying around, and a couple of the
8721 50mm Swarovski Crystal Teardrops. (When I made my version back in 2004, Swarovski wasn’t producing a large-size teardrop that had a flattened back…now they are. I should have just used chandelier drops like Mr. Giunta did in his design…and I could have sourced them from
Cristalier.com, but I thought the 8721 drops would work fine. The problem is that the drops I used have a point on either side, so they don’t sit flat against my skin. The
8741
is much flatter and would have probably been the better choice overall.) Ah well. I threw some assorted charms and pearl chain onto the necklace for the same effect as the original. I think it turned out great – I love wearing the necklace with a simple tank or a white tee to show it off…but it is darned heavy!

Here’s my comparison, side by side. Or above/below. Sorry this isn’t specifically a DIY tutorial, but you can probably figure out how the necklace is constructed just studying the photos: basically, drape, twist, and when in doubt – add more!!
 I hope Mr. Giunta takes it as a compliment! (I promise to buy something from him once I have a spare $600 laying about, I do promise.)
xoxox
Carly
~If you liked this DIY, please share it!~
Leave Comment
May 13, 2009 | DIY

Thank you Outsapop!
My go-to for DIY inspiration, she posted photos and a DIY for those Marc Jacobs lego accessories (as done by Dee and Ricky) waaaaay back. Since I still had a ton of Legos that I had religiously held onto since childhood, I definitely had enough to make the brooch…but I stopped by my local Lego store and bought the small size “Pick-a-Brick” bucket, choose carefully some basic brick sizes in colors that definitely weren’t available in the 80’s. (Lime green, charcoal grey, hot pink, sky blue, orange.) The effect, when paired with my old tooth-scarred Lego blocks (cuz gripping the darn Lego block between one’s teeth and just pulliing was the only way to separate the darn things back in the day….now the Lego Store sells thingies specifically for prying…one wonders why they didn’t think of that before).
I added some electrical tape between the layers and a pin back behind, so it can be pinned to clothing or even a belt front. I have short hair, so I don’t think I’ll be wearing it in my hair…plus I think 30 is probably to darn old for those things now. *sigh* Perhaps wearing any Lego accessory at my rather ancient age is a little much, but…I love the idea so much, I can’t resist!
Try channeling your inner Lego-loving kid and whip yourself up something fun like this – can’t help but grin at the irony of high fashion meets kiddie toy!
xo
Carly
Save
Save
Leave Comment
May 8, 2009 | DIY


I have (just like probably every other crafter out there since the Dawn of Time) an unbelievable amount of pretty beads sitting in my arsenal with nowhere to go. Mismatched, funny shapes, unusual colors…acrylic, pearl, glass…you name it, I probably have it. So I love the idea of taking a dead-soft piece of fine jewelry wire and wrapping up all those unmatched beads into a more beautiful shape, thus recycling all of my unusable cast-offs. (I used 18 gauge wire, I think, in a silvertone, but you could definitely go higher-end with sterling or 14K gold…a gift for Mom, perhaps?) The wrapping takes awhile, since it takes some time to perfect your shape as you’re doing it…and then using two wires you wrap a little chain around the shape’s edges to secure the piece. Finally, add a jumpring on each side, cut a length of chain in half and attach each end – the chain gets a clasp. And voila! Finally, a use for all those extra mismatched beads.

I made a clover and a heart – and in using the beads, tried to choose ones in a similar color scheme. I think they turned out pretty well – and it’s funny, since I can pretty much remember where each bead came from…it’s like each piece in the shape has its own little story. That green rectangular glass bead I found on the floor of the A & P when I was 8…that gold filigree bead was from a birthday party favor bag when I was 10…that acrylic shimmer heart was from a grab bag I ordered when I was 23 and making jewelry from my tiny apartment in Philly….
I have both the clover and the heart up for sale in my Etsy Shop. They’re $16 each if you want to check them out! And definitely grab some jewelry wire and make your own – in any shape imaginable! It’s a fun project that takes about an hour or so.
-Carly J. Cais
Leave Comment


 …and cut with fabric scissors!











