To take a break from my usual uniform of dark skinny jeans, black blazer, dark vest, and dark tee…I’ve created this adorable ruffled hem pleat-front ribbon-tie striped
babydoll dress from 2 men’s button-down shirts.

(Sorry for the super-dark photos – my sewing room is lit only by a firefly, various glow-in-the-dark toys, and a sputtering birthday candle.)
You Will Need:
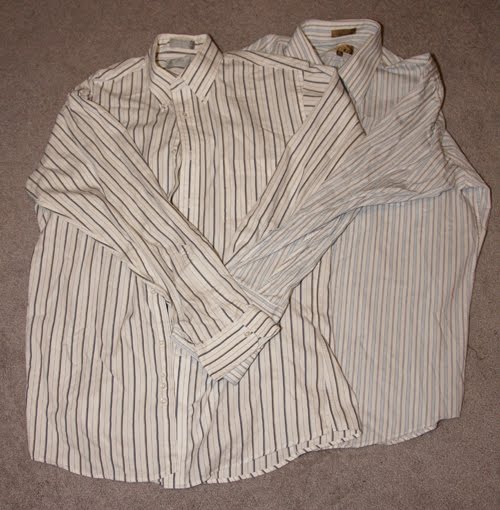
2 men’s button-down shirts in coordinating colors (I used size 16 – I think that’s an L, but I recommend using an XL if you are a S/M Misses’…an XXL if you are L/XL Misses.’) / thread matching topstitching thread in shirts / 23″ of 3/4″ wide flat elastic (white) / 3 m elastic cord (white)…we’ll be gathering fabric so only about 1m will be used eventually, but you need a longer length to do the gathering properly.
Tools:
sewing machine / needle for wovens / fabric scissors / seam ripper / iron (optional) / 1 safety pin
How To:
PREP YOUR PARTS
1. Cut Shirt #1: the sleeves off the shirt and straight across the top just under the second button.
This will serve as the body for your dress.
MAKE THE FRONT INSERT & DRESS BODY
2. To make the front insert, first cut the cuffs off both sleeves and discard. Pin the sleeves together on the long side closest to the sleeve opening placket. Sew together with a 3/8″ seam allowance, open up the piece you just sewed, and lay flat.
3. Turn insert upside-down and pin both sides of it to the underside of the opened shirt front we cut in Step 1), matching bottom hemline. (Underlap about 3/8 – 1/2″ on button placket.)
Sew to shirt front vertically along button plackets.
4. Close top button. On underside, create pleats in front insert, and pin to underside of front.
5. Sew a line straight across the top of the insert, through all layers, catching all the pleats. (This will result in a visible line of stitching through the front of your dress.) Then sew button placket closed above the line you just sewed, going through all layers.
MAKE THE BOTTOM RUFFLE
6. Button up Shirt #2 and lay flat. Mark 7.5″ up from the bottom, and 7.5″ above that. Cut shirt straight across, through both layers, at both marks.
7. Using the bottom of the shirt as a guide, hem the upper strip in a similar fashion (note the center front and center back of the shirt is lower than both sides). I just traced the shape of the bottom hem, added 3/8″, turned under, and stitched a 1/4″ hemline. (I know, technically the top strip needs to be 7 and 7/8″ tall, not 7.5″…but we won’t tell anyone.;-) It’s easier to explain this way.)
8. Cut Shirt #2 according to the photo above: cut the sleeves off, and cut the yoke off the back (we’ll use the yoke later on).
As to the sleeves, mark 7.5″ down from the top of each sleeve, and 7.5″ down below that. Cut sleeves straight across at those marks. (We won’t be using the cuff pieces.)
Pin each sleeve piece together at sides to make one long continuous piece. (In this order: Sleeve cap + bottom piece + sleeve cap + bottom piece. If you’re totally anal about this piece matching the hemmed pieces from Step 7), cut one of the bottom pieces in half widthwise – and pin each half to the outside edges of this joined piece. I.e., bottom piece half + sleeve cap + bottom piece + sleeve cap + bottom piece half.)
Sew sleeve pieces together. Hem the edge that has the rounded part of the sleeve caps in a similar fashion to the piece you hemmed in Step 7), cutting off the extra to create a similar hemline.
9. Connect all 3 ruffle pieces together by sewing them at their sides with a 3/8″ seam allowance. (Connect all so you’ve made a continuous piece.)
10. Make a double knot in the end of your elastic cord. Place it on the wrong side, along the top of the ruffle piece you just sewed (about 3/8″ from the edge). Using a loose zigzag stitch on your sewing machine, zigzag over the elastic cord all the way around the ruffle piece. Do not stitch through the cord – it must remain free and moveable under your stitches. Backstitch a couple times at the beginning and end of your stitching to strengthen it.
11. Pull on the un-knotted end of the cord, gathering the fabric underneath it. Gather the ruffle piece until it is basically the same circumference as the bottom of your dress.
12. Pin the gathered ruffle to the bottom of the dress, right sides together. The bottom of the dress is already a curvy hem – pin the straight side of your ruffle around these curves. This will create a beautiful wavy hem when finished. Double-knot the elastic cording again once you have verified the pinned length of the ruffle – then cut off the extra cord.
13. Stitch ruffle to bottom of dress, stitching below the elastic cording.
GATHER THE DRESS TOP
14. Fold under top of dress about 1″+. Stitch straight across bottom of folded edge to create a casing.
15. Attach safety pin to one end of your flat elastic. Thread through the casing and out the other side.
16. Match end of elastic to edge of dress; stitch down the edge to secure.
17. Hold the elastic firmly and gather the front fabric – the finished width of your dress front needs to be 11.5″.
18. Once at the correct width, stitch down the other end of the elastic, and trim so nothing is visible from the front.
19. Repeat for the back of the dress – the finished length for the back of the dress needs to be 10.5.”
MAKE THE SHOULDER-STRAPS
20. Cut back yoke off Shirt #1 as well as from Shirt #2…which we did in Step 8). (The yoke is usually double-sided; if yours isn’t, you have to scavenge fabric from somewhere else on your shirt. I think the ties look best when the stripe pattern is going up and down the length of the tie, not across, so I chose an area where I can get a piece of fabric 17.5″ long with the stripes going up and down.)
21. Sketch out the following shape onto both pieces: a tall trapezoid, with the top side 1.25″ wide, the bottom 2.5″ wide, and the entire piece 17.5″ tall. Cut shape out, separate the front and the back, and remove any labels with a seam ripper.
22. Fold each piece over, right sides together, and sew along longest edge, pivot, and along shortest edge. Turn piece right side out, and topstitch along unstitched edge to flatten it. (You can also iron it at this point to flatten it out further.)
23. Pin each piece under the top of the dress, at both front and back, about 1/2″ down from top hem, on either side. I positioned the pieces matching the dress body at the front, and the pieces matching the ruffle at the back.
24. Stitch across strap through all layers using a zigzag stitch for strength.
25. Tie bows tightly to prevent slippage.
You’re done!

You now have a super-cute dress perfect for lounging about, a sweet babydoll nightie appropriate for the boudoir – or even, under a blazer and over jeans or leggings, a chic piece to add into any day ensemble. Or you can wear it out as is during warmer months – rocking it with some lace-up sandals, a little metallic clutch, and a rhinestone clip in your hair.
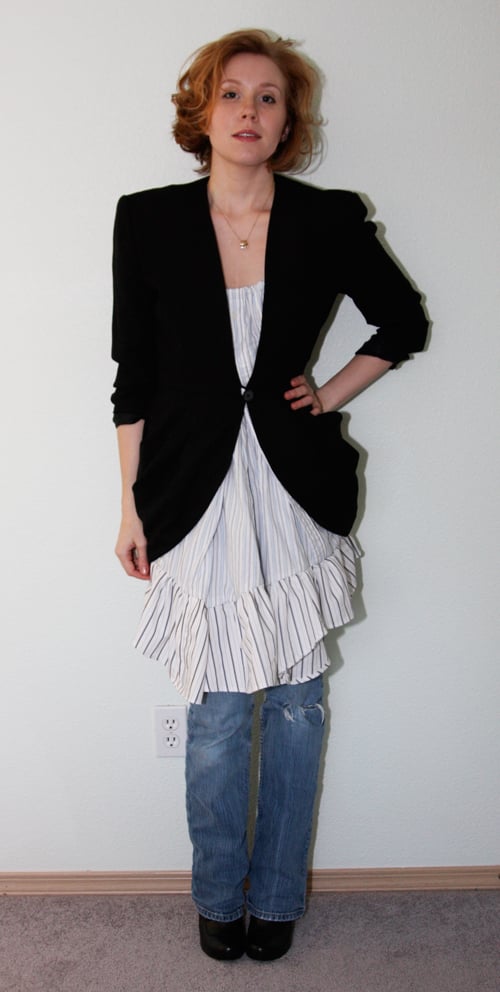
(Daiso 100yen shop multi-ring necklace, vintage blazer, handmade dress, DKNY jeans, Payless Victorian button booties)
Notes:
When I created the front of the dress, I sewed 2 sleeves together – resulting in a wide pleat at the front which can, in profile, make the wearer look preggers.:-P If you prefer a less generous A-line, create use a single sleeve instead for the front insert. This dress, because of the generous front pleat, would also be great maternity wear! (It’s kind of cute-sexy, so I think it would work great!)
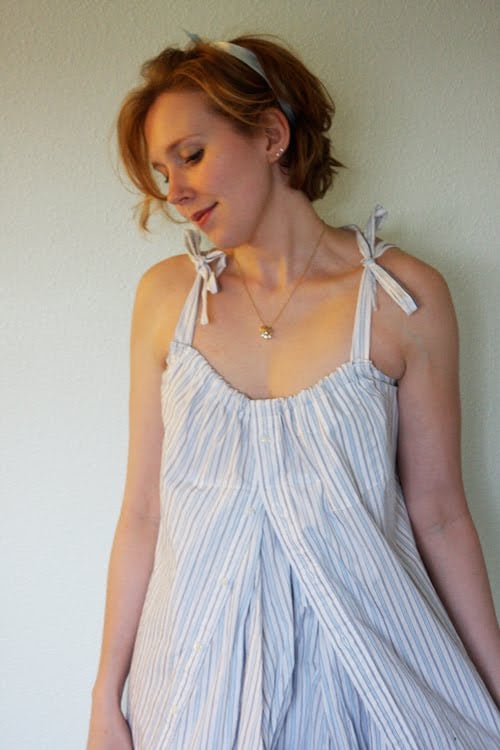
I would recommend if you wanted fuller bows – to either use fabric from other parts of the shirt and double the width of the cut parts…or cut the pieces as I wrote above and instead of folding them in half, just fold under the raw edges about 1/4″ and topstitch to keep in place (eliminating Step 22)- thus leaving you with single-layer fabric bows instead of double layer.
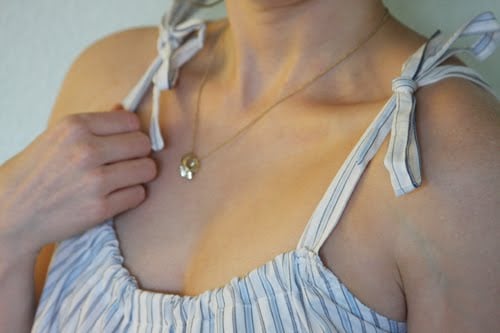
The finished dress may be somewhat short for some people -I’ve thus recommended an XL men’s shirt to hopefully deal with the length problem. Making the ruffle 8″ or 8.5″ high before you cut it out may also help with this if you’re concerned about the length – I am 5’6″.
I’d also recommend ironing your shirts first! My blue-striped shirt was a little rumply – which is reflected in the finished piece. The dress is now extremely difficult to iron due to all the ruffles – so make sure your shirts are free of wrinkles first!


Happy DIY’ing!
xo
Carly

 I’ve stuffed the stockings, laid out piles of prezzies under the Christmas Tree, emailed 18 of my closest friends holiday greetings, realized I’ve forgotten to stock my fridge with eggnog – and now I’m DIY’ing.
 1. Cut the sleeves off your top carefully so you leave the finished armhole seams on the shirt. Cut straight down the center of the shirt. (If your shirt didn’t have a V-neck before, cut the neck into a V-shape.)
 2. Cut each sleeve in half vertically and spread open.
 5. Cut the sleeve edges into a scalloped pattern – you can follow the pattern of your lace – or cut in a vertical zigzag – or scalloped – it’s up to you. It may take a couple tries of cutting and then trying the piece on to see how the fabric falls – and adjusting after that.
 You’re done!
 And if you don’t want to DIY – just buy – this adorable piece for $30 from jadelouse1’s Etsy store. (above)




 ). Place your shirt over a piece of cardboard and apply a liberal spraying of
  to make it literally “flat as a board.”
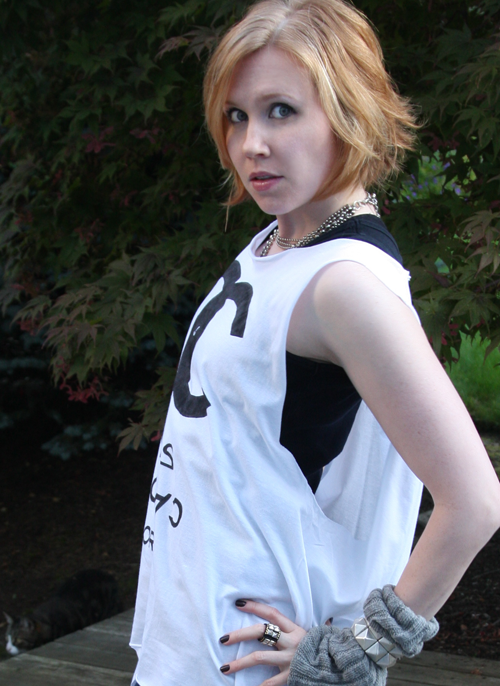
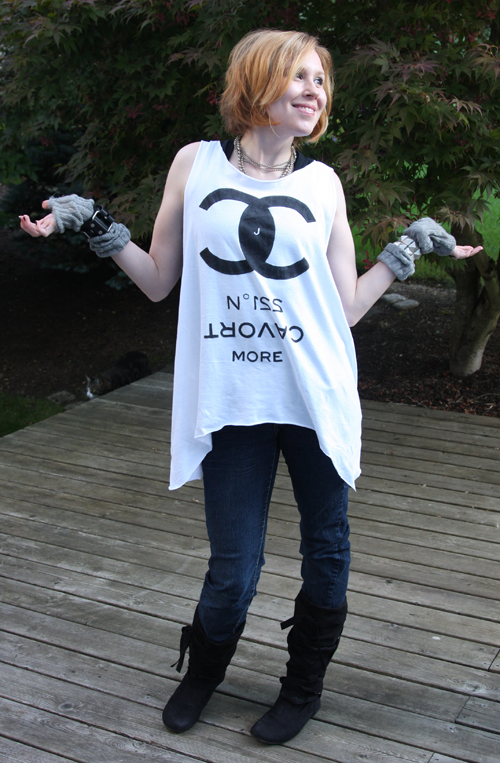
 So one look I was obsessed with was that effortless Katharine Hamnett “STAY ALIVE IN 85” tee that SJP was wearing in one scene as a mini-dress, with those unforgettable argyle thigh-highs and gladiator sandals. (I’ll skip the thigh-highs myself for wearing anywhere but in my backyard for a photo op.)
 Since I’m not about to go and plunk down 40 pounds (about $73 U.S.) for










