DIY Zebra Stencil Glitter Clutch

My DIY Zebra Clutch was featured on the ILoveToCreate.com blog yesterday! I thought all of you would also like to see the tutorial, so I’ve pasted it in full below: (more…)

My DIY Zebra Clutch was featured on the ILoveToCreate.com blog yesterday! I thought all of you would also like to see the tutorial, so I’ve pasted it in full below: (more…)
 I’m so thrilled to have been featured on the I Love to Create blog as a guest poster!
They sent me a lovely package of goodies from their immense ILoveToCreate.com website a little while ago (chock-full of Tulip-brand and Aleene’s products, fabric dyes, finishes, paints, and embellishments…if you haven’t checked it out for all your crafty needs, or for tutorial ideas and inspiration, please do!! You’re so missing out!!). I’ve used the contents of the package to create a couple tutorials for them that will be featured on their blog in the coming weeks. My first project, a Leopard-Print Infinity Scarf, repurposes the bottom of an old t-shirt and uses a stencil from one of their tie-dyeing kits to create a fancy feline look. Here is the tutorial in full below:
Fashion blogger Carly J. Cais of Chic Steals will be featured in the next few weeks as a guest blogger here on the iLoveToCreate blog! She has created some trendy and fashionable looks and she shows you step by step how to make them! Take it away Carly…
Nothing could be easier than re-purposing the bottom of an old t-shirt as an accessory! Wear as a simple scarf for a pop of pattern at the neck, a lightweight hood, or sew the bottom closed and add a drawstring to use as a pouch for makeup. By using two colors in the leopard print and varying the size of the spots, you get a much more finished, high-end look than by just using the stencil alone.
Materials:
– Tulip Tie-Dye Fashion Kit in Wild Thing (stencil, gloves, Aqua dye, Cobalt Dye)
– white t-shirt
and…
– garbage bags
– paper towels
– cotton swab (not pictured)
– small bowl for paint (not pictured)
– fabric scissors or rotary cutter

How To:
1. Begin by creating the leopard pattern on the t-shirt. Wash the shirt in the washer (do not use fabric softener) and dry in the dryer to remove sizing.
2. Place onto a garbage bag, laid onto a flat surface. Place another garbage bag in-between the fabric layers so the dye does not seep through.
3. Place the leopard stencil from the Tie-Dye Fashion Kit onto the shirt, and cover around the stencil with paper towels to prevent overspray.
 4. Put on the gloves in the kit. Mix the Tulip Aqua Tie-Dye according to the kit directions, and spritz onto the fabric using the spray bottle. Be careful to not spray too much; just enough so the stencil shapes are visible (too much and it will seep under the stencil and the pattern won’t be crisp).
 5. Remove the stencil; wipe down with a paper towel.
6. Repeat Steps 3) – 5) to cover all the area below the underarms of the t-shirt on the front. Turn the shirt onto the back and repeat.
7. Allow to dry about an hour.
 8. Mix the Tulip Cobalt Tye-Dye according to directions, and squirt some dye into a small bowl (not used for food). Dip a cotton swab into the dye and dab it onto the t-shirt, on top of the aqua spots you made with the stencil. (Reference a photo of what a leopard’s spots really look like to help with placement.)
9. Cover with plastic and allow to dry 4-6 hours. Once dry, wash in the washer with a small amount of detergent and water at the hottest suitable for the fabric. Dry in the dryer.
10. Once dry, cut off the top part of the shirt, from side to side right under the sleeves.
And you’re done! Wear the fabric loop as an infinity scarf for a punchy pattern at the neck, or customize further with a little craftery on your sewing machine.
Happy DIY’ing!
xoxox
Carly J. Cais
~If you liked this post, please share it!~
Leave Comment 70’s-style colorblocking is a hot trend for Fall 2011, seen on the runways and now beginning to trickle down into street style and retailers. I was hankering after a colorblocked purse, but didn’t want to pay a lot for it. Thankfully, thrift stores are a wonderful source of older handbags, and I found an adorable cross-body bag for a mere $4.99. But it was rather beat-up and needed a little makeover, so I figured it was time to break out the brushes and do some leather painting! Though technically when you paint leather, what is most recommended is to use paint that is specifically formulated for use on leather, like Angelus.
However, if you are feeling squeamish about buying an unfamiliar product online, or they don’t ship to your country, or you want to use some acrylic craft paint that you already have on hand, fear not! Leather and suede can actually be painted with acrylic paint, with fairly good results if you take the time to prep the piece properly. So here’s how to add some vibrant color-blocking to some leather or suede pieces you already own:
You Need: (more…)
Leave Comment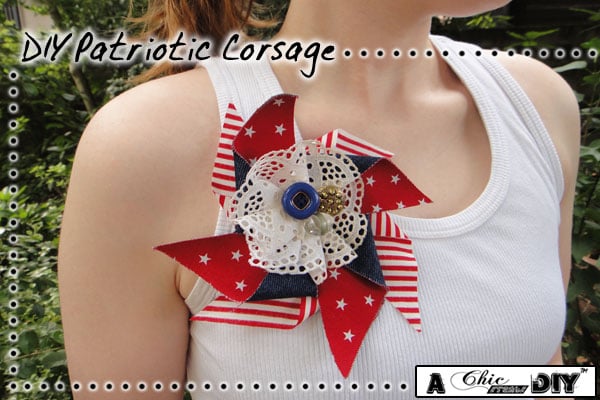 For the Fourth of July I’m sharing two tutorials over at Cocktails with Mom: one for a Patriotic-themed Double Pinwheel Corsage, and the second for a regular paper pinwheel. Please head on over there and check them out!
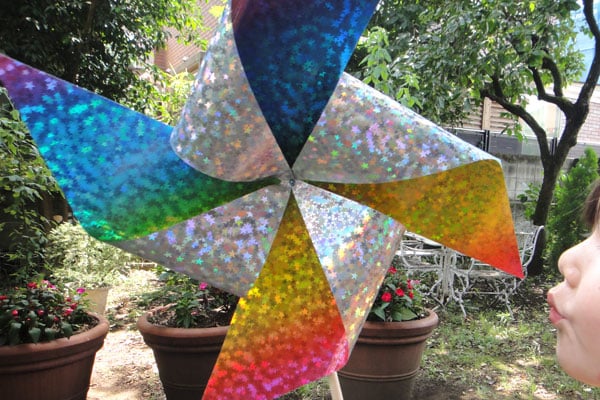
Happy Fourth, everyone! Hope it’s a great one!:-D
xoxox
Carly
~If you liked this post, please share it!~
Leave Comment
 Yesterday I coveted it, so today I’m going to show you how to make it. It’s DIY in 5 – minutes, that is. The easiest, quickest ways to take a piece from blah to fab and update it to current trends.
Also called the pussy-bow blouse on the other side of the pond, a chiffon bow at the collar of any blouse elevates it from everyday into elegant. But when you’re shopping on a budget (read: buying cheap), often the blouses that are affordable tend to lack such special details. I thrifted this lovely wide-collar chiffon blouse, but felt it needed an extra something to give it more style.
Leave Comment
Carly J. Cais I am a DIY’er, designer, sewist, maker, and marketer. Chic Creative Life is where I share what I do, and help others bring their unique style into their own lives.












