Nov 24, 2010 | DIY, Fashion
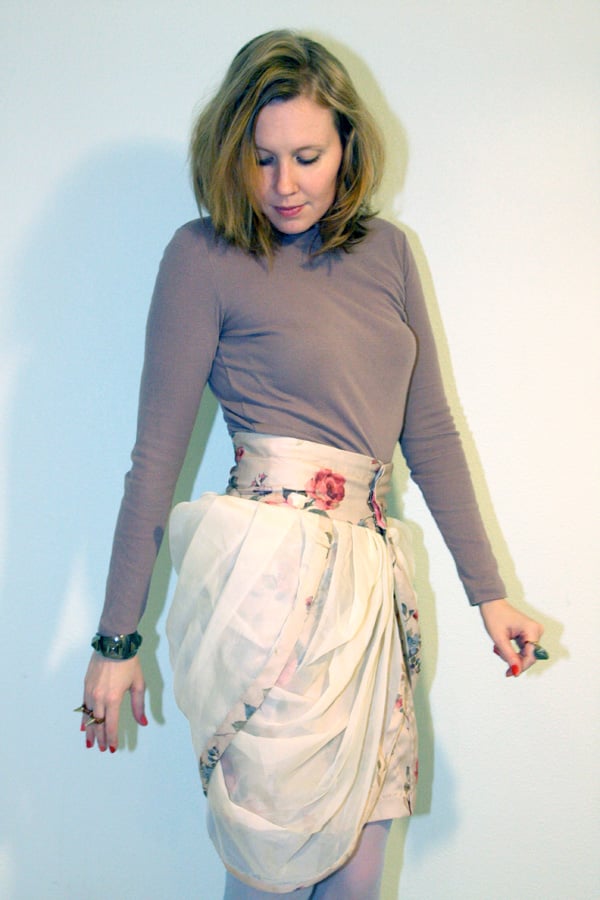
LS Tee: Petit Bateau
Draped Rose Chiffon Skirt: DIY
Studded Cuff: Target
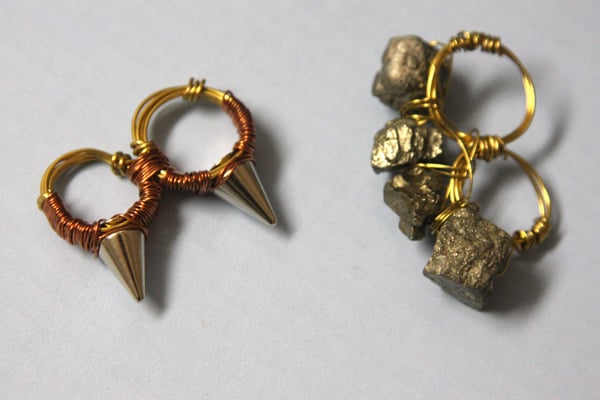
2-finger Pyrite Ring and Spike Ring: handmade by me
Diamond-pattern pale blue tights: unknown
Suedette Tie Shoes: Lela Rose for Payless (2009)
Quilted Bag: indio (Japan)
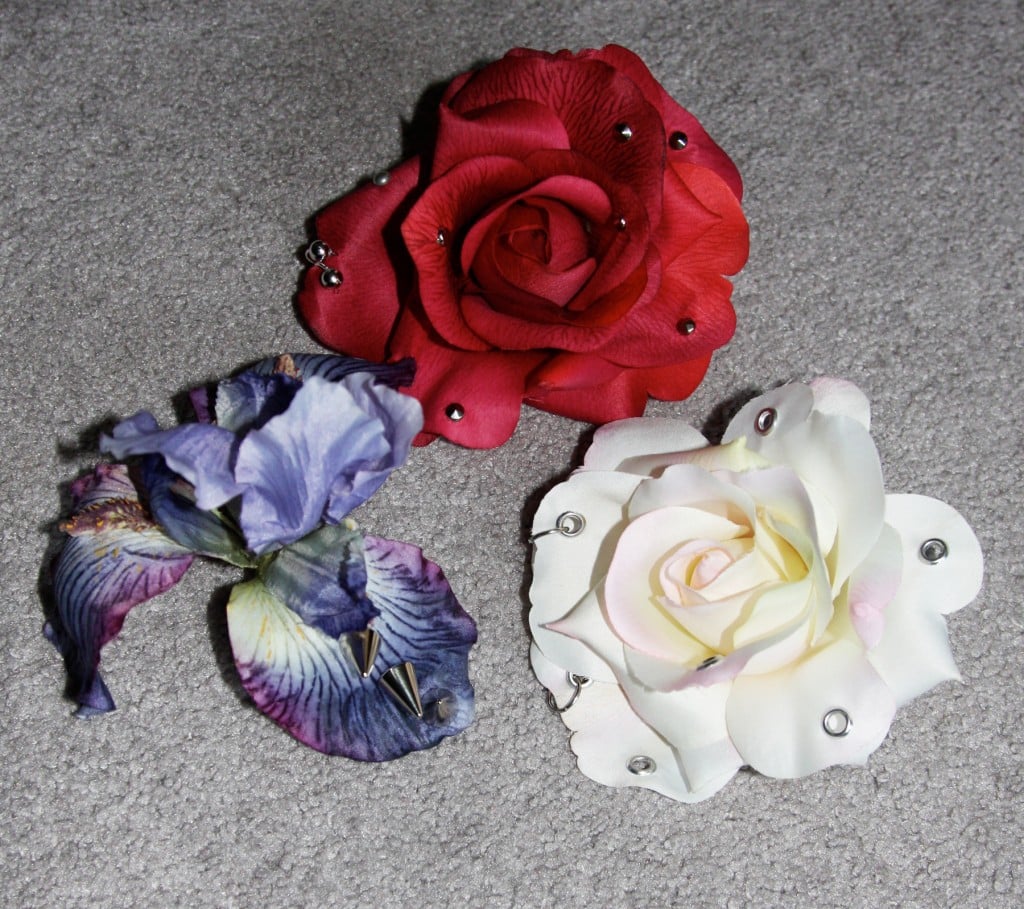
Pierced Rose Brooch: DIY
Day 21 in my 30 Days of Outfits Challenge: November 21.
Sunday at home recuperating from the long shoot from the day prior. But I still wanted to take a couple DIY items for a spin – and put together an outfit in dreamy pastels.
When I first saw luv aj‘s pieces, I thought they were a wonderful solution to connecting large statement pieces onto ring bases without soldering. Many jewelry artisans cannot solder (myself included). Not being able to do this simple construction method (though goodness knows I’ve tried!) often limits the designs you can create, especially when it comes to rings (which usually need to be soldered together lest the stone pop right off the base).
But wire-wrapping is an ingenious solution to the problem of connecting the top to the ring, and completely eliminates the need for soldering! I tested it out on a couple similar designs. (The drawback is the rings are incredibly uncomfortable on the fingers. I wonder if luv aj’s versions are easier to wear?)
This skirt I made from a curtain valance. Yes, a curtain valance!! If you ever check out Goodwill (or any thrift store that sells home items), you can probably find some curtain valances that have chiffon overlays to them. I was struck by how beautifully they were draped – so I bought the pair ($3.99) and made a skirt out of one. When I draped it onto my body I found the waistband wouldn’t sit right, so I did have to make some darts at the waist…and sew a front-seam and hidden fly. It’s not perfect – it’s DIY, after all!
But if you have any valances at home lying around, or spot any at the secondhand store – they really look lovely as a draped, twisted skirt – a style of skirt that is so popular now (just look at the recent collections of Alexander Wang, Burberry, and Celine, for example).
The Pierced Flower Corsage is so easy to make: just a silk flower from the craft store, with rings threaded through it, or grommets added and rings and ball beads through those. I made two and thought the rose one went better with this outfit.
Hope everyone had a great Sunday!
xoxox
Carly
~If you liked this post, please share it!~
Leave Comment
Nov 19, 2010 | DIY, Fashion
Scottie-print scarf: DIY. Chiffon ruffle blouse: Victoria’s Secret. Denim bustier: Forever 21. Assorted pins: vintage; from Japan; Lamb Tac Pin: Girlprops.com; kilt pin handmade by me. Pebble-print silk skirt: Banana Republic. Dainty Lace Ankle Socks: SockTheory.com. Striped espadrille wedges: Old Navy.
Day 17 in my 30 Days of Outfits Challenge: November 17.
Can you tell what runway show I was inspired by?
photos by Marcio Madeira, Style.com
Yup! Miu Miu S/S 2010. It was such an amazing collection with so many fabulous pieces…you could really take each look apart, bit by bit, and find yourself with so many versatile and chic accessories, jewelry items, and unique clothing.
I felt somewhat springy today (even though the weather was anything but)…and so wanted to try mixing patterns and colors and just going crazy with my outfit.
Can you guess what I made my scarf from?
…A pair of little girl’s pajama pants!!!
Yes, I found the pants at the Goodwill Outlet in Spring. The print reminded me of the Miu Miu collection, they felt satiny, and were still in great condition.
So I washed them and then did the following:
1. Separate the legs into two separate pieces by cutting all the seams apart.
2. Sew the legs together at the waist, so you have one long piece. Cut the ends on an angle so they look more “scarf”-like.
3. With right sides together, stitch around the edges, leaving about 2″ free.
4. Turn right-side-out and press.
5. Stitch remaining hole closed.
Very, very simple! I had been searching in fabric stores for a silky print similar to the ones in the Miu Miu show, but the fabric stores here aren’t progressive to carry anything similar. Silky pajamas have a number of great, fun prints – that are definitely very Miu-Miu-esque and look fabulous as an accent piece!
I bought this blouse something like 15 years ago and have not worn it once. Not once! The tag is still on it, I’m ashamed to say. Well, now I’ve worn it!;-)
A great way to jazz up a top is to pin on a variety of brooches and pins. I chose to do so smack-dab in the middle, which is a bit unusual, but (I think) it works. I made the bottom brooch from a kilt pin and bits of rhinestone jewelry, beads, and findings I had lying around.
And espadrille wedges are so not confined to summer! You can certainly wear them all year round (though you may have to switch up your leg-coverings;-)
What do you think? Is anyone going to try embellishing with brooches differently…or start searching for that perfect pair of pajama pants to repurpose into a scarf?;-)
Oh, and Katarina from She sells sea shells has posted more of her outfits in this Challenge. Have you checked out her blog yet? Please visit and say hi!
xoxox
Carly
~If you liked this post, please share it!~
Leave Comment
Oct 6, 2010 | DIY

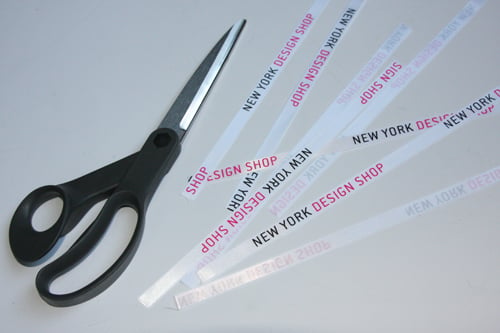
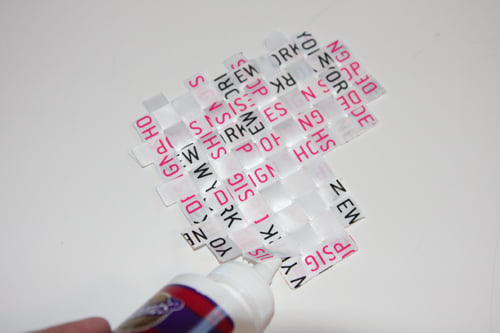
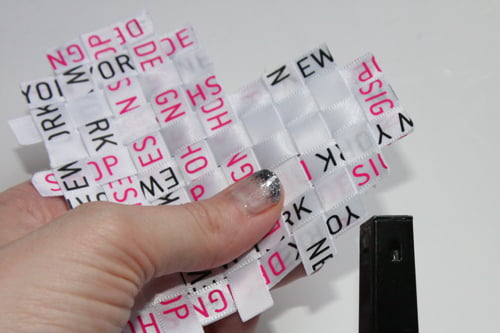
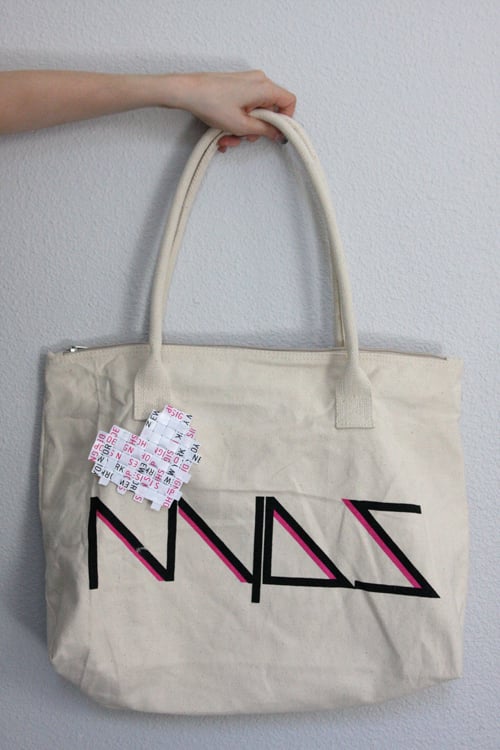
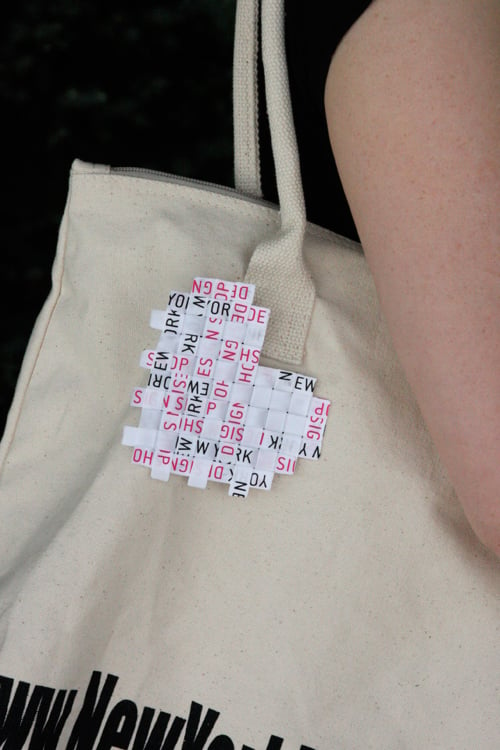
So this is the last of my submissions for Style Sample Magazine and New York Design Shop’s Create Couture Challenge back in early August! Whew! Can’t believe it’s taken me this long to post them all…I wanted to make a final DIY piece from the box of materials I received and my eye lit upon the beautiful “NEW YORK DESIGN SHOP” printed ribbon. I love white, pink, and black together! So I crafted up this sweet, modernist design pin – that could easily be used as a hair accessory, bag charm, ring, you name it – just by varying the size, shape, and finishing. (The weaving of the ribbon does take awhile, but the results are fantastic!
You Need:
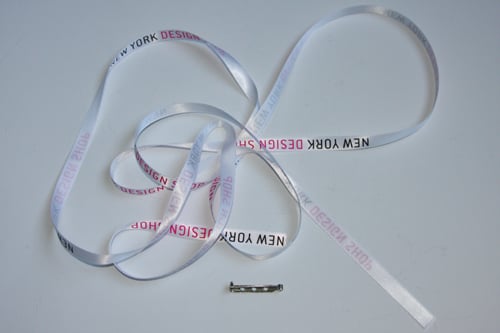
*NYDS Branded Ribbon (or any 1/4″ wide satin ribbon) – the NYDS-branded ribbon comes wrapped around the box when you place an order with New York Design Shop!
Additional Tools/Materials:
*scissors
*fabric glue
*stiff felt
*pin back
*lighter
*iron (optional)
*piece of paper (optional)
[prep: iron ribbon if kinked or curled; draw a shape as a template on a piece of paper]
How to:
1. Cut ribbon into eighths to start out.
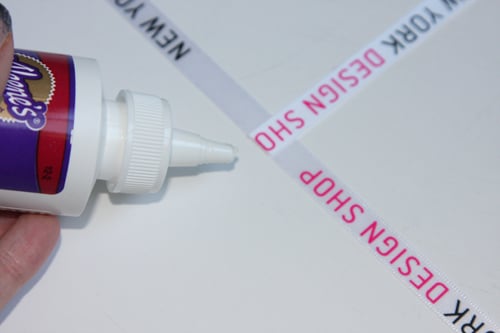
2. Seal ends of two of the ribbons with an open flame.
3. Glue two ends of ribbons together, overlapping them at a right angle.
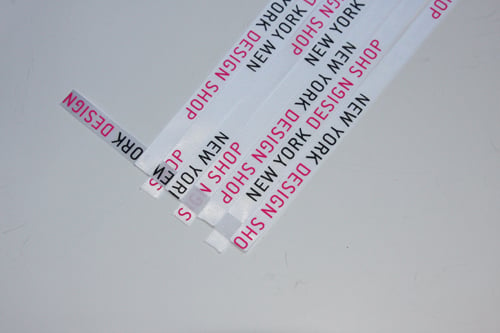
4. Seal the ends of more of the ribbons, and glue them parallel to the first ribbon, alternating the underlap and overlap of their edges.
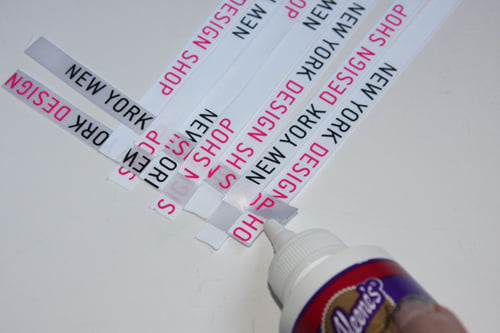
5. When you have enough ribbons to work with, start weaving in ribbons in the opposite direction, heat-sealing and gluing down the ends as you add them in.
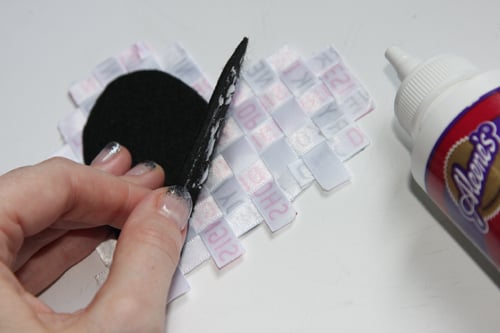
6. When you’ve run out of ribbons, start trimming the ones you’ve already woven, in order to create the desired shape.
7. Continue with trimming, heat-sealing, gluing, and weaving until your shape is what you like. Make sure all edges are glued together.
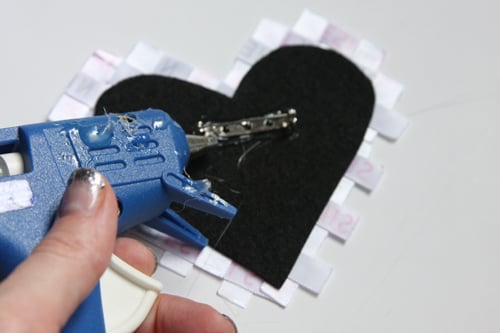
8. Cut piece of felt slightly smaller than your woven shape, and glue together with fabric glue.
9. Hot-glue pin back to wrong side.
Now anyone can wear their heart on their sleeve…or on their NYDS-branded tote!!
xoxox
Carly
Save
Leave Comment
Sep 21, 2010 | DIY
Another one of my submissions for Style Sample Magazine and New York Design Shop’s Create Couture Challenge back in early August – this time, a bag makeover!
Materials:
*Pink Ethnic Stripe Sash
*Brown Ethnic Stripe Sash
*pin back
*Cream Gardenia
Additional Tools/Materials:
*ugly old clutch handbag
*scissors
*fabric glue
*hot-glue gun
*small piece of scrap fabric
How-to:
1. Squeeze out a generous amount of glue onto the flap of the clutch, and press the Pink Stripe Sash onto it. Allow about a 1/2″ overhang on each side, and cut.
2. Add more pieces of stripe sash, overlapping the edges slightly as you go all around the clutch.
3. For the back add the contrasting color stripe for interest.
4. Fold under the overhang of the Sash, securing with the glue gun.
5. Hot-glue the pin onto the back of the Cream Gardenia, and glue a small piece of fabric over the pin back to secure it.
6. Cut two ribbons (like prize ribbons) from the leftover Sash.
Glue together with fabric glue.
7. Pin Cream Gardenia over prize ribbons, and pin to front of clutch.
What do you think? Does it look better now?
Everyone deserves a makeover!
xoxox
Carly
~If you liked this post, please share it!~
Leave Comment
Sep 19, 2010 | DIY
In the home stretch now, everyone! Another one of my submissions for Style Sample Magazine and New York Design Shop’s Create Couture Challenge back in early August.
Materials:
*White Sweater Style Stretch Trim
*Gold Circle Studs
Additional Tools/Materials:
*thin headband
*sewing machine + needle for knits (optional)
*hand-sewing needle
*matching thread
*hot-glue gun
How to:
1. Sew the Stretch Trim into a tube down its long side. (I sewed it on the sewing machine but you can hand-stitch it if you prefer.) Turn right-side out.
2. Cut into 3 pieces: 1 longer for the large flower, and 2 shorter for the two smaller flowers.
3. Hand-stitch the two ends of the long piece of Trim together, to form a circle.
Make 5 loops in the circle and push inwards to the center, stitching through the center area.
4. Pull the thread tight to gather the loops.
5. Sew a few times more all the way through the center to secure.
6. Repeat Steps 3) – 5) for the two smaller flowers. I made only 4 loops (4 petals) for each.
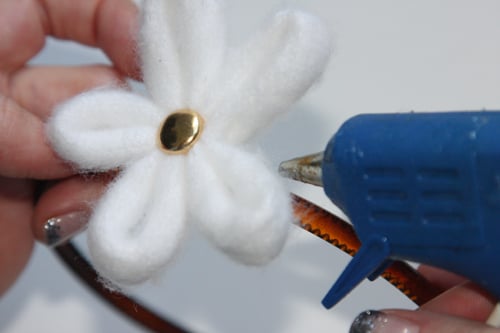
7. Dab some hot glue in the center of each flower, and glue down a Circle Stud.
8. Hot-glue each flower to the top of a thin headband. (For more security, I’d recommend hand-sewing the flowers on, looping the thread around the headband.)
And that’s it! This of course can be accomplished by using any scrap fabric or ribbon you have – though it works particularly well with “puffy” fabric like this sweater stretch trim because it creates a tube-like appearance to the flower petals.

Everything’s in bloom during the summer!
xoxox
Carly
~If you liked this post, please share it!~
Leave Comment